Blender 2.79系列のCrack it!アドオンは2.8以降でCell Fractureとして標準になったけどマテリアルは入ってないので手動で移行することにした
なろう系ラノベのようなタイトルだが要はそういうこと。私はCrack itは物体の粉砕より手軽にRockやMudのマテリアルを付けられるところが気に入っていた。Cell Fractureにはマテリアルが付属していないようなので手動で移行する。なお私の場合、管理はAsset Managementアドオンで行う。
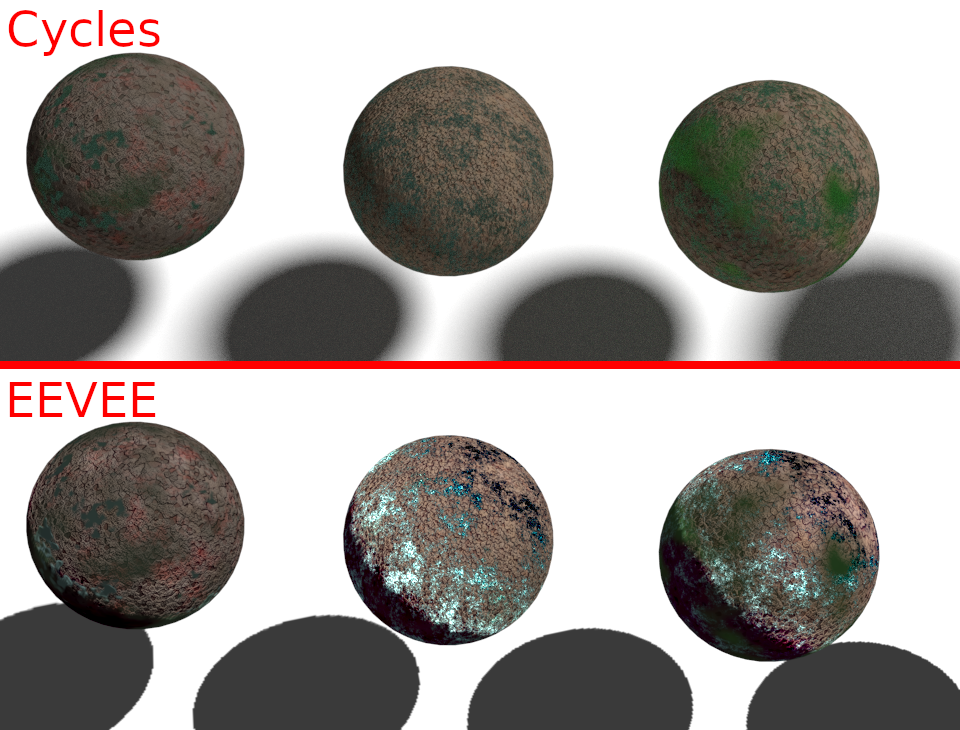
まずCrack it!の入ったBlender 2.7系にて、六個のオブジェクトを作成し、それぞれにCrack it!のマテリアルを設定する。オブジェクトをCrackする必要は無い。
それをファイル保存し、そのまま2.9で開けばマテリアルが適用されているので、自分の方法でマテリアルを管理できる。

注意点として、EEVEEとCyclesではかなり表示が異なる。設定かもしれないが詳細は不明。
Blender Pythonでエッジからなる曲線を再分割して等間隔の頂点リストにする
なんと表現していいか正直わからないがやりたいのは以下。
・分割する個数を指定できる
・頂点を等間隔に設置
ソースコード
コードの多くは、前に作った頂点をソートするプログラムになっている。ソートしないと点を補完する位置がわからない。補間の処理は後半部分になる。
import bpy

import numpy as np


######################################################
# 現在選択中のオブジェクトを取得
def select_object():
   ob = bpy.context.active_object

   if ob.type != 'MESH':
       raise TypeError("Active object is not a Mesh")

   mesh = ob.data

   #print( len(mesh.edges) )
   #print( len(mesh.vertices) )

   return mesh.vertices, mesh.edges

######################################################
######################################################
# @brief 端点を取得
# @param [in] verts 頂点リスト
# @param [in] edges エッジリスト
# @param [in] target 端点は二つあるので0,1のどちらか
# @return 頂点番号
def get_end_points(verts,edges,target):
    dic = {}

    for v in range(len(verts)):
        dic[v] = 0

    for e in edges:
        dic[e.vertices[0]] += 1
        dic[e.vertices[1]] += 1

    ends = []
    for i in range(len(dic)):
        if dic[ i ] == 1:
            ends.append( i )

    return ends[target]


######################################################
######################################################
# @brief vtxを持つエッジのリストを取得
# @param [in] edges エッジリスト
# @param [in] vtx 頂点index
# @return エッジindexの配列
def get_edge_by_point(edges,vtx):
    edgelist = []
    for e in edges:
        if e.vertices[0] == vtx or e.vertices[1] ==vtx:
            edgelist.append(e.index)

    return edgelist

######################################################
######################################################
# @brief V1を持ち、V2を持たないエッジ
# @param [in] V1 頂点index(持つ頂点)
# @param [in] v2 頂点index(持たない頂点)
# @return 見つかったエッジindex
# @retval None そのようなエッジはなかった
def get_edge_V1_but_V2(edges,V1,V2):
    for e in edges:
        if e.vertices[0] == V1 and e.vertices[1] != V2:
            return e.index
        if e.vertices[1] == V1 and e.vertices[0] != V2:
            return e.index
    return None


######################################################
######################################################
# @brief edgeを構成する2頂点のうち、vertexでないほうの頂点を返す
# @param [in] edge エッジリスト
# @param [in] vertex 基準となる頂点のIndex
# @return 頂点番号
def get_another_point_on_edge(edge,vertex):
    if edge.vertices[0] == vertex:
        return edge.vertices[1]
    if edge.vertices[1] == vertex:
        return edge.vertices[0]


######################################################
######################################################
# @brief 一直線に連続した順番の頂点一覧を取得
# @param [in] verts 頂点リスト
# @param [in] edges エッジリスト
# @param [in] order 端点のどちら側から探索するか(0 or 1)
# @return 頂点一覧
def get_connected_vertex_list(verts,edges,order):

    # 結果の格納先
    vlist = []

    # 最初の頂点を取得。「端点」は二つだけ存在するので
    # 結果は二つ求まる(0,1)。そのうちのorder番を取得
    EP = get_end_points(verts,edges,order)

    vlist.append(EP) #その要素が結果の一番目


    edgeidxlist = get_edge_by_point(edges,EP)# EPを持つエッジの一覧。要素数1の配列になるはず

    # エッジ最初の頂点を持つエッジ
    endpointedge = edges[edgeidxlist[0]]

    #EP(最初の端点)でない方の頂点を取得
    another = get_another_point_on_edge( endpointedge , EP )
    # 端点を持つエッジの、端点でないほうの頂点は、二番目の頂点
    vlist.append(another)

    # 無限ループを使うのでループ上限を設けておく
    looplimit = 100

    while True:

        # 前回の前回見つけた頂点
        before = vlist[len(vlist)-2]

        # 前回見つけた頂点。この頂点の次の頂点を探したい
        now = vlist[len(vlist)-1]

        #nowを持ち、beforeを持たないエッジを検索
        nextedge = get_edge_V1_but_V2(edges,now,before)

        # 端点には「nowを持ち、beforeを持たないエッジ」がないので、Noneが入っている
        if nextedge is None:
            break

        #nextedgeの、nowでない方の頂点を取得
        next = get_another_point_on_edge( edges[nextedge] , now )
        vlist.append(next)

        looplimit -= 1
        if looplimit == 0:
            break

    return vlist

######################################################
######################################################
# @brief 頂点のソート機能のエントリポイント
# @param [in] obj 対象のオブジェクト
def points_sort(obj):
    # 頂点群を取得
    _verts = obj[0]
    _edges = obj[1]

    # 頂点番号のテキストオブジェクトを追加
    #add_text_numbers(_verts)

    vtx_c_list = get_connected_vertex_list(_verts,_edges,0)
    print(vtx_c_list)

    points = []
    for v in vtx_c_list:
        points.append( obj[0][v].co )

    # 頂点一覧
    return points
######################################################
######################################################
######################################################
# @brief 結果の頂点+エッジのオブジェクトを作成する
# @param [in] points 頂点座標群
# @return なし
def new_interpo_curve(points):

	# make mesh
	vertices = points
	edges = []

	for i in range(0,len(vertices)-1):
    	edges.append([i,i+1])

	faces = []
	new_mesh = bpy.data.meshes.new('new_mesh')
	new_mesh.from_pydata(vertices, edges, faces)
	new_mesh.update()

	# make object from mesh
	new_object = bpy.data.objects.new('new_object', new_mesh)

	# make collection
	new_collection = bpy.data.collections.new('new_collection')
	bpy.context.scene.collection.children.link(new_collection)

	# add object to scene collection
	new_collection.objects.link(new_object)
######################################################
######################################################
######################################################
# @brief オブジェクトの頂点を補間する
# @param obj 選択したオブジェクト
# @param N 補間する頂点数
# @return 補間した頂点座標群
def p_subd(obj,N):

    # オブジェクトの頂点をソート
    points = points_sort(obj)


    distances = []
    distances.append(0.0)

    lensum = 0.0
    for pid in range(0,len(points)-1):
        lensum += np.linalg.norm(points[pid] - points[pid+1])
        distances.append(lensum)

    for pd in distances:
        print(pd)

    #######################################

    # 移動量の決定
    a = lensum / (N-1)

    # 結果の保存先
    interpo = []

    # distancesのindex
    dista = 0

    breakfor=False
    # i の範囲は 0...N-1
    for i in range(0,N):
        pos = i * a

        while distances[dista+1] < pos :
            if i==N-1:
                interpo.append(points[len(points)-1])
                breakfor=True
                break
            dista+=1
        if breakfor==True:
            break

        # 移動方向の決定
        _from = points[dista]
        _to = points[dista+1]
        vec = _to - _from
        veclen = np.linalg.norm(vec)
        vec = vec / veclen

        dlen = pos - distances[dista]
        pnew = _from + vec * dlen

        interpo.append(pnew)

    return interpo
# 選択したオブジェクト
obj = select_object()

# objを細分化した頂点群を作成
points = p_subd(obj,50)

# pointsからオブジェクトを作成
new_interpo_curve(points)
C++で実装した場合
vmmath.hpp:
https://www.study.suzulang.com/3dcg-functions/vmmath-hpp
#pragma warning(disable:4996)

#include <GL/glut.h>

#pragma comment(lib,"opengl32.lib")


#include "vmmath.hpp"
#include <array>
#include <vector>
#include <cassert>

std::vector<std::array<double, 3> > points;

std::vector<std::array<double, 3> > interpo;

void display(void)
{
  glClear(GL_COLOR_BUFFER_BIT);

  glMatrixMode(GL_PROJECTION);
  glLoadIdentity();
  glOrtho(-4, 4, -4, 4, 1, -1);
  glMatrixMode(GL_MODELVIEW);
  glLoadIdentity();
  glPushMatrix();

  glTranslated(0, 0, -0.5);
  glColor3d(1, 1, 1);
  glPointSize(5);
  glBegin(GL_POINTS);
  for (size_t i = 0; i < points.size(); i++) {
    glVertex3dv(points[i].data());
  }
  glEnd();
  glColor3d(1, 0, 0);
  glPointSize(3);
  glBegin(GL_POINTS);
  for (size_t i = 0; i < interpo.size(); i++) {
    glVertex3dv(interpo[i].data());
  }
  glEnd();


  glPopMatrix();

  glFlush();

}
//! @brief 再分割
//! @param [in] N 再分割後の頂点数
//! @param [in] points 再分割対象の頂点群
//! @return 再分割結果
std::vector<std::array<double, 3> > interporate(const size_t N, std::vector<std::array<double, 3> >& points) {
  std::vector<std::array<double, 3> > _interpo_;

  std::vector<double> distances;
  distances.push_back(0.0);
  double len = 0;
  // 全体の長さ計算
  for (size_t i = 0; i < points.size() - 1; i++) {
    size_t j = i + 1;
    len += szl::mathv::distance3(points[i], points[j]);
    distances.push_back(len);
  }

  assert(N >= 2);
  // N-1分割するときの 点から次の点までの距離
  double a = len / (N - 1);

  size_t dista = 0;
  bool breakfor=false;
  for (size_t i = 0; i < N; i++) {
    double pos = i * a;

    while (distances[dista + 1] < pos) {
      if (i == N - 1) {
        _interpo_.push_back(points.back());
        breakfor=true;
        break;
      }
      dista++;
    }
    if (breakfor==true)
      break;
    std::array<double, 3> from = points[dista];//移動の始点
    std::array<double, 3> to = points[dista + 1];
    std::array<double, 3> vec;//移動方向
    szl::mathv::vector_from_line3(vec, from, to);
    szl::mathv::normalize3(vec);

    //移動量
    double dlen = pos - distances[dista];
    std::array<double, 3> pnew;
    pnew[0] = from[0] + vec[0] * dlen;
    pnew[1] = from[1] + vec[1] * dlen;
    pnew[2] = from[2] + vec[2] * dlen;
    _interpo_.push_back(pnew);
  }

  return _interpo_;
}
void init(void)
{
  points.push_back({ -3.517056703567505 , 0.8161399364471436 , -6.102355065706888e-09 });
  points.push_back({ -3.4123122692108154 , 0.7847403883934021 , -5.867581087670715e-09 });
  points.push_back({ -3.3656115531921387 , 0.7668724656105042 , -5.733980401601002e-09 });
  points.push_back({ -3.0980424880981445 , 0.8815682530403137 , -6.591572176972704e-09 });
  points.push_back({ -2.770911931991577 , 0.8392514586448669 , -6.275163944025053e-09 });
  points.push_back({ -2.4997775554656982 , 0.732718288898468 , -5.478603348763045e-09 });
  points.push_back({ -2.2808961868286133 , 0.6278470754623413 , -4.694470145949481e-09 });
  points.push_back({ -1.8470044136047363 , 0.41193005442619324 , -3.0800362260663405e-09 });
  points.push_back({ -1.3970714807510376 , 0.1896354854106903 , -1.4179162288741054e-09 });
  points.push_back({ -1.2790554761886597 , 0.14838068187236786 , -1.1094490881546903e-09 });
  points.push_back({ -0.8242318630218506 , -0.001560855540446937 , 1.1680695473359481e-11 });
  points.push_back({ -0.6166437864303589 , -0.0058229416608810425 , 4.3537274480032195e-11 });
  points.push_back({ -0.3599426746368408 , 0.0 , 0.0 });
  points.push_back({ -0.08002424240112305 , 0.0 , 0.0 });
  points.push_back({ 0.2106800079345703 , 0.0 , 0.0 });
  points.push_back({ 0.23912858963012695 , 0.0 , 0.0 });
  points.push_back({ 0.5433409214019775 , 0.0 , 0.0 });
  points.push_back({ 0.853459358215332 , 0.0 , 0.0 });
  points.push_back({ 0.920318603515625 , 0.0 , 0.0 });
  points.push_back({ 1.2055344581604004 , 0.0 , 0.0 });
  points.push_back({ 1.5156524181365967 , 0.0 , 0.0 });
  points.push_back({ 1.8214571475982666 , 0.0 , 0.0 });
  points.push_back({ 2.1207892894744873 , 0.0 , 0.0 });
  points.push_back({ 2.4114935398101807 , 0.0 , 0.0 });
  points.push_back({ 2.2826988697052 , 0.0 , 0.0 });

  interpo = interporate(50,points);

}

int main(int argc,char*argv[])
{

  glutInit(&argc, argv);
  glutInitDisplayMode(GLUT_RGBA);
  glutCreateWindow(argv[0]);
  glutDisplayFunc(display);
  init();
  glClearColor(0.0, 0.0, 1.0, 1.0);

  glutMainLoop();
  return 0;
}
zBuffer法で陰面消去
zbuffer法はzバッファというメモリを用意し、ビューポート変換まで終わった図形をラスタライズする際に、走査変換などでピクセルをレンダーバッファに書き込む際にそのz値をzバッファに書き込むことで陰面消去を行う方法。ここで、ではどうやってz値を計算するのかというと、調べたところ面方程式を使うらしい。

つまり、三角形の三点の座標(整数ピクセル座標のx,yと実数のz)がわかっているので、その三点が存在する面の方程式を求めることができる。
面方程式がわかれば、問題は「ax+by+cz+d=0 で表される平面上のx,yがわかっているときのzを求めよ」という問いになり、zについて解けばいいという事になる。
LineCross.hpp
以前作った線分の交差判定をするコードと一緒に書いたPoint型に色を付けられるようにし、かつzを保持できるように変更する。
scanConversion.hpp
走査変換の際にdepthbufferのチェックと更新を行う。
#pragma once

#include "NByteData.hpp"
#include "LineCross.hpp"

template<typename PixelType>
struct imagedata {
  int width;
  int height;
  float* depthbuffer;// デプスバッファ
  PixelType* img;
};

//! @brief 水平な線分ともう一方の線分との交差判定を行う
//! @param [out] cross 交差していた場合の座標(ピクセル単位)
//! @param [in] scanL 水平な線分
//! @param [in] L 線分
bool isPixelHorizonalCross(
  Pointi* cross,
  const LineSegmenti& scanL,
  const LineSegmenti& L) {

  //三角形塗りつぶしようなので、scanLは必ずLの始点・終点よりも広い範囲をとる
  //そのため始点・終点のY座標が一致していたら交差しているのでtrueを返す
  if (scanL.s.y == L.s.y) {
    *cross = L.s;
    return true;
  }
  if (scanL.s.y == L.e.y) {
    *cross = L.e;
    return true;
  }

  return isCrossPixel(cross, scanL, L);

}

//! @brief 画素に色を設定
//! @param [in,out] img 画像データ
//! @param [in] P 書き込み先の座標
template<typename PixelType>
void Plot(
  imagedata<PixelType> *img,
  Pointi P,
  float z
  ) {

  PixelType Color{
    P.color.r,
    P.color.g,
    P.color.b
  };
  // デプステスト
  if (img->depthbuffer[P.y * img->width + P.x] > z) {
    img->img[P.y * img->width + P.x] = Color;

    img->depthbuffer[P.y * img->width + P.x] = z;// デプスバッファ更新
  }
}


//! @brief 走査変換で頂点ABCからなる三角形を描画
//! @param [in,out] img 画像データ
//! @param [in] A 頂点1の座標
//! @param [in] B 頂点2の座標
//! @param [in] C 頂点3の座標
template<typename PixelType>
void scanConversion(
  imagedata<PixelType> *img,
  const Pointi A,
  const Pointi B,
  const Pointi C
) {
  //三角形の法線ベクトル
  std::array<double, 3> pa{ A.x,A.y,A.z };
  std::array<double, 3> pb{ B.x,B.y,B.z };
  std::array<double, 3> pc{ C.x,C.y,C.z };
  std::array<double, 3> tn,v1,v2;
  szl::mathv::vector_from_line3(v1, pa, pb);
  szl::mathv::vector_from_line3(v2, pa, pc);
  szl::mathv::outer3(tn, v1, v2);
  double nx = tn[0]; double x0 = pa[0];
  double ny = tn[1]; double y0 = pa[1];
  double nz = tn[2]; double z0 = pa[2];
  double d = -(nx * x0 + ny * y0+ nz *z0 );
  // zの求め方
  auto getZ = [&](double x,double y)->double{
    return -(nx*x + ny * y + d) / nz;
  };
  //入力された頂点をY座標が小さい順にソート
  Pointi m[3]{ A,B,C };
  std::sort(
    std::begin(m), std::end(m),
    [](const auto& s, const auto& t) {
    return s.y < t.y;
  });

  //X座標の最大・最小より少し広い範囲
  const int xmin = std::min_element(
    std::begin(m), std::end(m),
    [](const auto& s, const auto& t) {return s.x < t.x; }
  )->x - 1;
  const int xmax = std::max_element(
    std::begin(m), std::end(m),
    [](const auto& s, const auto& t) {return s.x < t.x; }
  )->x + 1;

  /*
           0
         / |
       /   |
     /     |
    1      |
     \     |
      \    |
       \   |
        \  |
         \ |
          2

  ソートにより三角形の配列mはy座標順に並んでいる


  */

  // 走査線と 01,02
  for (int y = m[0].y; y < m[1].y; y++) {
    //上半分について処理

    LineSegmenti scan(
      Pointi(xmin, y),
      Pointi(xmax, y)
    );

    Pointi cross01;
    Pointi cross02;

    LineSegmenti L01(m[0], m[1]);
    LineSegmenti L02(m[0], m[2]);

    bool ab = isPixelHorizonalCross(&cross01, scan, L01);
    bool ac = isPixelHorizonalCross(&cross02, scan, L02);

    if (ab == true && ac == true) {
      int cxmin = (std::min)(cross01.x, cross02.x);
      int cxmax = (std::max)(cross01.x, cross02.x);
      for (int x = cxmin; x <= cxmax; x++) {
        Pointi P(x, y);
        P.color = A.color;
Plot(img, P , getZ(x,y) );
      }
    }


  }
  // 走査線と 12 , 01
  for (int y = m[1].y; y <= m[2].y; y++) {
    LineSegmenti scan(
      Pointi(xmin, y),
      Pointi(xmax, y)
    );

    Pointi cross12;
    Pointi cross02;

    LineSegmenti L12(m[1], m[2]);
    LineSegmenti L02(m[0], m[2]);

    bool bc = isPixelHorizonalCross(&cross12, scan, L12);
    bool ac = isPixelHorizonalCross(&cross02, scan, L02);

    if (bc == true && ac == true) {
      int cxmin = (std::min)(cross12.x, cross02.x);
      int cxmax = (std::max)(cross12.x, cross02.x);
      for (int x = cxmin; x <= cxmax; x++) {
        Pointi P(x, y);
        P.color = A.color;
Plot(img, P, getZ(x, y) );
      }

    }
  }

}
呼び出し例
mygl-transform.hpp,NByteData.hppは前に作った物を使う。
#pragma warning(disable:4996)

#include <GL/glut.h>

#pragma comment(lib,"opengl32.lib")

#include "NByteData.hpp"

#include "mygl-transform.hpp"

#include "scanConversion.hpp"

#include<vector>


std::vector < NByteData<3> > myimage;
std::vector < float > mydepthbuffer;

void my_transformation(
  std::array<double, 4>& wndcoord,
  const std::array<double, 4>& obj,
  const std::array<double, 4>& norm
) {

  std::array<double, 16> model;
  std::array<double, 16> proj;
  std::array<double, 2> depthrange{ 0, 1 };
  std::array<int, 4> viewport;

  glGetDoublev(GL_MODELVIEW_MATRIX, model.data());//行列とビューポート取得
  glGetDoublev(GL_PROJECTION_MATRIX, proj.data());
  glGetIntegerv(GL_VIEWPORT, viewport.data());


  opengltransformation(
    wndcoord,//結果のピクセル座標
    obj,//モデルの頂点座標
    norm,
    model,
    proj,
    depthrange,
    viewport
  );
}

//保存の時に画像を上下反転する
void reverse_Y(const int width, const int height, NByteData<3>* p);

void pnmP3_Write(const char* const fname, const int vmax, const int width, const int height, const unsigned char* const p);

void my_draw(
  RGB triangle_color,
  const std::array<double, 4>& A,
  const std::array<double, 4>& B,
  const std::array<double, 4>& C
) {
  std::array<double, 4> wA;
  std::array<double, 4> wB;
  std::array<double, 4> wC;

  //法線は今回は使用しない
  std::array<double, 4> dmy{ 1,1,1,1 };

  my_transformation(wA, A, dmy);//三次元座標をピクセル座標に変換
  my_transformation(wB, B, dmy);
  my_transformation(wC, C, dmy);

  //////////////////////////////
  int width = glutGet(GLUT_WINDOW_WIDTH);
  int height = glutGet(GLUT_WINDOW_HEIGHT);


  imagedata< NByteData<3> > imgd;
  imgd.width = width;
  imgd.height = height;
  imgd.img = &myimage[0];
  imgd.depthbuffer = &mydepthbuffer[0];

  //三角形の描画
  Pointi pA(wA[0], wA[1], wA[2]); pA.color = triangle_color;
  Pointi pB(wB[0], wB[1], wB[2]); pB.color = triangle_color;
  Pointi pC(wC[0], wC[1], wC[2]); pC.color = triangle_color;
  scanConversion(&imgd, pA, pB, pC);

}

void display(void)
{
  glClear(GL_DEPTH_BUFFER_BIT | GL_COLOR_BUFFER_BIT);
  glEnable(GL_DEPTH_TEST);

  glMatrixMode(GL_PROJECTION);//透視投影行列
  glLoadIdentity();
  gluPerspective(60, GLUT_SCREEN_WIDTH / (double)GLUT_SCREEN_HEIGHT, 0.01, 10);
  glMatrixMode(GL_MODELVIEW);//モデルビュー変換行列
  glLoadIdentity();
  glPushMatrix();

  int width = glutGet(GLUT_WINDOW_WIDTH);
  int height = glutGet(GLUT_WINDOW_HEIGHT);
  myimage.resize(width* height);
  std::fill(myimage.begin(), myimage.end(), NByteData<3>{255, 255, 255});

  //デプスバッファ初期化
  mydepthbuffer.resize(width* height);
  std::fill(mydepthbuffer.begin(), mydepthbuffer.end(), 1.0f);

  glTranslated(0.0, 0.0, -1);
  glRotated(30, 1, 1, 1);

  //赤い三角形の描画
  {

    std::array<double, 4> norm{ 1,1,1,1 };
    std::array<double, 4> pa{ -0.3 ,-0.4 , 0.0 ,1 };
    std::array<double, 4> pb{  0.3 ,-0.4 , 0.2 ,1 };
    std::array<double, 4> pc{  0.1 , 0.2 ,-0.2 ,1 };

    RGB red;
    red.r = 255; red.g = 0; red.b = 0;
    my_draw(red,pa, pb, pc);//座標変換のテスト

    glColor3d(1, 0, 0);
    glPointSize(5);
    glBegin(GL_TRIANGLES);
    glVertex3dv(pa.data());
    glVertex3dv(pb.data());
    glVertex3dv(pc.data());
    glEnd();
  }

  //緑の三角形の描画
  {

    std::array<double, 4> norm{ 1,1,1,1 };
    std::array<double, 4> pa{ 0.3 ,-0.4 , 0.0 , 1 };
    std::array<double, 4> pb{ -0.3, 0.4 , 0.2 , 1 };
    std::array<double, 4> pc{ 0.1 ,-1.0 ,-0.2 , 1 };

    RGB green;
    green.r = 0; green.g = 255; green.b = 0;
    my_draw(green,pa, pb, pc);//座標変換のテスト

    glColor3d(0, 1, 0);
    glPointSize(5);
    glBegin(GL_TRIANGLES);
    glVertex3dv(pa.data());
    glVertex3dv(pb.data());
    glVertex3dv(pc.data());
    glEnd();
  }


  glPopMatrix();

  glFlush();


  ////////////////////////////////////////////////
  // ファイル出力

  //上下反転
  reverse_Y(width, height, &myimage[0]);

  pnmP3_Write(//ファイルに出力
    R"(C:\test\data\a.ppm)",
    255, width, height, myimage.begin()->data()
  );


}

void init(void)
{
  glClearColor(0.0, 0.0, 1.0, 1.0);
}

int main(int argc, char*argv[])
{

  glutInit(&argc, argv);
  glutInitDisplayMode(GLUT_RGBA);
  glutCreateWindow(argv[0]);
  glutDisplayFunc(display);
  init();
  glutMainLoop();
  return 0;
}

//画像の上下を反転する
void reverse_Y(const int width, const int height, NByteData<3>* p) {

  size_t HalfHEIGHT = height / 2;
  for (int ha = 0; ha < HalfHEIGHT; ha++) {

    int hb = (height - ha) - 1;

    NByteData<3>* pha = p + ha * width;
    NByteData<3>* phb = p + hb * width;

    if (ha != hb) {
      for (size_t i = 0; i < width; i++) {
        std::swap(pha[i], phb[i]);
      }
    }

  }

}


//! @brief PPM(RGB各1byte,カラー,テキスト)を書き込む
//! @param [in] fname ファイル名
//! @param [in] vmax 全てのRGBの中の最大値
//! @param [in] width 画像の幅
//! @param [in] height 画像の高さ
//! @param [in] p 画像のメモリへのアドレス
//! @details RGBRGBRGB....のメモリを渡すと、RGBテキストでファイル名fnameで書き込む
void pnmP3_Write(const char* const fname, const int vmax, const int width, const int height, const unsigned char* const p) { // PPM ASCII


  FILE* fp = fopen(fname, "w");

  fprintf(fp, "P3\n%d %d\n%d\n", width, height, vmax);

  size_t k = 0;
  for (size_t i = 0; i < (size_t)height; i++) {
    for (size_t j = 0; j < (size_t)width; j++) {
      fprintf(fp, "%d %d %d ", p[k * 3 + 0], p[k * 3 + 1], p[k * 3 + 2]);
      k++;
    }
    fprintf(fp, "\n");
  }

  fclose(fp);


}
実行結果

OpenGLの座標変換を時前でやってみる
OpenGLがglVertex3d等で与えられた座標をどうやってピクセル座標に変換しているかは以下のサイトなどで説明されている。
http://www.songho.ca/opengl/gl_transform.html
これを実際に計算してみる。
なおベクトルの変換などは作り置きの関数vmmath.hppを使う
https://www.study.suzulang.com/3dcg-functions/vmmath-hpp
mygl-transform.hpp
#pragma once

#include <iostream>
#include <array>

#include "vmmath.hpp"

// 参考
//http://www.songho.ca/opengl/gl_transform.html

void opengltransformation(
  std::array<double, 4>& wnd,
  const std::array<double, 4>& obj,
  const std::array<double, 4>& norm,
  const std::array<double, 16>& modelview,
  const std::array<double, 16>& projection,
  const std::array<double, 2>& depthrange,
  const std::array<int, 4>& viewport
) {
  std::array<double, 4> exyz;
  szl::mathm::mult_m4_v4(exyz, modelview, obj);
  ///////////////////////////////////////////////

#if 0
  // 現在動作確認を取っていないのでとりあえず無効化
  //法線計算
  std::array<double, 16> modelInvT;
  szl::mathm::inverse44(modelInvT, modelview);
  szl::mathm::transpose44(modelInvT);
  std::array<double, 4> nxyz;
  szl::mathm::mult_m4_v4(nxyz, modelInvT, norm);
#endif

  ///////////////////////////////////////////////
  std::array<double, 4> clip;
  szl::mathm::mult_m4_v4(clip, projection, exyz);
///////////////////////////////////////////////
  std::array<double, 3> ndc;
  ndc[0] = clip[0] / clip[3];
  ndc[1] = clip[1] / clip[3];
  ndc[2] = clip[2] / clip[3];
//////////////////////////////////////
  double x = viewport[0];
  double y = viewport[1];
  double w = viewport[2];
  double h = viewport[3];
  double n = depthrange[0];
  double f = depthrange[1];


  wnd[0] = w / 2 * ndc[0] + (x + w / 2);
  wnd[1] = h / 2 * ndc[1] + (y + h / 2);
  wnd[2] = (f - n) / 2 * ndc[2] + (f + n) / 2;
}
使用例
#pragma warning(disable:4996)

#include <GL/glut.h>

#pragma comment(lib,"opengl32.lib")

#include "NByteData.hpp"

#include "mygl-transform.hpp"

#include "Bresenham.hpp"

#include<vector>


std::vector < NByteData<3> > myimage;
void my_transformation(
  std::array<double, 4>& wndcoord,
  const std::array<double, 4>& obj,
  const std::array<double, 4>& norm
) {

  std::array<double, 16> model;
  std::array<double, 16> proj;
  std::array<double, 2> depthrange{ 0, 1 };
  std::array<int, 4> viewport;

  glGetDoublev(GL_MODELVIEW_MATRIX, model.data());//行列とビューポート取得
  glGetDoublev(GL_PROJECTION_MATRIX, proj.data());
  glGetIntegerv(GL_VIEWPORT, viewport.data());


  opengltransformation(
    wndcoord,//結果のピクセル座標
    obj,//モデルの頂点座標
    norm,
    model,
    proj,
    depthrange,
    viewport
  );
  printf("%lf %lf %lf\n", wndcoord[0], wndcoord[1], wndcoord[2]);

}
//保存の時に画像を上下反転する
void reverse_Y(const int width, const int height, NByteData<3>* p);

void pnmP3_Write(const char* const fname, const int vmax, const int width, const int height, const unsigned char* const p);
void my_draw(
  const std::array<double, 4>& A,
  const std::array<double, 4>& B,
  const std::array<double, 4>& C
) {
  std::array<double, 4> wA;
  std::array<double, 4> wB;
  std::array<double, 4> wC;

  //法線は今回は使用しない
  std::array<double, 4> dmy{ 1,1,1,1 };

  my_transformation(wA, A, dmy);//三次元座標をピクセル座標に変換
  my_transformation(wB, B, dmy);
  my_transformation(wC, C, dmy);

  //////////////////////////////
  int width = glutGet(GLUT_WINDOW_WIDTH);
  int height = glutGet(GLUT_WINDOW_HEIGHT);
  myimage.resize(width* height);
  std::fill(myimage.begin(), myimage.end(), NByteData<3>{255, 255, 255});

  //三角形の描画
  Bresenham(&myimage[0], width, height, wA[0], wA[1], wB[0], wB[1], NByteData<3>{0, 0, 0});
  Bresenham(&myimage[0], width, height, wB[0], wB[1], wC[0], wC[1], NByteData<3>{0, 0, 0});
  Bresenham(&myimage[0], width, height, wC[0], wC[1], wA[0], wA[1], NByteData<3>{0, 0, 0});

  //上下反転
  reverse_Y(width, height, &myimage[0]);

  pnmP3_Write(//ファイルに出力
    R"(C:\test\data\a.ppm)",
    255, width, height, myimage.begin()->data()
  );
}
void display(void)
{
  glClear(GL_COLOR_BUFFER_BIT);


  std::array<double, 4> pa{ -0.3,-0.4,0,1 };
  std::array<double, 4> pb{ 0.3,-0.4,0.2,1 };
  std::array<double, 4> pc{ 0.1,0.2,-0.2,1 };

  std::array<double, 4> norm{ 1,1,1,1 };

  glMatrixMode(GL_PROJECTION);//透視投影行列
  glLoadIdentity();
  gluPerspective(60, GLUT_SCREEN_WIDTH / (double)GLUT_SCREEN_HEIGHT, 0.01, 10);
  glMatrixMode(GL_MODELVIEW);//モデルビュー変換行列
  glLoadIdentity();
  glPushMatrix();

  glRotated(30, 1, 1, 1);
  glTranslated(-0.2, -0.2, -1);

  glColor3d(1, 0, 0);
  glPointSize(5);
  glBegin(GL_TRIANGLES);
  glVertex3dv(pa.data());
  glVertex3dv(pb.data());
  glVertex3dv(pc.data());
  glEnd();

  my_draw(pa,pb,pc);//座標変換のテスト

  glPopMatrix();

  glFlush();

}
void init(void)
{
  glClearColor(0.0, 0.0, 1.0, 1.0);
}

int main(int argc,char*argv[])
{

  glutInit(&argc, argv);
  glutInitDisplayMode(GLUT_RGBA);
  glutCreateWindow(argv[0]);
  glutDisplayFunc(display);
  init();
  glutMainLoop();
  return 0;
}

//画像の上下を反転する
void reverse_Y(const int width, const int height, NByteData<3>* p) {

  size_t HalfHEIGHT = height / 2;
  for (int ha = 0; ha < HalfHEIGHT; ha++) {

    int hb = (height - ha) - 1;

    NByteData<3>* pha = p + ha * width;
    NByteData<3>* phb = p + hb * width;

    if (ha != hb) {
      for (size_t i = 0; i < width; i++) {
        std::swap(pha[i], phb[i]);
      }
    }

  }

}


//! @brief PPM(RGB各1byte,カラー,テキスト)を書き込む
//! @param [in] fname ファイル名
//! @param [in] vmax 全てのRGBの中の最大値
//! @param [in] width 画像の幅
//! @param [in] height 画像の高さ
//! @param [in] p 画像のメモリへのアドレス
//! @details RGBRGBRGB....のメモリを渡すと、RGBテキストでファイル名fnameで書き込む
void pnmP3_Write(const char* const fname, const int vmax, const int width, const int height, const unsigned char* const p) { // PPM ASCII


  FILE* fp = fopen(fname, "w");

  fprintf(fp, "P3\n%d %d\n%d\n", width, height, vmax);

  size_t k = 0;
  for (size_t i = 0; i < (size_t)height; i++) {
    for (size_t j = 0; j < (size_t)width; j++) {
      fprintf(fp, "%d %d %d ", p[k * 3 + 0], p[k * 3 + 1], p[k * 3 + 2]);
      k++;
    }
    fprintf(fp, "\n");
  }

  fclose(fp);


}
三角形の重心座標系を計算してみる
重心座標系は、ある三角形が頂点A,B,Cからなるとき、三角形上の点Pの座標を、ABCの座標とパラメータuvwを使って、P=wA+uB+vC の形で表す方法。
此の何が嬉しいかというと、例えば三角形ABCの上に点Pがあったとする。次に三角形ABCを変形して三角形A'B'C'を作る。この時、点PはA'B'C'上ではどの位置(x,y,z)に該当するかを知りたい。
こんな時、あらかじめPの重心座標系を求め、uvwを計算しておけば、ABCの座標が変わってもuvwからP'のxyzを求めることができる。

u,v,wの計算方法
BarycentricCoordinates.hpp
#pragma once

// https://www.study.suzulang.com/3dcg-functions/vmmath-hpp
#include "vmmath.hpp"

#include<array>
//! @brief ABCの頂点から外積で求められる平行四辺形の面積
//! @param [in] A 頂点1の三次元座標
//! @param [in] B 頂点2の三次元座標
//! @param [in] C 頂点3の三次元座標
//! @return 平行四辺形の面積
double parellogram(
  const std::array<double, 3>& A,
  const std::array<double, 3>& B,
  const std::array<double, 3>& C
) {
  // P = wA+uB+vC

  std::array<double, 3> AtoB;
  szl::mathv::vector_from_line3(AtoB, A, B);

  std::array<double, 3> AtoC;
  szl::mathv::vector_from_line3(AtoC, A, C);

  //外積を求める
  std::array<double, 3> parallelogramABC;
  szl::mathv::outer3(parallelogramABC, AtoB, AtoC);

  //△ABCの面積の二倍
  return szl::mathv::length3(parallelogramABC);

}
//! @brief 三角形ABC上の点Pの重心座標系での位置を求める
//! @param [out] u △CAP/△ABC
//! @param [out] v △ABP/△ABC
//! @param [out] w △BCP/△ABC
//! @param [in] A 頂点1
//! @param [in] B 頂点2
//! @param [in] C 頂点3
//! @param [in] P 三角形内部の点
//! @return なし
void BarycentricCoordinates(
  double* u,
  double* v,
  double* w,
  const std::array<double, 3> A,
  const std::array<double, 3> B,
  const std::array<double, 3> C,
  const std::array<double, 3> P

) {

  double parellogramABC = parellogram(A, B, C);
  *u = parellogram(C, A, P) / parellogramABC;
  *v = parellogram(A, B, P) / parellogramABC;
  *w = parellogram(B, C, P) / parellogramABC;

}
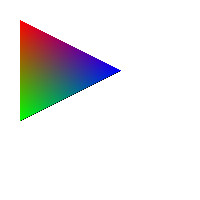
実験
LineCross.hpp
以前作った、線分の交差判定のプログラムで定義した頂点データに色情報を追加する。
struct RGB {
  int r, g, b;
};

template<typename ScalarT>
struct Point {
  ScalarT x, y;
  RGB color; // 色情報
  Point(const ScalarT X, const ScalarT Y) :x(X), y(Y) {}

  template<typename T>
  Point(const Point<T>& src) {
    x = src.x;
    y = src.y;

    color.r = src.color.r;
    color.g = src.color.g;
    color.b = src.color.b;
  }
  Point() {}

};
scanConversion.hpp
以前作ったscanConversion.hppの、点を打つPlot関数を以下のように変更する。これは三角形内部の色をABC山頂点に与えた色情報を使うようにし、補間を重心座標系で行うようにする。
#pragma once

#include "NByteData.hpp"
#include "LineCross.hpp"

#include "BarycentricCoordinates.hpp"

template<typename PixelType>
struct imagedata {
  int width;
  int height;
  PixelType* img;
};

//! @brief 水平な線分ともう一方の線分との交差判定を行う
//! @param [out] cross 交差していた場合の座標(ピクセル単位)
//! @param [in] scanL 水平な線分
//! @param [in] L 線分
bool isPixelHorizonalCross(
  Pointi* cross,
  const LineSegmenti& scanL,
  const LineSegmenti& L) {

  //三角形塗りつぶしようなので、scanLは必ずLの始点・終点よりも広い範囲をとる
  //そのため始点・終点のY座標が一致していたら交差しているのでtrueを返す
  if (scanL.s.y == L.s.y) {
    *cross = L.s;
    return true;
  }
  if (scanL.s.y == L.e.y) {
    *cross = L.e;
    return true;
  }

  return isCrossPixel(cross, scanL, L);

}

//! @brief 画素に色を設定
//! @param [in,out] img 画像データ
//! @param [in] P 書き込み先の座標
//! @param [in] A 頂点1の座標と色
//! @param [in] B 頂点2の座標と色
//! @param [in] C 頂点3の座標と色
//! @return なし
template<typename PixelType>
void Plot(
  imagedata<PixelType> *img,
  Pointi P,
  const Pointi A,
  const Pointi B,
  const Pointi C
  ) {

  std::array<double, 3> _A{ A.x,A.y,0 };
  std::array<double, 3> _B{ B.x,B.y,0 };
  std::array<double, 3> _C{ C.x,C.y,0 };
  std::array<double, 3> _P{ P.x,P.y,0 };

  //変更
  double u, v, w;
  BarycentricCoordinates(
    &u,&v,&w,
    _A, _B, _C,
    _P
  );
  // P = wA+uB+vC

  unsigned char cR = w * A.color.r;
  unsigned char cG = u * B.color.g;
  unsigned char cB = v * C.color.b;

  PixelType Color{ cR,cG,cB };
  img->img[P.y * img->width + P.x] = Color;

}

//! @brief 走査変換で頂点ABCからなる三角形を描画
//! @param [in,out] img 画像データ
//! @param [in] A 頂点1の座標
//! @param [in] B 頂点2の座標
//! @param [in] C 頂点3の座標
template<typename PixelType>
void scanConversion(
  imagedata<PixelType> *img,
  const Pointi A,
  const Pointi B,
  const Pointi C
) {

  //入力された頂点をY座標が小さい順にソート
  Pointi m[3]{ A,B,C };
  std::sort(
    std::begin(m), std::end(m),
    [](const auto& s, const auto& t) {
    return s.y < t.y;
  });

  //X座標の最大・最小より少し広い範囲
  const int xmin = std::min_element(
    std::begin(m), std::end(m),
    [](const auto& s, const auto& t) {return s.x < t.x; }
  )->x - 1;
  const int xmax = std::max_element(
    std::begin(m), std::end(m),
    [](const auto& s, const auto& t) {return s.x < t.x; }
  )->x + 1;

  /*
           0
         / |
       /   |
     /     |
    1      |
     \     |
      \    |
       \   |
        \  |
         \ |
           2

  ソートにより三角形の配列mはy座標順に並んでいる


  */

  // 走査線と 01,02
  for (int y = m[0].y; y < m[1].y; y++) {
    //上半分について処理

    LineSegmenti scan(
      Pointi(xmin, y),
      Pointi(xmax, y)
    );

    Pointi cross01;
    Pointi cross02;

    LineSegmenti L01(m[0], m[1]);
    LineSegmenti L02(m[0], m[2]);

    bool ab = isPixelHorizonalCross(&cross01, scan, L01);
    bool ac = isPixelHorizonalCross(&cross02, scan, L02);

    if (ab == true && ac == true) {
      int cxmin = (std::min)(cross01.x, cross02.x);
      int cxmax = (std::max)(cross01.x, cross02.x);
      for (int x = cxmin; x <= cxmax; x++) {
        Pointi P(x, y);
        Plot(img, P,A,B,C);//変更
      }
    }


  }
  // 走査線と 12 , 01
  for (int y = m[1].y; y <= m[2].y; y++) {
    LineSegmenti scan(
      Pointi(xmin, y),
      Pointi(xmax, y)
    );

    Pointi cross12;
    Pointi cross02;

    LineSegmenti L12(m[1], m[2]);
    LineSegmenti L02(m[0], m[2]);

    bool bc = isPixelHorizonalCross(&cross12, scan, L12);
    bool ac = isPixelHorizonalCross(&cross02, scan, L02);

    if (bc == true && ac == true) {
      int cxmin = (std::min)(cross12.x, cross02.x);
      int cxmax = (std::max)(cross12.x, cross02.x);
      for (int x = cxmin; x <= cxmax; x++) {
        Pointi P(x, y);
        Plot(img, P, A, B, C);//変更
      }

    }
  }

}
呼び出し例
#pragma warning(disable:4996)

#include <iostream>
#include <vector>
#include "Bresenham.hpp"

#include "scanConversion.hpp"

void ppmP3_write(
  const char* const fname,
  const int width,
  const int height,
  const unsigned char* const p,
  const int vmax
);

using ucrgb = NByteData<3>;
ucrgb Black = ucrgb{ 0,0,0 };
ucrgb White = ucrgb{ 255,255,255 };
ucrgb Red = ucrgb{ 255,0,0 };

void test1(imagedata<ucrgb>& img,bool fill);
void test2(imagedata<ucrgb>& img,bool fill);
void test3(imagedata<ucrgb>& img,bool fill);
void test4(imagedata<ucrgb>& img,bool fill);
void test5(imagedata<ucrgb>& img,bool fill);
void test6(imagedata<ucrgb>& img, bool fill);
int main()
{

  int width = 200;
  int height = 200;
  std::vector<ucrgb> image;


  image.resize(width*height, White);

  imagedata<ucrgb> imginfo;
  imginfo.width = width;
  imginfo.height = height;
  imginfo.img = &image[0];

  std::fill(image.begin(), image.end(), White);
  test1(imginfo,true);

  std::fill(image.begin(), image.end(), White);
  test2(imginfo, true);

  std::fill(image.begin(), image.end(), White);
  test3(imginfo, true);

  std::fill(image.begin(), image.end(), White);
  test4(imginfo, true);

  std::fill(image.begin(), image.end(), White);
  test5(imginfo, true);

  std::fill(image.begin(), image.end(), White);
  test6(imginfo, true);

}
//! @brief PPM(RGB各1byte,カラー,テキスト)を書き込む
//! @param [in] fname ファイル名
//! @param [in] width 画像の幅
//! @param [in] height 画像の高さ
//! @param [in] p 画像のメモリへのアドレス
//! @param [in] vmax 全てのRGBの中の最大値。普通の画像なら255
//! @details RGBRGBRGB....のメモリを渡すと、RGBテキストでファイル名fnameで書き込む
void ppmP3_write(
  const char* const fname,
  const int width,
  const int height,
  const unsigned char* const p,
  const int vmax
) {

  FILE* fp = fopen(fname, "wb");
  fprintf(fp, "P3\n%d %d\n%d\n", width, height, vmax);

  size_t k = 0;
  for (size_t i = 0; i < (size_t)height; i++) {
    for (size_t j = 0; j < (size_t)width; j++) {
      fprintf(fp, "%d %d %d ",
        p[k * 3 + 0],
        p[k * 3 + 1],
        p[k * 3 + 2]
      );
      k++;
    }
    fprintf(fp, "\n");
  }

  fclose(fp);
}
void test1(imagedata<ucrgb>& imginfo, bool fill) {
  Pointi A{ 20,20 };
  Pointi B{ 20,120 };
  Pointi C{ 120,70 };

  //追加
  A.color = RGB{ 255,0,0 };
  B.color = RGB{ 0,255,0 };
  C.color = RGB{ 0,0,255 };

  Bresenham(&imginfo.img[0], imginfo.width, imginfo.height, A.x, A.y, B.x, B.y, Black);
  Bresenham(&imginfo.img[0], imginfo.width, imginfo.height, B.x, B.y, C.x, C.y, Black);
  Bresenham(&imginfo.img[0], imginfo.width, imginfo.height, C.x, C.y, A.x, A.y, Black);

  if (fill) {
    scanConversion<ucrgb>(&imginfo, A, B, C);
  }


  ppmP3_write(R"(C:\test\t1.ppm)", imginfo.width, imginfo.height, imginfo.img->data(), 255);

}

void test2(imagedata<ucrgb>& imginfo, bool fill) {
  Pointi A{ 20,20 };
  Pointi B{ 120,20 };
  Pointi C{ 100,100 };

  //追加
  A.color = RGB{ 255,0,0 };
  B.color = RGB{ 0,255,0 };
  C.color = RGB{ 0,0,255 };

  Bresenham(&imginfo.img[0], imginfo.width, imginfo.height, A.x, A.y, B.x, B.y, Black);
  Bresenham(&imginfo.img[0], imginfo.width, imginfo.height, B.x, B.y, C.x, C.y, Black);
  Bresenham(&imginfo.img[0], imginfo.width, imginfo.height, C.x, C.y, A.x, A.y, Black);

  if (fill) {
    scanConversion<ucrgb>(&imginfo, A, B, C);
  }


  ppmP3_write(R"(C:\test\t2.ppm)", imginfo.width, imginfo.height, imginfo.img->data(), 255);

}

void test3(imagedata<ucrgb>& imginfo, bool fill) {
  Pointi A{ 100,20 };
  Pointi B{ 20,50 };
  Pointi C{ 130,100 };

  //追加
  A.color = RGB{ 255,0,0 };
  B.color = RGB{ 0,255,0 };
  C.color = RGB{ 0,0,255 };

  Bresenham(&imginfo.img[0], imginfo.width, imginfo.height, A.x, A.y, B.x, B.y, Black);
  Bresenham(&imginfo.img[0], imginfo.width, imginfo.height, B.x, B.y, C.x, C.y, Black);
  Bresenham(&imginfo.img[0], imginfo.width, imginfo.height, C.x, C.y, A.x, A.y, Black);

  if (fill) {
    scanConversion<ucrgb>(&imginfo, A, B, C);
  }


  ppmP3_write(R"(C:\test\t3.ppm)", imginfo.width, imginfo.height, imginfo.img->data(), 255);

}

void test4(imagedata<ucrgb>& imginfo, bool fill) {
  Pointi A{ 20,20 };
  Pointi B{ 20,20 };
  Pointi C{ 20,20 };

  //追加
  A.color = RGB{ 255,0,0 };
  B.color = RGB{ 0,255,0 };
  C.color = RGB{ 0,0,255 };

  Bresenham(&imginfo.img[0], imginfo.width, imginfo.height, A.x, A.y, B.x, B.y, Black);
  Bresenham(&imginfo.img[0], imginfo.width, imginfo.height, B.x, B.y, C.x, C.y, Black);
  Bresenham(&imginfo.img[0], imginfo.width, imginfo.height, C.x, C.y, A.x, A.y, Black);

  if (fill) {
    scanConversion<ucrgb>(&imginfo, A, B, C);
  }


  ppmP3_write(R"(C:\test\t4.ppm)", imginfo.width, imginfo.height, imginfo.img->data(), 255);

}
void test5(imagedata<ucrgb>& imginfo, bool fill) {
  Pointi A{ 20,20 };
  Pointi B{ 100,20 };
  Pointi C{ 50,20 };

  //追加
  A.color = RGB{ 255,0,0 };
  B.color = RGB{ 0,255,0 };
  C.color = RGB{ 0,0,255 };

  Bresenham(&imginfo.img[0], imginfo.width, imginfo.height, A.x, A.y, B.x, B.y, Black);
  Bresenham(&imginfo.img[0], imginfo.width, imginfo.height, B.x, B.y, C.x, C.y, Black);
  Bresenham(&imginfo.img[0], imginfo.width, imginfo.height, C.x, C.y, A.x, A.y, Black);

  if (fill) {
    scanConversion<ucrgb>(&imginfo, A, B, C);
  }

  ppmP3_write(R"(C:\test\t5.ppm)", imginfo.width, imginfo.height, imginfo.img->data(), 255);

}

void test6(imagedata<ucrgb>& imginfo, bool fill) {
  Pointi A{ 20,20 };
  Pointi B{ 20,50 };
  Pointi C{ 20,100 };

  //追加
  A.color = RGB{ 255,0,0 };
  B.color = RGB{ 0,255,0 };
  C.color = RGB{ 0,0,255 };

  Bresenham(&imginfo.img[0], imginfo.width, imginfo.height, A.x, A.y, B.x, B.y, Black);
  Bresenham(&imginfo.img[0], imginfo.width, imginfo.height, B.x, B.y, C.x, C.y, Black);
  Bresenham(&imginfo.img[0], imginfo.width, imginfo.height, C.x, C.y, A.x, A.y, Black);

  if (fill) {
    scanConversion<ucrgb>(&imginfo, A, B, C);
  }

  ppmP3_write(R"(C:\test\t6.ppm)", imginfo.width, imginfo.height, imginfo.img->data(), 255);

}
実行結果
走査変換で塗りつぶされた三角形を描画
三点を指定し、中が塗りつぶされた三角形を描く。以下、プログラムでは表示にブレゼンハムを使ってはいるが領域の塗りつぶしではないのでただの確認のために使っている。
scanConversion.hpp
#pragma once

#include "NByteData.hpp"
#include "Bresenham.hpp"
#include "LineCross.hpp"

template<typename PixelType>
struct imagedata {
  int width;
  int height;
  PixelType* img;
};
//! @brief 水平な線分ともう一方の線分との交差判定を行う
//! @param [out] cross 交差していた場合の座標(ピクセル単位)
//! @param [in] scanL 水平な線分
//! @param [in] L 線分
bool isPixelHorizonalCross(
  Pointi* cross,
  const LineSegmenti& scanL,
  const LineSegmenti& L) {

  //三角形塗りつぶしようなので、scanLは必ずLの始点・終点よりも広い範囲をとる
  //そのため始点・終点のY座標が一致していたら交差しているのでtrueを返す
  if (scanL.s.y == L.s.y) {
    *cross = L.s;
    return true;
  }
  if (scanL.s.y == L.e.y) {
    *cross = L.e;
    return true;
  }

  return isCrossPixel(cross, scanL, L);

}
//! @brief 画素に色を設定
//! @param [in,out] img 画像データ
//! @param [in] P 書き込み先の座標
template<typename PixelType>
void Plot(
  imagedata<PixelType> *img,
  Pointi P) {

  PixelType Color{ 255,0,0 };
  img->img[P.y * img->width + P.x] = Color;

}
//! @brief 走査変換で頂点ABCからなる三角形を描画
//! @param [in,out] img 画像データ
//! @param [in] A 頂点1の座標
//! @param [in] B 頂点2の座標
//! @param [in] C 頂点3の座標
template<typename PixelType>
void scanConversion(
  imagedata<PixelType> *img,
  const Pointi A,
  const Pointi B,
  const Pointi C
) {

  //入力された頂点をY座標が小さい順にソート
  Pointi m[3]{ A,B,C };
  std::sort(
    std::begin(m), std::end(m),
    [](const auto& s, const auto& t) {
    return s.y < t.y;
  });


  //X座標の最大・最小より少し広い範囲
  const int xmin = std::min_element(
    std::begin(m), std::end(m),
    [](const auto& s, const auto& t) {return s.x < t.x; }
  )->x - 1;
  const int xmax = std::max_element(
    std::begin(m), std::end(m),
    [](const auto& s, const auto& t) {return s.x < t.x; }
  )->x + 1;

  /*
           0
         / |
       /   |
     /     |
    1      |
     \     |
      \    |
       \   |
        \  |
         \ |
           2

  ソートにより三角形の配列mはy座標順に並んでいる


  */

  // 走査線と 01,02
  for (int y = m[0].y; y < m[1].y; y++) {
    //上半分について処理

    LineSegmenti scan(
      Pointi(xmin, y),
      Pointi(xmax, y)
    );

    Pointi cross01;
    Pointi cross02;

    LineSegmenti L01(m[0], m[1]);
    LineSegmenti L02(m[0], m[2]);

    bool ab = isPixelHorizonalCross(&cross01, scan, L01);
    bool ac = isPixelHorizonalCross(&cross02, scan, L02);

    if (ab == true && ac == true) {
      int cxmin = (std::min)(cross01.x, cross02.x);
      int cxmax = (std::max)(cross01.x, cross02.x);
      for (int x = cxmin; x <= cxmax; x++) {
        Pointi P(x, y);
        Plot(img, P);
      }
    }


  }
  // 走査線と 12 , 01
  for (int y = m[1].y; y <= m[2].y; y++) {
    LineSegmenti scan(
      Pointi(xmin, y),
      Pointi(xmax, y)
    );

    Pointi cross12;
    Pointi cross02;

    LineSegmenti L12(m[1], m[2]);
    LineSegmenti L02(m[0], m[2]);

    bool bc = isPixelHorizonalCross(&cross12, scan, L12);
    bool ac = isPixelHorizonalCross(&cross02, scan, L02);

    if (bc == true && ac == true) {
      int cxmin = (std::min)(cross12.x, cross02.x);
      int cxmax = (std::max)(cross12.x, cross02.x);
      for (int x = cxmin; x <= cxmax; x++) {
        Pointi P(x, y);
        Plot(img, P);
      }

    }
  }

}
テストプログラム
#pragma warning(disable:4996)

#include <iostream>
#include <vector>

#include "scanConversion.hpp"

void ppmP3_write(
  const char* const fname,
  const int width,
  const int height,
  const unsigned char* const p,
  const int vmax
);

using ucrgb = NByteData<3>;
ucrgb Black = ucrgb{ 0,0,0 };
ucrgb White = ucrgb{ 255,255,255 };
ucrgb Red = ucrgb{ 255,0,0 };

void test1(imagedata<ucrgb>& img,bool fill);
void test2(imagedata<ucrgb>& img,bool fill);
void test3(imagedata<ucrgb>& img,bool fill);
void test4(imagedata<ucrgb>& img,bool fill);
void test5(imagedata<ucrgb>& img,bool fill);
void test6(imagedata<ucrgb>& img, bool fill);
int main()
{

  int width = 200;
  int height = 200;
  std::vector<ucrgb> image;


  image.resize(width*height, White);

  imagedata<ucrgb> imginfo;
  imginfo.width = width;
  imginfo.height = height;
  imginfo.img = &image[0];

  std::fill(image.begin(), image.end(), White);
  test1(imginfo,true);

  std::fill(image.begin(), image.end(), White);
  test2(imginfo, true);

  std::fill(image.begin(), image.end(), White);
  test3(imginfo, true);

  std::fill(image.begin(), image.end(), White);
  test4(imginfo, true);

  std::fill(image.begin(), image.end(), White);
  test5(imginfo, true);

  std::fill(image.begin(), image.end(), White);
  test6(imginfo, true);

}
//! @brief PPM(RGB各1byte,カラー,テキスト)を書き込む
//! @param [in] fname ファイル名
//! @param [in] width 画像の幅
//! @param [in] height 画像の高さ
//! @param [in] p 画像のメモリへのアドレス
//! @param [in] vmax 全てのRGBの中の最大値。普通の画像なら255
//! @details RGBRGBRGB....のメモリを渡すと、RGBテキストでファイル名fnameで書き込む
void ppmP3_write(
  const char* const fname,
  const int width,
  const int height,
  const unsigned char* const p,
  const int vmax
) {

  FILE* fp = fopen(fname, "wb");
  fprintf(fp, "P3\n%d %d\n%d\n", width, height, vmax);

  size_t k = 0;
  for (size_t i = 0; i < (size_t)height; i++) {
    for (size_t j = 0; j < (size_t)width; j++) {
      fprintf(fp, "%d %d %d ",
        p[k * 3 + 0],
        p[k * 3 + 1],
        p[k * 3 + 2]
      );
      k++;
    }
    fprintf(fp, "\n");
  }

  fclose(fp);
}
void test1(imagedata<ucrgb>& imginfo, bool fill) {
  Pointi A{ 20,20 };
  Pointi B{ 20,120 };
  Pointi C{ 120,70 };

  Bresenham(&imginfo.img[0], imginfo.width, imginfo.height, A.x, A.y, B.x, B.y, Black);
  Bresenham(&imginfo.img[0], imginfo.width, imginfo.height, B.x, B.y, C.x, C.y, Black);
  Bresenham(&imginfo.img[0], imginfo.width, imginfo.height, C.x, C.y, A.x, A.y, Black);

  if (fill) {
    scanConversion<ucrgb>(&imginfo, A, B, C);
  }


  ppmP3_write(R"(C:\test\t1.ppm)", imginfo.width, imginfo.height, imginfo.img->data(), 255);

}

void test2(imagedata<ucrgb>& imginfo, bool fill) {
  Pointi A{ 20,20 };
  Pointi B{ 120,20 };
  Pointi C{ 100,100 };

  Bresenham(&imginfo.img[0], imginfo.width, imginfo.height, A.x, A.y, B.x, B.y, Black);
  Bresenham(&imginfo.img[0], imginfo.width, imginfo.height, B.x, B.y, C.x, C.y, Black);
  Bresenham(&imginfo.img[0], imginfo.width, imginfo.height, C.x, C.y, A.x, A.y, Black);

  if (fill) {
    scanConversion<ucrgb>(&imginfo, A, B, C);
  }


  ppmP3_write(R"(C:\test\t2.ppm)", imginfo.width, imginfo.height, imginfo.img->data(), 255);

}

void test3(imagedata<ucrgb>& imginfo, bool fill) {
  Pointi A{ 100,20 };
  Pointi B{ 20,50 };
  Pointi C{ 130,100 };

  Bresenham(&imginfo.img[0], imginfo.width, imginfo.height, A.x, A.y, B.x, B.y, Black);
  Bresenham(&imginfo.img[0], imginfo.width, imginfo.height, B.x, B.y, C.x, C.y, Black);
  Bresenham(&imginfo.img[0], imginfo.width, imginfo.height, C.x, C.y, A.x, A.y, Black);

  if (fill) {
    scanConversion<ucrgb>(&imginfo, A, B, C);
  }


  ppmP3_write(R"(C:\test\t3.ppm)", imginfo.width, imginfo.height, imginfo.img->data(), 255);

}

void test4(imagedata<ucrgb>& imginfo, bool fill) {
  Pointi A{ 20,20 };
  Pointi B{ 20,20 };
  Pointi C{ 20,20 };

  Bresenham(&imginfo.img[0], imginfo.width, imginfo.height, A.x, A.y, B.x, B.y, Black);
  Bresenham(&imginfo.img[0], imginfo.width, imginfo.height, B.x, B.y, C.x, C.y, Black);
  Bresenham(&imginfo.img[0], imginfo.width, imginfo.height, C.x, C.y, A.x, A.y, Black);

  if (fill) {
    scanConversion<ucrgb>(&imginfo, A, B, C);
  }


  ppmP3_write(R"(C:\test\t4.ppm)", imginfo.width, imginfo.height, imginfo.img->data(), 255);

}
void test5(imagedata<ucrgb>& imginfo, bool fill) {
  Pointi A{ 20,20 };
  Pointi B{ 100,20 };
  Pointi C{ 50,20 };

  Bresenham(&imginfo.img[0], imginfo.width, imginfo.height, A.x, A.y, B.x, B.y, Black);
  Bresenham(&imginfo.img[0], imginfo.width, imginfo.height, B.x, B.y, C.x, C.y, Black);
  Bresenham(&imginfo.img[0], imginfo.width, imginfo.height, C.x, C.y, A.x, A.y, Black);

  if (fill) {
    scanConversion<ucrgb>(&imginfo, A, B, C);
  }

  ppmP3_write(R"(C:\test\t5.ppm)", imginfo.width, imginfo.height, imginfo.img->data(), 255);

}

void test6(imagedata<ucrgb>& imginfo, bool fill) {
  Pointi A{ 20,20 };
  Pointi B{ 20,50 };
  Pointi C{ 20,100 };

  Bresenham(&imginfo.img[0], imginfo.width, imginfo.height, A.x, A.y, B.x, B.y, Black);
  Bresenham(&imginfo.img[0], imginfo.width, imginfo.height, B.x, B.y, C.x, C.y, Black);
  Bresenham(&imginfo.img[0], imginfo.width, imginfo.height, C.x, C.y, A.x, A.y, Black);

  if (fill) {
    scanConversion<ucrgb>(&imginfo, A, B, C);
  }

  ppmP3_write(R"(C:\test\t6.ppm)", imginfo.width, imginfo.height, imginfo.img->data(), 255);

}
線分の交差判定するコード
線分の交差判定を行う。二次元画像の場合、結果がピクセル単位になるため座標の四捨五入が必要。
LineCross.hpp
#pragma once
template<typename ScalarT>
struct Point {
  ScalarT x, y;
  Point(const ScalarT X, const ScalarT Y) :x(X), y(Y) {}

  template<typename T>
  Point(const Point<T>& src) {
    x = src.x;
    y = src.y;
  }
  Point() {}

};

template<typename ScalarT>
struct LineSegment {
  Point<ScalarT> s, e;

  template<typename T>
  LineSegment(const Point<T>& S, const Point<T>& E) :s(S), e(E) {}
  template<typename T>
  LineSegment(const LineSegment<T>& LS):s(LS.s),e(LS.e){}
  LineSegment() {}
};
using Pointd = Point<double>;
using LineSegmentd = LineSegment<double>;
//! @brief 線分の交点を求める
//! @param [out] cross 交点座標の格納先
//! @param [in] L1 線分1
//! @param [in] L2 線分2
//! @retval true 交差している
//! @retval false 交差していない
bool isCross(Pointd* cross, const LineSegmentd& L1, const LineSegmentd& L2) {
  const double Ax = L1.s.x;
  const double Ay = L1.s.y;
  const double Bx = L1.e.x;
  const double By = L1.e.y;
  const double Cx = L2.s.x;
  const double Cy = L2.s.y;
  const double Dx = L2.e.x;
  const double Dy = L2.e.y;

  //分子
  const double  s_numerator = (Cx - Ax)*(Dy - Cy) - (Cy - Ay)*(Dx - Cx);
  //分母
  const double s_denominator = (Bx - Ax)*(Dy - Cy) - (By - Ay)*(Dx - Cx);

  //分子
  const double t_numerator = (Ax - Cx)*(By - Ay) - (Ay - Cy)*(Bx - Ax);
  //分母
  const double t_denominator = (Dx - Cx)*(By - Ay) - (Dy - Cy)*(Bx - Ax);


  const double s = s_numerator / s_denominator;
  const double t = t_numerator / t_denominator;

  if (
    0 <= s && s <= 1
    &&
    0 <= t && t <= 1
    ) {

    cross->x = Ax + s * (Bx - Ax);
    cross->y = Ay + s * (By - Ay);

    return true;
  }

  return false;

}
using Pointi = Point<int>;
using LineSegmenti = LineSegment<int>;
//! @brief ピクセル単位を想定して線分の交差判定を行う
bool isCrossPixel(Pointi* P, const LineSegmenti a, const LineSegmenti b) {

  LineSegmentd da(a);
  LineSegmentd db(b);
  Pointd c;
  if (isCross(&c, da, db) == false)
    return false;

  P->x = (int)round(c.x);// 四捨五入
  P->y = (int)round(c.y);// 四捨五入

  return true;

}
テストコード
以前書いたBresenhamとデータ用にNByteDataを使用している。
#pragma warning(disable:4996)

#include <iostream>
#include <vector>
#include <random> // 乱数用

#include "Bresenham.hpp"
#include "NByteData.hpp"
#include "LineCross.hpp"


void ppmP3_write(
  const char* const fname,
  const int width,
  const int height,
  const unsigned char* const p,
  const int vmax
);
int main()
{
  using ucrgb = NByteData<3>;

  int width = 200;
  int height = 200;
  std::vector<ucrgb> image;

  ucrgb Black = ucrgb{ 0,0,0 };
  ucrgb White = ucrgb{ 255,255,255 };
  ucrgb Red = ucrgb{ 255,0,0 };
  ucrgb Blue = ucrgb{ 0,0,255 };

  image.resize(width*height, White);


  // 疑似乱数
  std::mt19937 mt(2);
  // 0~5の範囲の一様乱数作成用
  // float型が欲しいなら std::uniform_real_distribution<>
  std::uniform_int_distribution<> idistriW(0, width-1);
  std::uniform_int_distribution<> idistriH(0, height-1);

  //赤い線分
  const LineSegmenti A( Pointi(20,80),Pointi(190,123) );
  Bresenham(image.data(), width, height, A.s.x, A.s.y, A.e.x, A.e.y, Red);

  for (size_t i = 0; i < 10; i++) {
    int x1 = idistriW(mt);
    int y1 = idistriH(mt);
    int x2 = idistriW(mt);
    int y2 = idistriH(mt);

    //黒い線分
    LineSegmenti B(Pointi(x1,y1), Pointi(x2,y2) );
    Bresenham(image.data(), width, height, B.s.x, B.s.y, B.e.x, B.e.y, Black);

    //交点があれば着色
    Pointi c;
    if (isCrossPixel(&c, A, B) == true) {
      image[c.y*width + c.x] = Blue;
    }

  }

  //ファイル保存
  char fname[100];
  sprintf(fname, R"(C:\test\ret.ppm)", 10);
  ppmP3_write(fname, width, height, image.data()->data(), 255);

}
//! @brief PPM(RGB各1byte,カラー,テキスト)を書き込む
//! @param [in] fname ファイル名
//! @param [in] width 画像の幅
//! @param [in] height 画像の高さ
//! @param [in] p 画像のメモリへのアドレス
//! @param [in] vmax 全てのRGBの中の最大値。普通の画像なら255
//! @details RGBRGBRGB....のメモリを渡すと、RGBテキストでファイル名fnameで書き込む
void ppmP3_write(
  const char* const fname,
  const int width,
  const int height,
  const unsigned char* const p,
  const int vmax
) {

  FILE* fp = fopen(fname, "wb");
  fprintf(fp, "P3\n%d %d\n%d\n", width, height, vmax);

  size_t k = 0;
  for (size_t i = 0; i < (size_t)height; i++) {
    for (size_t j = 0; j < (size_t)width; j++) {
      fprintf(fp, "%d %d %d ",
        p[k * 3 + 0],
        p[k * 3 + 1],
        p[k * 3 + 2]
      );
      k++;
    }
    fprintf(fp, "\n");
  }

  fclose(fp);
}
ブレゼンハムで線分描画
そのまま、ブレゼンハムのC++での実装。
元のコードはWikipediaから:
Bresenham.hpp
//! @brief ブレゼンハムの直線描画
//! @param [out] img 画像データ(一次元配列)へのポインタ
//! @param [in] width 画像の幅(画素数)
//! @param [in] height 画像の高さ(画素数)
//! @param [in] sx 線の始点X
//! @param [in] sy 線の始点Y
//! @param [in] ex 線の終点X
//! @param [in] ey 線の終点Y
//! @param [in] color 線の色
template<typename PixelType>
void Bresenham(
  PixelType* img,
  const int width,
  const int height,
  const int sx,
  const int sy,
  const int ex,
  const int ey,
  const PixelType color
) {
  // https://ja.wikipedia.org/wiki/%E3%83%96%E3%83%AC%E3%82%BC%E3%83%B3%E3%83%8F%E3%83%A0%E3%81%AE%E3%82%A2%E3%83%AB%E3%82%B4%E3%83%AA%E3%82%BA%E3%83%A0

  const int dx = std::abs(ex - sx);
  const int dy = std::abs(ey - sy);

  const int nx = (sx < ex) ? 1 : -1;
  const int ny = (sy < ey) ? 1 : -1;

  int err = dx - dy;

  int x = sx;
  int y = sy;
  while (1) {

    if (x >= 0 && y >= 0 && x < width && y < height) {
      img[y*width + x] = color;
    }

    if (x == ex && y == ey)
      break;

    const int e2 = 2 * err;
    if (e2 > -dy) {
      err = err - dy;
      x += nx;
    }
    if (e2 < dx) {
      err = err + dx;
      y += ny;
    }
  }
}
使用例
データは前に作ったNByteDataを使用して、3Byteで1ピクセルとする。
https://www.study.suzulang.com/2dcg-functions/nbyte-data-type
#pragma warning(disable:4996)

#include <iostream>
#include <vector>

#include"NByteData.hpp"

#include"Bresenham.hpp"


void ppmP3_write(
  const char* const fname,
  const int width,
  const int height,
  const unsigned char* const p,
  const int vmax
);
int main()
{
  using ucrgb = NByteData<3>;  // RGB 計3Byteのデータ型

  int width = 200;
  int height = 200;
  std::vector<ucrgb> image;

  ucrgb Red = ucrgb{ 255,0,0 };
  ucrgb White = ucrgb{ 255,255,255 };

  image.resize(width*height, White);

  // 直線描画
  Bresenham(image.data(), width, height, -23, 24, 150, 173, Red);

  // 結果をファイルへ保存
  ppmP3_write(R"(C:\test\a.ppm)",width,height,image.data()->data(),255);

}
//! @brief PPM(RGB各1byte,カラー,テキスト)を書き込む
//! @param [in] fname ファイル名
//! @param [in] width 画像の幅
//! @param [in] height 画像の高さ
//! @param [in] p 画像のメモリへのアドレス
//! @param [in] vmax 全てのRGBの中の最大値。普通の画像なら255
//! @details RGBRGBRGB....のメモリを渡すと、RGBテキストでファイル名fnameで書き込む
void ppmP3_write(
  const char* const fname,
  const int width,
  const int height,
  const unsigned char* const p,
  const int vmax
) {

  FILE* fp = fopen(fname, "wb");
  fprintf(fp, "P3\n%d %d\n%d\n", width, height, vmax);

  size_t k = 0;
  for (size_t i = 0; i < (size_t)height; i++) {
    for (size_t j = 0; j < (size_t)width; j++) {
      fprintf(fp, "%d %d %d ",
        p[k * 3 + 0],
        p[k * 3 + 1],
        p[k * 3 + 2]
      );
      k++;
    }
    fprintf(fp, "\n");
  }

  fclose(fp);
}
実行結果
Create a Realistic Forest Landscape In 10 Minutesのチュートリアルを試す
- Landscapeで地形を一つ用意し、サイズを5倍くらいにする。
2. 以下からHDRIをダウンロードし、Worldに設定して山の背景が空になるように回転する。(元の動画ではカメラ位置が任意なので下記の通りに設定してもあまり意味がない)。
https://hdrihaven.com/hdri/?h=sunflowers
3. テクスチャをダウンロードする(TexturesCom_Nature_Moss)
https://www.textures.com/download/PBR0426/137222
LandscapeにMaterialを設定する。albedo,roughness,height,normalの各テクスチャを以下のように設定する

木の設定
- 以下から木の画像をダウンロードする。
https://www.transparentpng.com/details/texture-hackberry-tree-_6385.html
https://www.transparentpng.com/details/texture-hackberry-tree-_6386.html
普通にPlaneに貼り付けても勿論いいが、Import Images as Planesアドオンを有効にしておくと楽ができる。

2. Editモードで木のPlaneを複製、回転し、4枚のPlaneが交差した形状にする。さらにOriginを根元に合わせる。
3. 6385,6386の画像で木を作ったら、それらをCollectionに入れる。Collection名はtreesとしておく。
4. カメラの範囲内の頂点のみを選択し、Vertex Groupを作成する。
5. Hairを追加し、木を生やす設定をする。


ここまでの結果
多分ライトの当て方が悪くて今一つ格好よくない。

チュートリアル自体はもうちょっとだけ続いているが霧をかけるだけなのでやめておく。
可変長テンプレート引数のパラメータパックはinitializer_listに変換できるらしい
初めて知った。可変長テンプレート引数を使ったからと言って必ずしも再帰せずにすむ。
template<typename... Args>
void myprint(const Args... args) {

  //型が違うと暗黙キャストがきなくてエラーになったりするのでstatic_castする
  auto ini_list = { static_cast<double>(args)... };// init_listの型はinitializer_list<double>

  for (const auto d : ini_list) {
    std::cout << d << std::endl;
  }
}
int main()
{
  myprint(3.5, 3, 5.f);
}
上記の用途なら以下のように書くとシンプルになる。
#include <string>

template<typename... Args>
void myprint(const Args... args) {

  for (const auto& s: { std::to_string(args)... }) {
    std::cout << s << std::endl;
  }

}