可変長テンプレート引数のパラメータパックはinitializer_listに変換できるらしい
初めて知った。可変長テンプレート引数を使ったからと言って必ずしも再帰せずにすむ。
template<typename... Args>
void myprint(const Args... args) {

  //型が違うと暗黙キャストがきなくてエラーになったりするのでstatic_castする
  auto ini_list = { static_cast<double>(args)... };// init_listの型はinitializer_list<double>

  for (const auto d : ini_list) {
    std::cout << d << std::endl;
  }
}
int main()
{
  myprint(3.5, 3, 5.f);
}
上記の用途なら以下のように書くとシンプルになる。
#include <string>

template<typename... Args>
void myprint(const Args... args) {

  for (const auto& s: { std::to_string(args)... }) {
    std::cout << s << std::endl;
  }

}
Blender 有料アドオン Asset Managementを軽く触った
Blenderの有料アドオンAsset Management。有料であるが故に日本語の使い方を書いているところが少ないのでさらっと書いておきたい。
使うまでのステップは
1.アセットを保存するフォルダをExplorerなどでPC上に作成(以下、「アセットデータ保存先」とする)
2.そのアセットデータ保存先に保存したいアセットの種類(モデル,マテリアル,...)を指定
3.アセットの整理に使うカテゴリを登録。アセットをディレクトリツリーのように管理できる
1.アセットを保存するフォルダを作成
保存先をExplorerなどでPC上に作成し、そのパスを指定する。このパスは複数登録して切り替えできるので、「仕事用」「趣味用」などのように分けて管理してもいい。

2.保存したいアセットの種類を指定
・assets(モデル+マテリアル)
・materials(マテリアル)
・HDRI (環境テクスチャ)
・scenes(シーン丸ごと一個)
から選ぶ。
3.アセットの整理に使うカテゴリを登録
下の図では、「assets」という大カテゴリの中に中カテゴリNatureを作り、その下に小カテゴリtreesを作成している。

4.オブジェクトを選択しアセットを追加
オブジェクトを選択しアセット追加ボタン(+)を押すと、下の図ではtreesカテゴリに選択中のオブジェクトを保存できる。
この時の設定項目は
EXPORT MESH ASSET ... 選択したものをどのように保存するか。大体全部チェックしとけばいい
Render Type ... サムネイルの作り方。
use object's material ... サムネイルの作り方。
Format ... サムネイルの作り方
Pack textures ... テクスチャをモデルと一緒にまとめて保存するか。
塗りつぶし Flood fill(2)再帰関数を無理やり不使用にする
(編集後記)
しかし酷いコードだ。余りに酷すぎるから投稿するか悩んだほどだ。たまにこれやるんだがFloodFillでやる必要はない気がする。
でももっと普通のコードを書くのが間に合わなかったので仕方が無いから出す。
本文
関数呼び出しでは何が行われているか。ローカル変数をスタックに積んでループしている。であれば、ローカル変数をヒープに積めばStack over flowにはならない。だからローカル変数を構造体にまとめ、その構造体をヒープ上のスタック構造で管理する。さらに関数呼び出しは行わず、代わりにGoto文で制御する。
#pragma once

#include "NByteData.hpp"

////////////////////////////////////////////
////////

using uc3T = NByteData<3>;

//! @brief 座標計算などを行う補助クラス
class accessor {
  int width;
  int height;
public:
  void set(int Width, int Height) {
    width = Width;
    height = Height;
  }
  bool is_in(const int x, const int y) {
    if (x < 0 || y < 0 || x >= width || y >= height)
      return false;

    return true;

  }
  size_t get_pos(const int x, const int y) {
    return (size_t)y * width + (size_t)x;
  }

};

///////////////////////////////////////
// ff_fillのローカル変数とreturnしたときに戻る先
// 本当は全ての引数を保存するのが正しいが、関数呼び出しで変化しない変数は
// 保存する必要がないので省いている
struct StackItem {
  int x;
  int y;
  uc3T* node;
  int return_to_where;
};
// 関数呼び出し時のスタックの挙動を再現する
struct MyStack {
  std::vector< StackItem > stack;
  void push(StackItem data) {
    stack.push_back(data);
  }
  bool isEmpty() {
    return stack.size() != 0;
  }
  StackItem pop() {
    StackItem value = stack.back();
    stack.pop_back();
    return value;
  }

};
///////////////////////////////////////
//! @brief floodfill本体
//! @param [in] x 対象の画素のX座標
//! @param [in] y 対象の画素のY座標
//! @param [in] targetcolor 塗りつぶし対象の色
//! @param [in] replacementcolor 塗りつぶし結果の色
//! @param [in,out] img 対象の画像データ
//! @param [in] acc 画素の座標等を求めたりする補助クラスのインスタンス
void ff_fill(
  int _x,
  int _y,
  uc3T targetcolor,
  uc3T replacementcolor,
  uc3T* img,
  accessor* acc) {

  MyStack ms;
  StackItem items; //この関数のローカル変数

  items.x = _x;
  items.y = _y;
  items.return_to_where = 4;

Entry:;

  if (acc->is_in(items.x, items.y) == false) {
    //return
    switch (items.return_to_where) {
    case 0:goto Return_0;
    case 1:goto Return_1;
    case 2:goto Return_2;
    case 3:goto Return_3;
    case 4:goto Return_4;
    default:throw "call error";
    }
  }

  items.node = &img[acc->get_pos(items.x, items.y)];

  //1. If target-color is equal to replacement-color, return.
  if (targetcolor == replacementcolor) {
    //return
    switch (items.return_to_where) {
    case 0:goto Return_0;
    case 1:goto Return_1;
    case 2:goto Return_2;
    case 3:goto Return_3;
    case 4:goto Return_4;
    default:throw "call error";
    }
  }
  //2. If the color of node is not equal to target-color, return.
  if (*items.node != targetcolor) {
    //return
    switch (items.return_to_where) {
    case 0:goto Return_0;
    case 1:goto Return_1;
    case 2:goto Return_2;
    case 3:goto Return_3;
    case 4:goto Return_4;
    default:throw "call error";
    }
  }
  // 3. Set the color of node to replacement-color.
  *items.node = replacementcolor;

  /////////////////////
  // Perform Flood-fill(one step to the south of node, target-color, replacement-color).
  ms.push(items);
  items.x = items.x;
  items.y = items.y + 1;
  items.return_to_where = 0;
  goto Entry;//ff_fill(items.x, items.y + 1, targetcolor, replacementcolor, img, acc);
Return_0:;
  items = ms.pop();
  /////////////////////

  /////////////////////
  // Perform Flood-fill(one step to the north of node, target-color, replacement-color).
  ms.push(items);
  items.x = items.x;
  items.y = items.y - 1;
  items.return_to_where = 1;
  goto Entry;//ff_fill(items.x, items.y - 1, targetcolor, replacementcolor, img, acc);
Return_1:;
  items = ms.pop();
  /////////////////////

  /////////////////////
  // Perform Flood-fill(one step to the west of node, target-color, replacement-color).
  ms.push(items);
  items.x = items.x-1;
  items.y = items.y;
  items.return_to_where = 2;
  goto Entry;//ff_fill(items.x - 1, items.y, targetcolor, replacementcolor, img, acc);
Return_2:;
  items = ms.pop();
  /////////////////////

  /////////////////////
  // Perform Flood-fill(one step to the east of node, target-color, replacement-color).
  ms.push(items);
  items.x = items.x+1;
  items.y = items.y;
  items.return_to_where = 3;
  goto Entry;//ff_fill(items.x + 1, items.y, targetcolor, replacementcolor, img, acc);
Return_3:;
  items = ms.pop();
  /////////////////////

Return_4:;
  // 5. Return.
  //return
  switch (items.return_to_where) {
  case 0:goto Return_0;
  case 1:goto Return_1;
  case 2:goto Return_2;
  case 3:goto Return_3;
  case 4:return;//goto Return_4;
  default:throw "call error";
  }
}
//! @brief floodfillエントリポイント
//! @param [in] seedx 塗りつぶし開始点
//! @param [in] seedy 塗りつぶし開始点
//! @param [in] replacementcolor 塗りつぶし結果の色
//! @param [in,out] img 対象の画像データ
//! @param [in] Width 画像幅(画素数)
//! @param [in] Height 画像高さ(画素数)
void f_fill(
  int seedx, int seedy,
  uc3T replacementcolor,
  uc3T* img,
  int Width, int Height) {

  accessor acc;
  acc.set(Width, Height);
  if (acc.is_in(seedx, seedy) == false)
    return;

  uc3T targetcolor = img[acc.get_pos(seedx, seedy)];

  ff_fill(seedx, seedy, targetcolor, replacementcolor, img, &acc);

}


////////
////////////////////////////////////////////
関連
塗りつぶし Flood fill(1)
Flood fillを実装する。データには前回作ったNByteDataのクラスを使う。
参考
WikipediaのFloodFillの項目に疑似コードがあるので、それをC++に書き直す。
https://en.wikipedia.org/wiki/Flood_fill
コード(FloodFill.hpp)
#pragma once

#include "NByteData.hpp"


using uc3T = NByteData<3>;
//! @brief 座標計算などを行う補助クラス
class accessor {
  int width;
  int height;
public:
  void set(int Width, int Height) {
    width = Width;
    height = Height;
  }
  bool is_in(const int x, const int y) {
    if (x < 0 || y < 0 || x >= width || y >= height)
      return false;

    return true;

  }
  size_t get_pos(const int x, const int y) {
    return (size_t)y * width + (size_t)x;
  }

};
//! @brief floodfill本体
//! @param [in] x 対象の画素のX座標
//! @param [in] y 対象の画素のY座標
//! @param [in] targetcolor 塗りつぶし対象の色
//! @param [in] replacementcolor 塗りつぶし結果の色
//! @param [in,out] img 対象の画像データ
//! @param [in] acc 画素の座標等を求めたりする補助クラスのインスタンス
void ff_fill(
  int x,
  int y,
  uc3T targetcolor,
  uc3T replacementcolor,
  uc3T* img,
  accessor* acc) {

  if (acc->is_in(x, y) == false)
    return;

  uc3T* node = &img[acc->get_pos(x, y)];

  //1. If target - color is equal to replacement - color, return.
  if (targetcolor == replacementcolor) {
    return;
  }
  //2. If the color of node is not equal to target - color, return.
  if (*node != targetcolor) {
    return;
  }
  // 3. Set the color of node to replacement - color.
  *node = replacementcolor;

  // 4.
  ff_fill(x, y + 1, targetcolor, replacementcolor, img, acc);  // Perform Flood - fill(one step to the south of node, target-color, replacement-color).

  ff_fill(x, y - 1, targetcolor, replacementcolor, img, acc);  // Perform Flood - fill(one step to the north of node, target-color, replacement-color).

  ff_fill(x - 1, y, targetcolor, replacementcolor, img, acc);  // Perform Flood - fill(one step to the west of node, target-color, replacement-color).

  ff_fill(x + 1, y, targetcolor, replacementcolor, img, acc);  // Perform Flood - fill(one step to the east of node, target-color, replacement-color).

  // 5. Return.
  return;
}
//! @brief floodfillエントリポイント
//! @param [in] seedx 塗りつぶし開始点
//! @param [in] seedy 塗りつぶし開始点
//! @param [in] replacementcolor 塗りつぶし結果の色
//! @param [in,out] img 対象の画像データ
//! @param [in] Width 画像幅(画素数)
//! @param [in] Height 画像高さ(画素数)
void f_fill(
  int seedx, int seedy,
  uc3T replacementcolor,
  uc3T* img,
  int Width, int Height) {

  accessor acc;
  acc.set(Width, Height);
  if (acc.is_in(seedx, seedy) == false)
    return;

  uc3T targetcolor = img[acc.get_pos(seedx, seedy)];

  ff_fill(seedx, seedy, targetcolor, replacementcolor, img, &acc);

}
呼び出し側
#include <iostream>
#include<vector>

#pragma warning(disable:4996)

#include "NByteData.hpp"

#include "floodfill.hpp"

void pnmP3_Write(
  const char* const fname,
  const int vmax,
  const int width,
  const int height,
  const unsigned char* const p);

bool pnmP6_Read(
  const char* fname,
  int* vmax,
  int *width,
  int *height,
  unsigned char** p); // PPM BINARY


uc3T getrgb(
  unsigned char r,
  unsigned char g,
  unsigned char b
) {
  return uc3T({ r,g,b });
}
int main()
{

  int width = 255;
  int height = 30;
  unsigned char* image;
  int vmax;
  pnmP6_Read(// 画像準備
    R"(C:\data\p6ascii.ppm)",
    &vmax,
    &width,
    &height,
    &image
  );

  uc3T* img = (uc3T*)image;


  f_fill(// 塗りつぶし
    300, 200,
    getrgb(0, 0, 0),
    img,
    width, height
  );

  // 結果をファイルに出力
  pnmP3_Write(R"(C:\data\floodfill.ppm)", 255, width, height, image);

}
/////////////////////////////////////////////////////////////////

//! @brief PPM(RGB各1byte,カラー,テキスト)を書き込む
//! @param [in] fname ファイル名
//! @param [in] vmax 全てのRGBの中の最大値
//! @param [in] width 画像の幅
//! @param [in] height 画像の高さ
//! @param [in] p 画像のメモリへのアドレス
//! @details RGBRGBRGB....のメモリを渡すと、RGBテキストでファイル名fnameで書き込む
void pnmP3_Write(
  const char* const fname,
  const int vmax, const int width, const int height,
  const unsigned char* const p) { // PPM ASCII

  FILE* fp = fopen(fname, "wb");
  fprintf(fp, "P3\n%d %d\n%d\n", width, height, vmax);

  size_t k = 0;
  for (size_t i = 0; i < (size_t)height; i++) {
    for (size_t j = 0; j < (size_t)width; j++) {
      fprintf(fp, "%d %d %d ", p[k * 3 + 0], p[k * 3 + 1], p[k * 3 + 2]);
      k++;
    }
    fprintf(fp, "\n");
  }

  fclose(fp);
}
//! @brief PPM(RGB各1byte,カラー,バイナリ)を読み込む
//! @param [in] fname ファイル名
//! @param [out] vmax 全てのRGBの中の最大値
//! @param [out] width 画像の幅
//! @param [out] height 画像の高さ
//! @param [in] 画像を読み込んだメモリアドレスを返すためのポインタへのポインタ
//! @retval true 成功
//! @retval false 失敗
//! @warning RGBが各1byteでないと動作しない
//! @details ファイルを読み込み、width*height*3のメモリを確保したうえでRGBをそこへ格納する
bool pnmP6_Read(const char* fname, int* vmax, int *width, int *height, unsigned char** p) { // PPM BINARY
  *width = -1;
  *height = -1;
  *vmax = -1;

  FILE* fp;
  fp = fopen(fname, "rb");
  char tmp[2048];

  char c;
  while (c = fgetc(fp)) {
    if (isspace(c))
      continue;

    if (c == 'P') { //フォーマットを特定する
      c = fgetc(fp) - '0';
      if (c != 6) {
        fclose(fp);
        return false;
      }
      continue;
    }

    if (c == '#') { //コメントを読み飛ばす
      while (c != '\r' && c != '\n')
        c = fgetc(fp);
      continue;
    }
    if (*width < 0) {
      int s = 0;
      while (1) {
        if (isdigit(c)) {
          tmp[s++] = c;
          c = fgetc(fp);
        }
        else {
          tmp[s] = '\0';
          *width = atoi(tmp);
          break;
        }
      }
      continue;
    }
    if (*height < 0) {
      int s = 0;
      while (1) {
        if (isdigit(c)) {
          tmp[s++] = c;
          c = fgetc(fp);
        }
        else {
          tmp[s] = '\0';
          *height = atoi(tmp);
          break;
        }
      }
      continue;
    }

    if (*vmax < 0) {
      int s = 0;
      while (1) {
        if (isdigit(c)) {
          tmp[s++] = c;
          c = fgetc(fp);
        }
        else {
          tmp[s] = '\0';
          *vmax = atoi(tmp);
          break;
        }
      }
      break;
    }
    else {
      break;
    }
  }

  if (*width < 0 || *height < 0 || *vmax < 0) {
    return false;
  }

  const size_t maxsize = *width* *height;
  unsigned char r, g, b;

  *p = new unsigned char[maxsize * 3];
  for (size_t i = 0; i < maxsize; i++) {
    fread(&r, 1, 1, fp);
    fread(&g, 1, 1, fp);
    fread(&b, 1, 1, fp);

    (*p)[i * 3 + 0] = r;
    (*p)[i * 3 + 1] = g;
    (*p)[i * 3 + 2] = b;
  }

  fclose(fp);

  return true;
}
結果
スタックサイズ
FloodFillは再帰を使うが、再帰はスタックを食いつぶすのでStack over flowが起こる。
VC++の初期設定は1MBらしいので、[プロジェクトのプロパティ]→[リンカー]→[システム]→[スタックのサイズ設定]からスタックを大きめに確保しておく。なおここはバイト単位なのでメガバイト単位で指定するには1024*1024しなければならない。
関連
Joomla 3.9にGantry 5をインストールした話。あとCSS。
Gantry 5はJoomlaの、かなり柔軟なテンプレートだと思えばいい。ただし、モジュール本体+テンプレートデータ という構成になっているので、まずモジュールをインストールし、次に(好みの)テンプレートをインストールし、そしてテンプレートをカスタマイズするという作業が必要になる。
インストール
ダウンロード
joomla-pkg_gantry5_**** ... 本体
joomla-tpl_**** ... テンプレートデータ
アップロード&インストール
pkg,tpl両方のzipファイルをエクステンションからインストールする。

確認
基本的な使い方
1.アウトラインを作る
Outlineを複製して新たなOutlineを作る。Outlineは縦三分割とかのページの基本構造。
画面右上の「Outline」へ行き、新たなアウトラインを作成する。

2.テーマを編集する
左側にメニューを配置するとか配色を変えるとかする。
なおメニュー項目の順番などは右上の「Menu」からできる。
なんとなくいじっていればできる。
一部CSSの適用
なぜかメニュー項目が横並びになってしまったり、preタグの背景色が親オブジェクトから継承されていなかったりと、コピペやマウス操作だけではどうにもならないところがあったので、CSSを一部書き足す方法をメモしておく。
1.出力されるブロックにCSSのIDやクラスを追加
ブロックはdivで囲まれているので、歯車アイコンをクリックしてそこに付加するclassやidを設定できる。
2.ページ全体のCSSの追加分を記述
CSSを追記する。今回メニューが勝手に横並びになっていたので、#clearfloatの入れ子になっているliの設定を以下のように記述。
typetraitsのstd::is_base_ofにパラメータパックを入れられるare_derived_fromを作る
下記のように、パラメータパックで入ってきたクラス全部が特定のクラスの子であることをチェックしたい。探したが見つからなかったので自分で作る。
// OK
template<class Base,class Class>
class MyClass {
  static_assert(std::is_base_of<Base, Class>::value, " Class is invalid");
};

// NG
template<class Base, class... Classes>
class MyClass2 {
  static_assert(std::is_base_of<Base, Classes...>::value, " Class are invalid");
};
まず、以下のようにテスト用のクラスを定義しておく。
class MyBase {
  int a;
};
class MyDeri1 :public MyBase{
  int b;
};
class MyDeri2 :public MyBase {
  int c;
};
class Independent{
  int d;
};
次に、そもそもstd::is_base_ofのvalueが型としては何なのかを知りたいので、以下のようにチェックする。
  std::cout <<
    std::is_base_of<
      std::true_type,
      std::is_base_of<MyBase, MyDeri1>>::value;
出力:
と、std::is_base_ofは最終的にはstd::true_typeかstd::false_typeになることが分かったので、それと同じようになるようにare_derived_fromも実装する。are_derived_fromが英語的にどうかは知らい。
template<class Base, class CHead, class ...Classes>
struct are_derived_from : public
  std::conditional<
    std::is_base_of<Base, CHead>::value,  //CHeadに対して評価
      are_derived_from<Base, Classes...>, // 上評価がtrueならそれ以外の型についても調べる
      std::false_type                       // 一つでもfalseなら全部falseになる
  >::type
{
};


//末尾の特殊化
template<class Base, class CTail>
struct are_derived_from<Base, CTail> : public std::is_base_of<Base, CTail>
{
};
使用例
int main()
{

  std::cout << are_derived_from<MyBase, MyDeri1, MyDeri2>::value << std::endl;
  std::cout << are_derived_from<MyBase, MyDeri1, Independent>::value << std::endl;

}
出力:
1
0
Joomla 3のSEF URLからindex.phpと数字を取り除く
JoomlaのURLはデフォルトではとても複雑で、SEO Friendly URLの設定をすることでだいぶすっきりするが、それでもindex.phpや数字が残る。これを取り除く。

手順
システム→グローバル設定
グローバル設定 → サイト
→ フレンドリURL ... はい
→ URLリライトの使用 ... はい

URLリライトのために、サーバーに置いてある「htaccess.txt」のファイル名を「.htaccess」に変更
※もしInternal Server Error が出るなら以下を参照
Joomla!備忘録
.htaccess にファイル名を変更した内容を以下の部分を書き加えて下さい。
14行目(Joomla!3.4.1 オリジナルの場合)
Options +FollowSymlinks
の先頭に(#)を追加して保存して下さい。
https://joomla.mdeps.com/nmerror/urlrwerr.html
記事→ 統合
→ URLルーティング ... モダン
→ URLからIDを削除する ... はい

参考
https://www.joomshaper.com/blog/making-joomla-site-seo-friendly-by-removing-id-from-urls
https://www.joomlabeginner.com/blog/tutorials/116-how-to-remove-ids-and-numbers-from-joomla-urls
Blender エッジをCurveに変換
ただ Object → Convert To → Curve だけではカーブオブジェクトにはなっても曲線にならない。

カーブにしてから種類をBezierカーブに変更する。
F3 → Curve → Set Spline Type → Bezier

Bezierではこれでもまだ曲線にならない。[v]を押し、ハンドルの種類をAlignedにすることで曲線になる。
浮動小数点以外の値が入力されたら浮動小数点が入力されたことにするテンプレート関数
目的
以下のような関数があるとする。
float divide(const float a, const float b) {
  return a / b;
}
諸事情によりテンプレート化を行ったとする。
template<typename T>
auto divide(const T a,const T b) {
  return a/b;
}
この時、整数が入力されたときにもまともな答えが出てほしい。
template<typename T>
auto divide(const T a,const T b) {
  return a/b;
}

int main()
{

  float a = divide(5.0,10.0); // a == 0.5

  float b = divide(5,10);     // b == 0.0

  printf("%lf %lf", a,b);

  getchar();
}
方法
こんなテンプレートを定義する
//入力が浮動小数点の時はそのまま返す
//それ以外の時はfloatを返す
template<typename T, bool isint>struct IsRealT;
template<typename T>struct IsRealT<T, true> { using type = T; };
template<typename T>struct IsRealT<T, false> { using type = float; };

//入力が整数ならfloatを返す
template<typename T>
struct RealIfInt {
	using type = typename IsRealT<T, std::is_floating_point<T>::value>::type;
};
内部でキャストする。なんで普通にdoubleでキャストしないでテンプレートで切り分けなんかするのか、そもそもこの関数自体doubleで受け取ればいいんじゃないのか、と思うのだが、型が違うと随所でwarningが出て読みづらくなるというのがある。
template<typename T>
auto divide(const T a, const T b) {

  using realT = typename RealIfInt<T>::type;

  return static_cast<realT>(a) / static_cast<realT>(b);
}

int main()
{

  auto a = divide(5.0, 10.0); // a == 0.5

  auto b = divide(5, 10);     // b == 0.5

  printf("%lf %lf", a, b);

  getchar();
}
正直、エラーの読みづらさをいうならテンプレートを使った時点で大変なことになるので説得力は微妙。
NBytesのデータを扱うクラス
PPMのような3byteのデータを扱うと画素のコピーとか素直にできない。あとループ時のメモリ計算が面倒くさい。sizeofでとれないので*3しなければならないが、PGM等に変えるとcharなので*3を外さなければいけない。
かといって専用構造体を作るとそれはそれで使いにくい。そんなときNByteのデータを扱うようなデータ型が欲しい。
NByteData.hpp
#include<array>

#include<cstring>

template<size_t SIZE>
class NByteData {
  std::array<unsigned char, SIZE> m_data;
public:
  using ThisT = NByteData<SIZE>;

  unsigned char* data() { return m_data.data(); }
  ThisT& operator=(const ThisT& t) {
    for (size_t i = 0; i < m_data.size(); i++) {
      m_data[i] = t.m_data[i];
    }
    return *this;
  }
  bool operator==(const ThisT& t)const {
    for (size_t i = 0; i < SIZE; i++) {
      if (m_data[i] != t.m_data[i])
        return false;
    }
    return true;
  }
  bool operator!=(const ThisT& t)const {
    return !this->operator==(t);
  }
NByteData() {}
  NByteData(const ThisT& src) {
    this->operator=(src);
  }
  NByteData(std::initializer_list<unsigned char> inits) {
    unsigned char* p = m_data.data();
    for (auto uc : inits) {
      *p = uc;
      ++p;
    }
  }
};
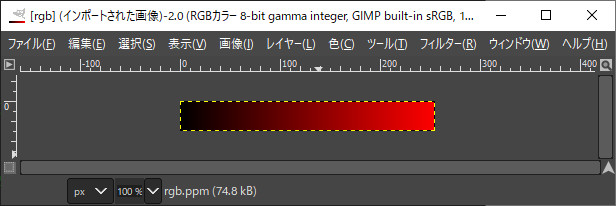
PPM出力の例
#include <iostream>
#include<vector>

#pragma warning(disable:4996)

#include "NByteData.hpp"
// 3byte rgbの画素作成
NByteData<3> uc3rgb(
  unsigned char r,
  unsigned char g,
  unsigned char b) {

  return NByteData<3>({r,g,b});
}
void pnmP3_Write(const char* const fname, const int vmax, const int width, const int height, const unsigned char* const p);
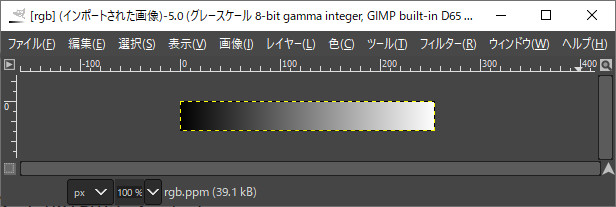
int main()
{

  std::vector<NByteData<3> > rgb_ppm;

  int width = 255;
  int height = 30;
  rgb_ppm.resize(width*height);

  for (int y = 0; y < height; y++) {
    for (int x = 0; x < width; x++) {
      rgb_ppm[y*width+x] = uc3rgb(x, 0, 0);
    }
  }

  pnmP3_Write(R"(C:\data\rgb.ppm)", 255, width, height, rgb_ppm.begin()->data());

}
/////////////////////////////////////////////////////////////////

//! @brief PPM(RGB各1byte,カラー,テキスト)を書き込む
//! @param [in] fname ファイル名
//! @param [in] vmax 全てのRGBの中の最大値
//! @param [in] width 画像の幅
//! @param [in] height 画像の高さ
//! @param [in] p 画像のメモリへのアドレス
//! @details RGBRGBRGB....のメモリを渡すと、RGBテキストでファイル名fnameで書き込む
void pnmP3_Write(const char* const fname, const int vmax, const int width, const int height, const unsigned char* const p) { // PPM ASCII

  FILE* fp = fopen(fname, "wb");
  fprintf(fp, "P3\n%d %d\n%d\n", width, height, vmax);

  size_t k = 0;
  for (size_t i = 0; i < (size_t)height; i++) {
    for (size_t j = 0; j < (size_t)width; j++) {
      fprintf(fp, "%d %d %d ", p[k * 3 + 0], p[k * 3 + 1], p[k * 3 + 2]);
      k++;
    }
    fprintf(fp, "\n");
  }

  fclose(fp);
}
PGM出力の例
#include <iostream>
#include<vector>

#pragma warning(disable:4996)

#include "NByteData.hpp"
// 1byte グレイスケールの画素作成
NByteData<1> uc1gray(unsigned char gray) {

  return NByteData<1>({gray});
}
void pnmP2_Write(const char* const fname, const int vmax, const int width, const int height, const unsigned char* const p);
int main()
{

  std::vector<NByteData<1> > gray_pgm;

  int width = 255;
  int height = 30;
  gray_pgm.resize(width*height);

  for (int y = 0; y < height; y++) {
    for (int x = 0; x < width; x++) {
      gray_pgm[y*width+x] = uc1gray(x);
    }
  }

  pnmP2_Write(R"(C:\data\gray.pgm)", 255, width, height, gray_pgm.begin()->data());

}
/////////////////////////////////////////////////////////////////

//! @brief PPM(RGB各1byte,カラー,テキスト)を書き込む
//! @param [in] fname ファイル名
//! @param [in] vmax 全てのRGBの中の最大値
//! @param [in] width 画像の幅
//! @param [in] height 画像の高さ
//! @param [in] p 画像のメモリへのアドレス
//! @details RGBRGBRGB....のメモリを渡すと、RGBテキストでファイル名fnameで書き込む
void pnmP2_Write(const char* const fname, const int vmax, const int width, const int height, const unsigned char* const p) { // PPM ASCII

  FILE* fp = fopen(fname, "wb");
  fprintf(fp, "P2\n%d %d\n%d\n", width, height, vmax);

  size_t k = 0;
  for (size_t i = 0; i < (size_t)height; i++) {
    for (size_t j = 0; j < (size_t)width; j++) {
      fprintf(fp, "%d ", p[k]);
      k++;
    }
    fprintf(fp, "\n");
  }

  fclose(fp);
}