VSCode+anaconda環境でPythonのデバッグをする
Python Extensionをインストール

Anaconda環境の選択
実行
ブレークポイントなど
VTKでPointCloud表示(4)頂点をSphereで表示(vtkGlyph3DMapper)
vtkGlyph3DMapperを使うと、より高速に表示できるらしい。
//VTK_MODULE_INITに必要
#include <vtkAutoInit.h>


#include <vtkSmartPointer.h>
#include <vtkRenderer.h>
#include <vtkRenderWindow.h>
#include <vtkRenderWindowInteractor.h>


#include <eigen/Core>

#include <vtkPolyDataMapper.h>
#include <vtkPolyData.h>
#include <vtkPoints.h>
#include <vtkPointData.h>
#include <vtkProperty.h>          // 色を設定するために必要
#include <vtkUnsignedCharArray.h> // 色を設定するために必要

#include <vtkGlyph3DMapper.h>   // 点を球にするために必要(Mapper)

#include <vtkSphereSource.h>      // 球を作成するために必要

#include <vtkFloatArray.h>        // 点のサイズを設定するためのスカラー配列に必要

#pragma comment(lib,"opengl32.lib")
#pragma comment(lib,"psapi.lib")
#pragma comment(lib,"dbghelp.lib")
#pragma comment(lib,"ws2_32.lib")

//必須
VTK_MODULE_INIT(vtkRenderingOpenGL2);
VTK_MODULE_INIT(vtkInteractionStyle);
vtkSmartPointer<vtkActor>  CreatePointCloudActor(
  const std::vector<Eigen::Vector3d>& vertices,
  const std::vector<Eigen::Vector3d>& colors,
  const std::vector<float>& scales,
  vtkAlgorithmOutput* glyphpoly // 点を球にするためのvtkPolyData
) {
  auto vtk_cloud = vtkSmartPointer<vtkPolyData>::New();
  auto vtk_points = vtkSmartPointer<vtkPoints>::New();
  auto vtk_colors = vtkSmartPointer<vtkUnsignedCharArray>::New();
  auto vtk_scale = vtkSmartPointer<vtkFloatArray>::New();

  ///////////////////////////////////////////////////////
  // 頂点の配列を生成
  for (const auto& v : vertices) {
    vtk_points->InsertNextPoint(v.x(), v.y(), v.z());
  }
  vtk_cloud->SetPoints(vtk_points);

  ///////////////////////////////////////////////////////
  // 色の配列を生成
  vtk_colors->SetNumberOfComponents(3);
  for (const auto& c : colors) {
    vtk_colors->InsertNextTuple3(c.x() * 255, c.y() * 255, c.z() * 255);
  }
  vtk_colors->SetName("MY_POINT_COLOR");

  ///////////////////////////////////////////////////////
  // 球のサイズを設定する配列を生成
  vtk_scale->SetNumberOfComponents(1);
  for (int i = 0; i < scales.size(); i++) {
    vtk_scale->InsertNextValue(scales[i]);
  }
  vtk_scale->SetName("MY_SIZE_SCALAR");

  ///////////////////////////////////////////////////////
  // 点群にサイズのスカラー配列を追加
  vtk_cloud->GetPointData()->AddArray(vtk_scale);
  vtk_cloud->GetPointData()->AddArray(vtk_colors);

  ///////////////////////////////////////////////////////

  vtkSmartPointer<vtkGlyph3DMapper> glyph3DMapper = vtkSmartPointer<vtkGlyph3DMapper>::New();
  glyph3DMapper->SetSourceConnection(glyphpoly);
  glyph3DMapper->SetInputData(vtk_cloud);
  glyph3DMapper->SetScaleArray("MY_SIZE_SCALAR");    // 点のサイズを設定するスカラー配列を指定
  glyph3DMapper->SelectColorArray("MY_POINT_COLOR"); // 点の色を設定するスカラー配列を指定
  glyph3DMapper->SetScaleMode(vtkGlyph3DMapper::SCALE_BY_MAGNITUDE); // 点のサイズをスカラー値によって変更
  glyph3DMapper->SetScalarModeToUsePointFieldData(); // 点の色をスカラー値によって変更
  glyph3DMapper->Update();

  ///////////////////////////////////////////////////////


  auto vtk_actor = vtkSmartPointer<vtkActor>::New();

  vtk_actor->SetMapper(glyph3DMapper);

  return vtk_actor;
}
int main(int /*argc*/, char** /*argv*/)
{
  ////////////////////////////////////////
  // 点群の定義

  // ランダムの1000頂点を作成
  std::vector<Eigen::Vector3d> vertices;
  for (int i = 0; i < 1000; i++) {
    vertices.push_back(Eigen::Vector3d::Random());
  }
  // ランダムの色を設定
  std::vector<Eigen::Vector3d> colors;
  for (int i = 0; i < 1000; i++) {
    Eigen::Vector3d rnd = Eigen::Vector3d::Random();             // -1~1の乱数
    Eigen::Vector3d v01 = 0.5 * (rnd + Eigen::Vector3d::Ones()); //  0~1に変換
    colors.push_back(v01);
  }
  ////////////////////////////////////////
  // 球のサイズを設定
  std::vector<float> scales;
  for (int i = 0; i < vertices.size(); i++) {

    float sz = vertices[i].z() + 1.0;
    sz *= 0.05;
    scales.push_back(sz);

  }


  // 球を作成
  vtkSmartPointer<vtkSphereSource> sphereSource = vtkSmartPointer<vtkSphereSource>::New();
  sphereSource->SetRadius(1.0); // 球の半径を設定
  sphereSource->Update();

  // 点群のアクタを作成
  auto actor = CreatePointCloudActor(vertices, colors, scales,sphereSource->GetOutputPort() );

  //////////////////////////////////////
  auto renderer = vtkSmartPointer<vtkRenderer>::New();
  renderer->AddActor(actor);
  renderer->ResetCamera();

  //////////////////////////////////////
  auto interactor = vtkSmartPointer<vtkRenderWindowInteractor>::New();

  //////////////////////////////////////
  auto renderWindow = vtkSmartPointer<vtkRenderWindow>::New();
  renderWindow->AddRenderer(renderer);
  renderWindow->SetInteractor(interactor);
  renderWindow->Render();

  interactor->Start(); //イベントループへ入る

  return 0;
}
VTKでPointCloud表示(3)頂点をSphereで表示
vtkGlyph3Dで頂点をPolyDataに置き換えて表示
//VTK_MODULE_INITに必要
#include <vtkAutoInit.h>


#include <vtkSmartPointer.h>
#include <vtkRenderer.h>
#include <vtkRenderWindow.h>
#include <vtkRenderWindowInteractor.h>


#include <eigen/Core>

#include <vtkPolyDataMapper.h>
#include <vtkPolyData.h>
#include <vtkPoints.h>
#include <vtkPointData.h>
#include <vtkProperty.h>          // 色を設定するために必要
#include <vtkUnsignedCharArray.h> // 色を設定するために必要
#include <vtkVertexGlyphFilter.h> // 点を描画するために必要
#include <vtkGlyph3D.h>           // 点を球にするために必要

#include <vtkSphereSource.h>      // 球を作成するために必要

#pragma comment(lib,"opengl32.lib")
#pragma comment(lib,"psapi.lib")
#pragma comment(lib,"dbghelp.lib")
#pragma comment(lib,"ws2_32.lib")

//必須
VTK_MODULE_INIT(vtkRenderingOpenGL2);
VTK_MODULE_INIT(vtkInteractionStyle);
void CreatePointArray(
  std::vector<Eigen::Vector3d>& vertices,
  vtkSmartPointer<vtkPolyData> vtk_mesh,
  vtkSmartPointer<vtkPoints> vtk_points) {

  // 頂点配列を作成
  for (const auto& v : vertices) {
    vtk_points->InsertNextPoint(v.x(), v.y(), v.z());
  }
  // 頂点配列を設定
  vtk_mesh->SetPoints(vtk_points);

}
void CreateColorsArray(
  std::vector<Eigen::Vector3d>& vertex_colors,
  vtkSmartPointer<vtkPolyData> vtk_mesh,
  vtkSmartPointer<vtkUnsignedCharArray> vtk_colors) {

  vtk_colors->SetNumberOfComponents(3);

  for (const auto& c : vertex_colors) {
    vtk_colors->InsertNextTuple3(c.x() * 255, c.y() * 255, c.z() * 255);
  }
  vtk_mesh->GetPointData()->SetScalars(vtk_colors);

}
vtkSmartPointer<vtkActor>  CreatePointCloudActor(
  std::vector<Eigen::Vector3d> vertices,
  std::vector<Eigen::Vector3d> colors,
  vtkAlgorithmOutput* glyphpoly // 点を球にするためのvtkPolyData
) {
  auto vtk_cloud = vtkSmartPointer<vtkPolyData>::New();
  auto vtk_points = vtkSmartPointer<vtkPoints>::New();
  auto vtk_colors = vtkSmartPointer<vtkUnsignedCharArray>::New();

  ///////////////////////////////////////////////////////
  // 頂点の配列を生成
  CreatePointArray(vertices, vtk_cloud, vtk_points);
  ///////////////////////////////////////////////////////
  // 色の配列を生成
  CreateColorsArray(colors, vtk_cloud, vtk_colors);
  ///////////////////////////////////////////////////////

  ///////////////////////////////////////////////////////
  // Glyph3Dを使用して点に球を描画
  vtkSmartPointer<vtkGlyph3D> glyph3D = vtkSmartPointer<vtkGlyph3D>::New();
  glyph3D->SetSourceConnection(glyphpoly);
  glyph3D->SetInputData(vtk_cloud);
  glyph3D->SetColorModeToColorByScalar(); // 色情報を使用
  glyph3D->SetScaleFactor(0.1);           // 球をスケーリング
  glyph3D->SetScaleModeToDataScalingOff(); // サイズを一定にする

  glyph3D->Update();


  ///////////////////////////////////////////////////////

  auto vtk_mapper = vtkSmartPointer<vtkPolyDataMapper>::New();
  vtk_mapper->SetInputConnection(glyph3D->GetOutputPort());

  auto vtk_actor = vtkSmartPointer<vtkActor>::New();
  vtk_actor->SetMapper(vtk_mapper);

  return vtk_actor;
}
int main(int /*argc*/, char** /*argv*/)
{
  ////////////////////////////////////////
  // 点群の定義

  // ランダムの1000頂点を作成
  std::vector<Eigen::Vector3d> vertices;
  for (int i = 0; i < 1000; i++) {
    vertices.push_back(Eigen::Vector3d::Random());
  }
  // ランダムの色を設定
  std::vector<Eigen::Vector3d> colors;
  for (int i = 0; i < 1000; i++) {
    Eigen::Vector3d rnd = Eigen::Vector3d::Random();             // -1~1の乱数
    Eigen::Vector3d v01 = 0.5 * (rnd + Eigen::Vector3d::Ones()); //  0~1に変換
    colors.push_back(v01);
  }
  ////////////////////////////////////////


  // 球を作成
  vtkSmartPointer<vtkSphereSource> sphereSource = vtkSmartPointer<vtkSphereSource>::New();
  sphereSource->SetRadius(1.0); // 球の半径を設定
  sphereSource->Update();


  // 点群のアクタを作戦
  auto actor = CreatePointCloudActor(vertices, colors,sphereSource->GetOutputPort() );

  //////////////////////////////////////
  auto renderer = vtkSmartPointer<vtkRenderer>::New();
  renderer->AddActor(actor);
  renderer->ResetCamera();

  //////////////////////////////////////
  auto interactor = vtkSmartPointer<vtkRenderWindowInteractor>::New();

  //////////////////////////////////////
  auto renderWindow = vtkSmartPointer<vtkRenderWindow>::New();
  renderWindow->AddRenderer(renderer);
  renderWindow->SetInteractor(interactor);
  renderWindow->Render();

  interactor->Start(); //イベントループへ入る

  return 0;
}
球のサイズを変更
球サイズのスカラー値の配列を指定することで、球のサイズを変更できる
void CreateColorsArray(
  std::vector<Eigen::Vector3d>& vertex_colors,
  vtkSmartPointer<vtkPolyData> vtk_mesh,
  vtkSmartPointer<vtkUnsignedCharArray> vtk_colors) {

  vtk_colors->SetName("MY_POINT_COLOR"); // 明示的に指定するため名前を付ける
  vtk_colors->SetNumberOfComponents(3);

  for (const auto& c : vertex_colors) {
    vtk_colors->InsertNextTuple3(c.x() * 255, c.y() * 255, c.z() * 255);
  }
  vtk_mesh->GetPointData()->SetScalars(vtk_colors);

}
vtkSmartPointer<vtkFloatArray> CreateSizeScalarArray(const std::vector<Eigen::Vector3d>& points) {

  auto size_scalars = vtkSmartPointer<vtkFloatArray>::New();
  size_scalars->SetName("MY_SIZE_SCALAR"); // 明示的にアクティブにするため名前を付ける
  size_scalars->SetNumberOfComponents(1);
  size_scalars->SetNumberOfTuples(points.size());
  for (int i = 0; i < points.size(); i++) {

    float sz = points[i].z() + 1.0;
    sz *= 0.05;

    size_scalars->SetValue(i, sz);
  }
  return size_scalars;
}
vtkSmartPointer<vtkActor>  CreatePointCloudActor(
  std::vector<Eigen::Vector3d> vertices,
  std::vector<Eigen::Vector3d> colors,
  vtkAlgorithmOutput* glyphpoly // 点を球にするためのvtkPolyData
) {
  auto vtk_cloud = vtkSmartPointer<vtkPolyData>::New();
  auto vtk_points = vtkSmartPointer<vtkPoints>::New();
  auto vtk_colors = vtkSmartPointer<vtkUnsignedCharArray>::New();

  ///////////////////////////////////////////////////////
  // 頂点の配列を生成
  CreatePointArray(vertices, vtk_cloud, vtk_points);
  ///////////////////////////////////////////////////////
  // 色の配列を生成
  CreateColorsArray(colors, vtk_cloud, vtk_colors);
  ///////////////////////////////////////////////////////

  // 球のサイズを設定するスカラー配列を生成
  auto size_scalar_array = CreateSizeScalarArray(vertices);

  // 点群にサイズのスカラー配列を追加
  vtk_cloud->GetPointData()->AddArray(size_scalar_array);
  vtk_cloud->GetPointData()->SetActiveScalars("MY_SIZE_SCALAR");

  ///////////////////////////////////////////////////////
  // Glyph3Dを使用して点に球を描画
  vtkSmartPointer<vtkGlyph3D> glyph3D = vtkSmartPointer<vtkGlyph3D>::New();
  glyph3D->SetSourceConnection(glyphpoly);
  glyph3D->SetInputData(vtk_cloud);
  glyph3D->SetColorModeToColorByScalar(); // 色情報を使用
  //glyph3D->SetScaleFactor(0.1);           // 球をスケーリング

  glyph3D->SetScaleModeToScaleByScalar(); // スケールをスカラー値にする
  //glyph3D->SetScaleModeToDataScalingOff(); // サイズを一定にする

  glyph3D->Update();

  ///////////////////////////////////////////////////////


  auto vtk_mapper = vtkSmartPointer<vtkPolyDataMapper>::New();
  vtk_mapper->SetInputConnection(glyph3D->GetOutputPort());

  // 色の設定はデフォルトでアクティブなスカラー値が使用されるが
  // glyph3Dでスケーリングの指定をするため、スケール用のスカラー値をアクティブにする必要があるため
  // カラー用のスカラー値は明示的に指定する
  vtk_mapper->SetScalarModeToUsePointFieldData();
  vtk_mapper->SelectColorArray("MY_POINT_COLOR");

  auto vtk_actor = vtkSmartPointer<vtkActor>::New();
  vtk_actor->SetMapper(vtk_mapper);

  return vtk_actor;
}
VTKでPointCloud表示(2)
以前VTKでPointCloudを表示するのをやったが、多分vtkVertexGlyphFilterを使ったほうがよい。
vtkVertexGlyphFilterを使って点群表示
//VTK_MODULE_INITに必要 #include <vtkAutoInit.h> #include <vtkSmartPointer.h> #include <vtkRenderer.h> #include <vtkRenderWindow.h> #include <vtkRenderWindowInteractor.h> #include <eigen/Core> #include <vtkPolyDataMapper.h> #include <vtkPolyData.h> #include <vtkPoints.h> #include <vtkPointData.h> #include <vtkUnsignedCharArray.h> // 色を設定するために必要 #include <vtkVertexGlyphFilter.h> // 点を描画するために必要 #include <vtkProperty.h> // 色を設定するために必要 #pragma comment(lib,"opengl32.lib") #pragma comment(lib,"psapi.lib") #pragma comment(lib,"dbghelp.lib") #pragma comment(lib,"ws2_32.lib") //必須 VTK_MODULE_INIT(vtkRenderingOpenGL2); VTK_MODULE_INIT(vtkInteractionStyle);void CreatePointArray( std::vector<Eigen::Vector3d>& vertices, vtkSmartPointer<vtkPolyData> vtk_mesh, vtkSmartPointer<vtkPoints> vtk_points) { // 頂点配列を作成 for (const auto& v : vertices) { vtk_points->InsertNextPoint(v.x(), v.y(), v.z()); } // 頂点配列を設定 vtk_mesh->SetPoints(vtk_points); }
void CreateColorsArray( std::vector<Eigen::Vector3d>& vertex_colors, vtkSmartPointer<vtkPolyData> vtk_mesh, vtkSmartPointer<vtkUnsignedCharArray> vtk_colors) { vtk_colors->SetNumberOfComponents(3); for (const auto& c : vertex_colors) { vtk_colors->InsertNextTuple3(c.x() * 255, c.y() * 255, c.z() * 255); } vtk_mesh->GetPointData()->SetScalars(vtk_colors); }
vtkSmartPointer<vtkActor> CreatePointCloudActor( std::vector<Eigen::Vector3d> vertices, std::vector<Eigen::Vector3d> colors, float pointsize ) { auto vtk_cloud = vtkSmartPointer<vtkPolyData>::New(); auto vtk_points = vtkSmartPointer<vtkPoints>::New(); auto vtk_colors = vtkSmartPointer<vtkUnsignedCharArray>::New(); /////////////////////////////////////////////////////// // 頂点の配列を生成 CreatePointArray(vertices, vtk_cloud, vtk_points); /////////////////////////////////////////////////////// // 色の配列を生成 CreateColorsArray(colors, vtk_cloud, vtk_colors); /////////////////////////////////////////////////////// // 使用して点を描画するためのGlyph filter vtkSmartPointer<vtkVertexGlyphFilter> vertexFilter = vtkSmartPointer<vtkVertexGlyphFilter>::New(); vertexFilter->SetInputData(vtk_cloud); vertexFilter->Update(); /////////////////////////////////////////////////////// auto vtk_mapper = vtkSmartPointer<vtkPolyDataMapper>::New(); vtk_mapper->SetInputData(vtk_cloud); vtk_mapper->SetInputConnection(vertexFilter->GetOutputPort()); auto vtk_actor = vtkSmartPointer<vtkActor>::New(); vtk_actor->SetMapper(vtk_mapper); vtk_actor->GetProperty()->SetPointSize(pointsize); // 点のサイズを設定 return vtk_actor; }int main(int /*argc*/, char** /*argv*/) { //////////////////////////////////////// // 点群の定義 // ランダムの1000頂点を作成 std::vector<Eigen::Vector3d> vertices; for (int i = 0; i < 1000; i++) { vertices.push_back(Eigen::Vector3d::Random()); } // ランダムの色を設定 std::vector<Eigen::Vector3d> colors; for (int i = 0; i < 1000; i++) { Eigen::Vector3d rnd = Eigen::Vector3d::Random(); // -1~1の乱数 Eigen::Vector3d v01 = 0.5 * (rnd + Eigen::Vector3d::Ones()); // 0~1に変換 colors.push_back(v01); } //////////////////////////////////////// // 点群のアクタを作戦 auto actor = CreatePointCloudActor(vertices, colors,5); ////////////////////////////////////// auto renderer = vtkSmartPointer<vtkRenderer>::New(); renderer->AddActor(actor); renderer->ResetCamera(); ////////////////////////////////////// auto interactor = vtkSmartPointer<vtkRenderWindowInteractor>::New(); ////////////////////////////////////// auto renderWindow = vtkSmartPointer<vtkRenderWindow>::New(); renderWindow->AddRenderer(renderer); renderWindow->SetInteractor(interactor); renderWindow->Render(); interactor->Start(); //イベントループへ入る return 0; }
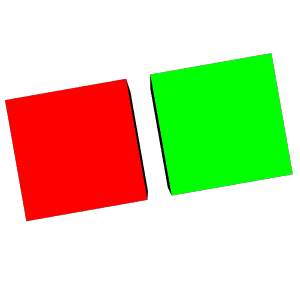
VTKでクライアント領域の画像を取得してファイル保存
クライアント領域を画像化して保存(背景透明)
vtkWindowToImageFilter で画像を取得し、vtkPNGWriterで画像を保存する。
以下はタイマーが起動するたびに画面更新し、その結果を連番画像にして保存している。
#pragma warning(disable:4996)


#include <iostream>

//VTK_MODULE_INITに必要
#include <vtkAutoInit.h>


#include <vtkSmartPointer.h>
#include <vtkRenderer.h>
#include <vtkRenderWindow.h>
#include <vtkRenderWindowInteractor.h>

//円筒とその表示に必要
#include <vtkCylinderSource.h>
#include <vtkPolyDataMapper.h>

#include <vtkActor.h>
#include <vtkCubeSource.h>
#include <vtkProperty.h>

#include <vtkAssembly.h>
#include <vtkTransform.h>

#pragma comment(lib,"opengl32.lib")
#pragma comment(lib,"psapi.lib")
#pragma comment(lib,"dbghelp.lib")
#pragma comment(lib,"ws2_32.lib")


// コールバック関数を使用するのに必要
#include <vtkCallbackCommand.h>

// スクリーンショットを取得するのに必要
#include <vtkWindowToImageFilter.h>
#include <vtkPNGWriter.h>

//必須
VTK_MODULE_INIT(vtkRenderingOpenGL2);
VTK_MODULE_INIT(vtkInteractionStyle);


///////////////////////////////////////////////////////////////
///////////////////////////////////////////////////////////////
///////////////////////////////////////////////////////////////
///////////////////////////////////////////////////////////////
void GetClientImage(vtkRenderWindow* renderWindow) {
  // スクリーンショットを取得
  vtkSmartPointer<vtkWindowToImageFilter> windowToImageFilter = vtkSmartPointer<vtkWindowToImageFilter>::New();
  windowToImageFilter->SetInput(renderWindow);
  windowToImageFilter->SetScale(1);  // スクリーンショットのサイズ(スケール)を設定
  windowToImageFilter->SetInputBufferTypeToRGBA();  // バッファの種類を設定
  windowToImageFilter->ReadFrontBufferOff();  // フロントバッファをオフに設定
  windowToImageFilter->Update();

  static int counter = 0;
  char filename[256];
  sprintf(filename, "C:/test/ss/screenshot_%03d.png", counter++);
  // スクリーンショットを保存
  vtkSmartPointer<vtkPNGWriter> writer = vtkSmartPointer<vtkPNGWriter>::New();
  writer->SetFileName(filename);
  writer->SetInputConnection(windowToImageFilter->GetOutputPort());
  writer->Write();

}
// コールバック関数に渡すデータ
struct MyData
{
  vtkSmartPointer<vtkAssembly> assembly;
};

// タイマーのコールバック関数
void MyTimerCallbackFunction(vtkObject* caller, long unsigned int eventId, void* clientData, void* callData)
{
  MyData* data = static_cast<MyData*>(clientData);

  static int angle = 0;

  vtkSmartPointer<vtkTransform> tra = vtkSmartPointer<vtkTransform>::New();
  tra->RotateWXYZ(angle+=10, 0, 0, 1);
  tra->Update();

  data->assembly->SetUserTransform(tra);

  // 画面更新
  auto interactor = static_cast<vtkRenderWindowInteractor*>(caller);
  interactor->Render();

  // スクリーンショットを保存
  vtkRenderWindow* renderWindow = interactor->GetRenderWindow();
  GetClientImage(renderWindow);


}
///////////////////////////////////////////////////////////////
///////////////////////////////////////////////////////////////
///////////////////////////////////////////////////////////////
///////////////////////////////////////////////////////////////


vtkSmartPointer<vtkActor> createActor1();
vtkSmartPointer<vtkActor> createActor2();


int main(int /*argc*/, char** /*argv*/)
{
  // アクタを作成
  vtkSmartPointer<vtkActor> actor1 = createActor1();
  vtkSmartPointer<vtkActor> actor2 = createActor2();

  // アクタをまとめてアセンブリを作成
  vtkSmartPointer<vtkAssembly> assembly = vtkSmartPointer<vtkAssembly>::New();
  assembly->AddPart(actor1);
  assembly->AddPart(actor2);

  //////////////////////////////////////
  auto renderer = vtkSmartPointer<vtkRenderer>::New();
  renderer->ResetCamera();

  // アセンブリをレンダラに追加
  renderer->AddActor(assembly);


  //////////////////////////////////////

  auto interactor = vtkSmartPointer<vtkRenderWindowInteractor>::New();

  auto renderWindow = vtkSmartPointer<vtkRenderWindow>::New();
  renderWindow->AddRenderer(renderer);
  renderWindow->SetInteractor(interactor);
  renderWindow->Render();

  //////////////////////////////////////
  //////////////////////////////////////

  // タイマーに渡す構造体の作成
  MyData callbackData{ assembly };

  // タイマー作成
  auto timerCallback = vtkSmartPointer<vtkCallbackCommand>::New();
  timerCallback->SetCallback(MyTimerCallbackFunction); // コールバック関数を設定
  timerCallback->SetClientData(&callbackData); // コールバック関数に渡すデータを設定

  interactor->AddObserver(vtkCommand::TimerEvent, timerCallback); // タイマーイベントにコールバック関数を設定

  interactor->Initialize();
  interactor->CreateRepeatingTimer(100); // 100msごとにタイマーイベントを発生させる

  //////////////////////////////////////
  //////////////////////////////////////

  interactor->Start(); //イベントループへ入る

  return 0;
}


vtkSmartPointer<vtkActor> createActor1()
{
  // 1つ目の立方体を作成
  vtkSmartPointer<vtkCubeSource> cubeSource1 = vtkSmartPointer<vtkCubeSource>::New();
  vtkSmartPointer<vtkPolyDataMapper> mapper1 = vtkSmartPointer<vtkPolyDataMapper>::New();
  mapper1->SetInputConnection(cubeSource1->GetOutputPort());
  vtkSmartPointer<vtkActor> actor1 = vtkSmartPointer<vtkActor>::New();
  actor1->SetMapper(mapper1);
  actor1->GetProperty()->SetColor(1, 0, 0); // 赤色

  return actor1;
}
vtkSmartPointer<vtkActor> createActor2()
{
  // 2つ目の立方体を作成
  vtkSmartPointer<vtkCubeSource> cubeSource2 = vtkSmartPointer<vtkCubeSource>::New();
  cubeSource2->SetCenter(1.2, 0, 0); // 位置を変更
  vtkSmartPointer<vtkPolyDataMapper> mapper2 = vtkSmartPointer<vtkPolyDataMapper>::New();
  mapper2->SetInputConnection(cubeSource2->GetOutputPort());
  vtkSmartPointer<vtkActor> actor2 = vtkSmartPointer<vtkActor>::New();
  actor2->SetMapper(mapper2);
  actor2->GetProperty()->SetColor(0, 1, 0); // 緑色

  return actor2;
}
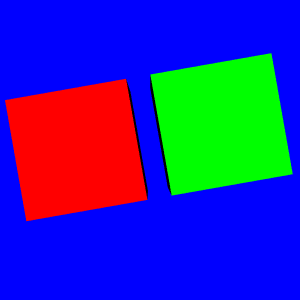
クライアント領域を画像化して保存(背景色あり)
背景色が必要な場合、SetInputBufferTypeToRGBに設定する。renderer->SetBackground で設定した背景色となる。
/* ... */
void GetClientImage(vtkRenderWindow* renderWindow) {
  // スクリーンショットを取得
  vtkSmartPointer<vtkWindowToImageFilter> windowToImageFilter = vtkSmartPointer<vtkWindowToImageFilter>::New();
  windowToImageFilter->SetInput(renderWindow);
  windowToImageFilter->SetScale(1);  // スクリーンショットのサイズ(スケール)を設定
  windowToImageFilter->SetInputBufferTypeToRGB();  // バッファの種類をRGBに設定
  windowToImageFilter->ReadFrontBufferOff();  // フロントバッファをオフに設定
  windowToImageFilter->Update();

  static int counter = 0;
  char filename[256];
  sprintf(filename, "C:/test/ss/screenshot_%03d.png", counter++);
  // スクリーンショットを保存
  vtkSmartPointer<vtkPNGWriter> writer = vtkSmartPointer<vtkPNGWriter>::New();
  writer->SetFileName(filename);
  writer->SetInputConnection(windowToImageFilter->GetOutputPort());
  writer->Write();

}
/* ... */


int main(int /*argc*/, char** /*argv*/)
{
/* ... */

  //////////////////////////////////////
  auto renderer = vtkSmartPointer<vtkRenderer>::New();

  /* ... */

  // 背景色を設定 windowToImageFilter->SetInputBufferTypeToRGB();にすれば背景がこの色になる
  renderer->SetBackground(0.0, 0.0, 1.0);

  //////////////////////////////////////

  auto interactor = vtkSmartPointer<vtkRenderWindowInteractor>::New();

  /* ... */

  interactor->Start(); //イベントループへ入る

  return 0;
}


/* ... */
余談 アニメーションgif化
ImageMagickで、以下のコマンドでanimation gif 化できる。
背景が透明な場合、先に以下の方法で背景を黒に変換してからmagick convertする。
HTML内にクリップボードへコピーボタンを作成
自サイト内のコードをコピペするときに、時々このコードをコピーボタンが恋しくなる。実装するにはどうすればいいのか調べた。JavaScriptでクリップボードにコピーするらしい。
1
<html>
  <head>
    <meta http-equiv="content-type" content="text/html; charset=Shift_JIS">
  </head>
  <body>
    <div>
      <pre id="code1"><code>print("Hello, World!")</code></pre>
      <button onclick="copyToClipboard('code1')">コピー</button>
    </div>
    <div>
      <pre id="code2"><code>sudo apt-get update</code></pre>
      <button onclick="copyToClipboard('code2')">コピー</button>
    </div>
<script>
        // クリックすると呼び出される
        function copyToClipboard(elementId) {
            var codeBlock = document.getElementById(elementId); // preの中身全部が入る
            var range = document.createRange(); // ドキュメントの一部を選択する貯めのオブジェクトを作成
            range.selectNode(codeBlock);
            window.getSelection().removeAllRanges(); // 選択解除
            window.getSelection().addRange(range);   // 選択範囲に、codeBlockを追加済みのrangeオブジェクトを指定
            try {
                document.execCommand('copy');        // クリップボードへコピー
            } catch (err) {
                alert('コピー失敗');
            }
            window.getSelection().removeAllRanges();
        }
    </script>
  </body>
</html>
実行例
print("Hello, World!")sudo apt-get update2
code1とかが冗長な気がして調べたら、previousElementSiblingで、オブジェクトの一つ前のエレメントを取得できるらしい。
さらにnavigator.clipboard.writeTextでクリップボードに書き込めるので、だいぶシンプルになった。
<html>
  <head>
    <meta http-equiv="content-type" content="text/html; charset=Shift_JIS">
  </head>
  <body>
    <div>
      <pre><code>print("Hello, World!")</code></pre>
      <button onclick="copyToClipboard(this)">コピー</button>
    </div>
    <div>
      <pre><code>sudo apt-get update</code></pre>
      <button onclick="copyToClipboard(this)">コピー</button>
    </div>
<script>
        // クリックすると呼び出される
        function copyToClipboard(elem) {

            var codeBlock = elem.previousElementSibling;                       // elem の前の要素を取得
            var codeText = codeBlock.innerText || codeBlock.textContent;       // elem からテキストを取得

            navigator.clipboard.writeText(codeText);  // テキストをクリップボードにコピー

        }
    </script>
  </body>
</html>
[‘ubuntu.exe’ の起動時にエラー 2147942402 (0x80070002) が発生しました] に対処
windows 11, でWSLのUbuntuを起動しようとしたところ、以下のエラーが出た。
対処法
プロンプトの画面の[設定]を開く。
左側のUbuntu(アイコンがオレンジのほう)を選択し、「コマンドライン」の項目を開く。
内容を以下のように書き換える
後は保存をして、Ubuntuを開きなおす。
参考
https://loumo.jp/archives/28998
所感
なぜこうなった。原因がわからん。
printfスタイルの%03dみたいな形式の番号付きファイル名のパターンをregexに変換して番号を取り出す
sscanf版
%03dみたいなファイル名からIDを取り出したい。sscanfを使う場合、「%03d」だと、「0005」など、3桁でない番号を拾えないので、いっそ%dのほうがいい。
#include <iostream>

int main()
{

  std::string pattern = "myfile_%d.txt";

  std::string fname = "myfile_002010.txt";

  int id;
  sscanf(fname.c_str(), pattern.c_str(), &id);

  printf("%d\n", id);

}
Regex版
#include <iostream>
#include <regex>

int main()
{

  std::string pattern = "myfile_(\\d+)\\.txt";

  std::regex reg_fname(pattern);

  std::string fname = "myfile_0001.txt";
  std::smatch match;
  if (std::regex_search(fname, match, reg_fname)) {
    if (match.size() >= 2) {
      int id = std::stoi(match[1].str().c_str());
    }
  }
}
printf型のパターンを正規表現のパターンに変換して処理
使う側としては正規表現を知らないと分かりづらいので%dを含んだ文字列を正規表現に変換することを考える。
.や+などの記号をエスケープした後で、%dを\d+に置換する。
#include <iostream>
#include <regex>
// 正規表現の特殊文字をエスケープする関数
std::string escapeRegexSpecialCharacters(const std::string& str) {

  // 正規表現の特殊文字を定義
  std::regex special_chars(R"([.^$*+?{}[\]()|\\])");
  // 各特殊文字をエスケープシーケンスに置き換える
  return std::regex_replace(str, special_chars, R"(\$&)");
}
// パターンを正規表現に変換する関数
std::string convertPatternToRegex(const std::string& pattern) {
  std::string regex_pattern;

  // この処理により、
  // "my+file_%d.txt" → "my\+file_%d\.txt"
  // のように、特殊文字をエスケープした文字列になる
  regex_pattern = escapeRegexSpecialCharacters(pattern);

  // %d または %0xd (例: %05d) を正規表現パターンに置換
  // この処理により、
  // "my\+file_%d\.txt"  → "my\+file_(\d+)\.txt"
  std::regex d_pattern(R"(%\d*d)");
  regex_pattern = std::regex_replace(regex_pattern, d_pattern, R"((\d+))");
  return regex_pattern;
}
int main()
{
  // ファイル名のパターン
  std::string pattern = "my+file_%d.txt";

  // ファイル名のパターンを正規表現に変換
  std::string reg_pattern = convertPatternToRegex(pattern);

  std::regex regexpattern = std::regex(reg_pattern);


  // このファイル名から番号を取り出す
  std::string fname = "my+file_002010.txt";

  std::smatch match;
  if (std::regex_search(fname, match, regexpattern)) {
    if (match.size() >= 2) {
      int id = std::stoi(match[1].str().c_str());
      std::cout << id << std::endl;
    }
  }
}
WSL2+Docker+Ubuntuで日本語の文字化けを修正
WSL2上でDockerのUbuntuを使っていると日本語が表示できない。これを解決する。
Before
After
手順
以下で locale -a を行ってみる。日本語ロケールが存在しない。
まず言語パックをインストール
apt update
apt install language-pack-ja
そのあと、
設定が終わったら、LANGに言語を設定するため、~/.bashrc を編集する。
で、ファイルの最後に
終わったら
これで ls などすると日本語表示ができる。
VTKでタイマー
#include <iostream>

//VTK_MODULE_INITに必要
#include <vtkAutoInit.h>

#include <vtkSmartPointer.h>
#include <vtkRenderer.h>
#include <vtkRenderWindow.h>
#include <vtkRenderWindowInteractor.h>

// コールバック関数を使用するのに必要
#include <vtkCallbackCommand.h>


//必須
VTK_MODULE_INIT(vtkRenderingOpenGL2);
VTK_MODULE_INIT(vtkInteractionStyle);
// コールバック関数に渡すデータ
struct MyData
{
  std::string text;
  int counter;
};
// タイマーのコールバック関数
void MyTimerCallbackFunction(vtkObject* caller, long unsigned int eventId, void* clientData, void* callData)
{
  MyData* data = static_cast<MyData*>(clientData);

  // タイマーイベントが発生したことを確認する
  std::cout << data->text << " " << data->counter << std::endl;
  data->counter++;

  // 画面更新
  auto interactor = static_cast<vtkRenderWindowInteractor*>(caller);
  interactor->Render();
}
int main(int /*argc*/, char** /*argv*/)
{

  //////////////////////////////////////
  auto renderer = vtkSmartPointer<vtkRenderer>::New();
  renderer->ResetCamera();

  //////////////////////////////////////
  auto interactor = vtkSmartPointer<vtkRenderWindowInteractor>::New();
  auto renderWindow = vtkSmartPointer<vtkRenderWindow>::New();
  renderWindow->AddRenderer(renderer);
  renderWindow->SetInteractor(interactor);
  renderWindow->Render();

  //////////////////////////////////////
  // タイマーに渡す構造体の作成
  MyData callbackData{ "Counter:",0 };

  // タイマー作成
  auto timerCallback = vtkSmartPointer<vtkCallbackCommand>::New();
  timerCallback->SetCallback(MyTimerCallbackFunction); // コールバック関数を設定
  timerCallback->SetClientData(&callbackData); // コールバック関数に渡すデータを設定

  interactor->AddObserver(vtkCommand::TimerEvent, timerCallback); // タイマーイベントにコールバック関数を設定

  interactor->Initialize();
  interactor->CreateRepeatingTimer(100); // 100msごとにタイマーイベントを発生させる
  //////////////////////////////////////


  interactor->Start(); //イベントループへ入る

  return 0;
}