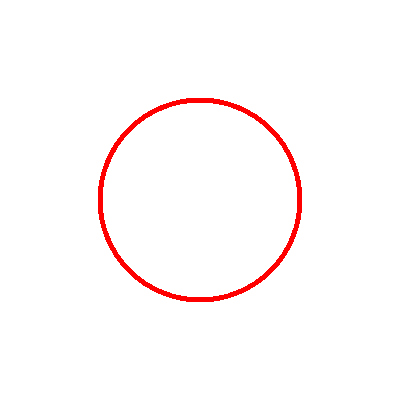
Rust+ skia-safeで画像描画
skia-safeはSkiaのRustバインディング(非公式)。厳密にはskia-bindingというバインディングがあり、それをRustらしく使えるようにしたのがskia-safe。
Cargo.toml
# Skiaの使用。
# https://crates.io/crates/skia-safe
skia-safe = "0.80"
サンプルコード
use std::fs::File;
use std::io::BufWriter;
fn main() {

    let width:u32 = 400;
    let height:u32 = 400;

    //(C++) SkBitmap bitmap;
    let mut bitmap = skia_safe::Bitmap::new();

    //(C++) bitmap.setInfo(SkImageInfo::MakeN32Premul(400, 400));
    let info = skia_safe::ImageInfo::new(
        (400,400),
        skia_safe::ColorType::N32,
        skia_safe::AlphaType::Premul,
        None
    );
    bitmap.set_info(&info,None);

    //(C++) bitmap.allocPixels();
    bitmap.alloc_pixels();

    //(C++) SkCanvas canvas(bitmap);
    let mut canvas:skia_safe::OwnedCanvas = skia_safe::Canvas::from_bitmap(&bitmap,None).unwrap();

    // bitmapの情報を表示
    dispinfo(&bitmap);

    // 描画呼び出し
    draw(&mut canvas);


    //(C++) SkPngEncoder::Options options;
    //(C++) options.fZLibLevel = 9; // 圧縮レベル
    //(C++) options.fFilterFlags = SkPngEncoder::FilterFlag::kAll; // フィルタの種類
    let mut opt = skia_safe::png_encoder::Options::default();
    opt.z_lib_level = 9;
    opt.filter_flags = skia_safe::png_encoder::FilterFlag::ALL;
    opt.comments = vec![];

    // ファイル出力
    let file = File::create("out.png").unwrap();
    let mut writer = BufWriter::new(file);
    let png_data = skia_safe::png_encoder::encode(&bitmap.pixmap(),&mut writer,&opt);

}
fn draw(canvas:&mut skia_safe::OwnedCanvas){

    //(C++) SkPaint paint;
    let mut paint: skia_safe::Paint = skia_safe::Paint::new(skia_safe::colors::BLACK,None);

    //(C++) paint.setStyle(SkPaint::kStroke_Style);
    paint.set_style(skia_safe::PaintStyle::Stroke);

    //(C++) paint.setStrokeWidth(5);
    paint.set_stroke_width(5.0);

    //(C++) paint.setColor(SK_ColorRED);
    paint.set_color(skia_safe::Color::RED);

    //(C++) canvas.drawCircle(200, 200, 100, paint);
    // (200,200) はタプル
    canvas.draw_circle((200,200),100.0,&paint);

}
fn dispinfo(bitmap :&skia_safe::Bitmap) {
    let info = &bitmap.info();

    let rowbytes = bitmap.row_bytes();
    let channel = info.bytes_per_pixel();
    let width = info.width();
    let height = info.height();

    println!("rowbytes:{}\nchannel:{}\nwidth:{}\nheight{}",rowbytes,channel,width,height);

}
Rust + tiny-skiaで画像を描画
tiny-skiaはskiaの影響を受けたライブラリで、テキストレンダリングなどの機能を除いて「skiaっぽくつかえる軽量のライブラリ」として開発されている。本家とは関係ない。BSDライセンス。
Cargo.toml
[dependencies]
# tiny-skiaの使用。
# https://crates.io/crates/tiny-skia/
tiny-skia = "0.11"
# 乱数を使用 https://crates.io/crates/rand
rand = "0.8.5"
サンプルコード
※コード中の「skia」は全てtiny-skiaの意味。
use rand::Rng;// 乱数用
use tiny_skia::{Pixmap, Paint, Color,  PathBuilder, Transform};
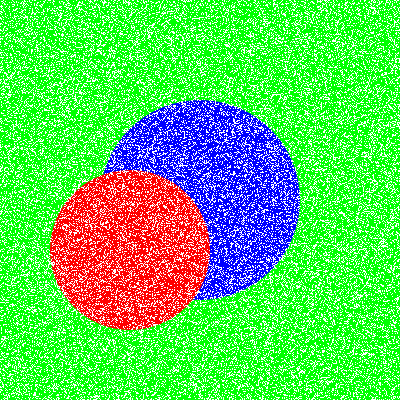
fn main() {

    let width:u32 = 400;
    let height:u32 = 400;

    // skiaの画像を作成
    let mut skiaimage = Pixmap::new(width,height).expect("skia error");

    // イテレータ経由でピクセルバッファへアクセス
    // 全ての画素を緑で塗りつぶし
    let mut pixel_itr = skiaimage.data_mut().chunks_exact_mut(4);
    for pixel in pixel_itr{
        pixel[0] = 0;
        pixel[1] = 255; // 緑
        pixel[2] = 0;
        pixel[3] = 255;
    }

    // tiny-skiaで円を描く
    circle(&mut skiaimage,200.0,200.0,100.0,0,0,255);
    circle(&mut skiaimage,130.0,250.0,80.0,255,0,0);

    let mut rng = rand::thread_rng(); // 乱数を使用

    // ランダムアクセス
    // スライスの配列を作成してアクセスするので、使い回さないのなら効率が悪い
    let mut pixels: Vec<&mut [u8]> = skiaimage.data_mut().chunks_exact_mut(4).collect();
    (0..50000).for_each(|_|{
        let x:u32=rng.gen_range(0 ..width as i32) as u32;
        let y:u32=rng.gen_range(0 .. height as i32) as u32;

        let pos = (y*width+x) as usize;
        pixels[pos][0] =255;
        pixels[pos][1] =255;
        pixels[pos][2] =255;
        pixels[pos][3] =255;

    });

    // 結果をPNGに保存
    skiaimage.save_png("output.png").expect("Failed to save PNG");
    println!("Image saved as output.png");

}
fn circle(simg:&mut Pixmap,px:f32,py:f32,radius:f32,r:u8,g:u8,b:u8){

    // 塗りつぶしの色を設定
    let mut paint = Paint::default();
    paint.set_color(Color::from_rgba8(r,g,b, 255));

    // パス作成
    let mut path_builder = PathBuilder::new();
    path_builder.push_circle(px,py,radius);
    let path = path_builder.finish().expect("Failed to create path");

    // 円を描画
    simg.fill_path(
        &path,
        &paint,
        tiny_skia::FillRule::Winding,
        Transform::identity(),
        None,
    );
}
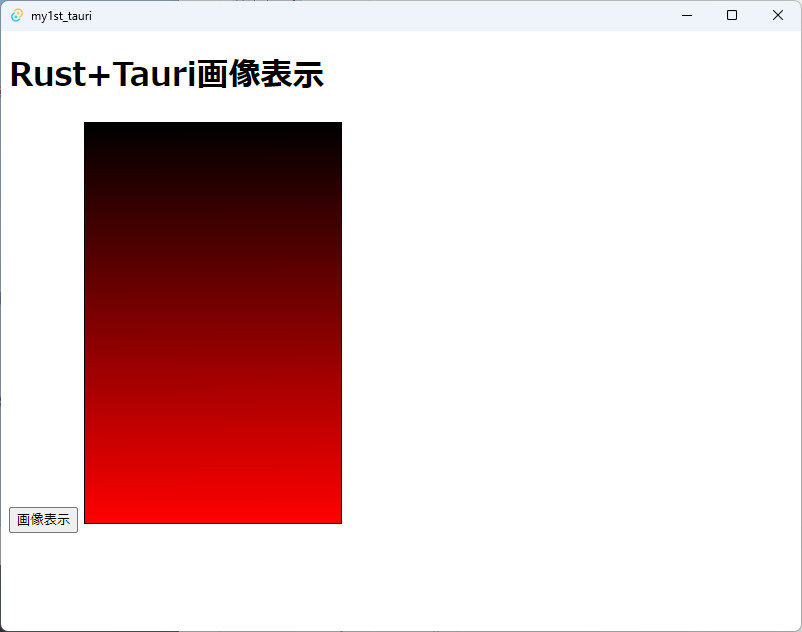
Rust+Tauriで画像を表示してみる(2) 配列で転送
配列をそのままフロントエンド(HTML+Javascript)に転送する。
// 返却用の構造体のために必要
use serde::Serialize;

// 値を返す構造体
#[derive(Serialize)]
struct ImageData{
    image:Vec<u8>,
    width:u32,
    height:u32,
}

// 画像と情報を返す関数
#[tauri::command]
fn get_image() -> ImageData {

    let width:u32 = 256;
    let height:u32 = 400;

    // 画像生成
    let mut imgrgb = Vec::<u8>::new();
    for x in 0..width{
        let r = (x  % height) as u8;
        for _ in 0..height{
            imgrgb.push(((r as usize ) % 256) as u8);
            imgrgb.push(0);
            imgrgb.push(0);
        }
    }
    // 返却
    ImageData {
        image: imgrgb,
        width: width,
        height: height,
    }

}

fn main() {
    tauri::Builder::default()
        .invoke_handler(tauri::generate_handler![get_image]) // get_image関数を登録
        .run(tauri::generate_context!())
        .expect("error while running Tauri application");
}
main.html
<!DOCTYPE html>
<html lang="ja">
<head>
  <meta charset="UTF-8">
  <title>Rust+Tauri画像表示</title>
  <style>
    canvas#mycanvas {
      border: 1px solid #000;
    }
  </style>
  <script type="module" src="/main.js" defer></script>
</head>
<body>
  <h1>Rust+Tauri画像表示</h1>
  <button id="ButtonLoadImage">画像表示</button>
  <canvas id="mycanvas" width="640" height="480"></canvas>

</body>
</html>
main.js
const { invoke } = window.__TAURI__.core;

document.getElementById('ButtonLoadImage').addEventListener('click',async()=>{

  const mycanvas = document.getElementById('mycanvas');
  const ctx = mycanvas.getContext('2d');

  const ImageData = await window.__TAURI__.core.invoke("get_image");
  const rustArray = new Uint8Array(ImageData.image); // RGB8の配列
  const width = ImageData.width;
  const height = ImageData.height;
  // Canvasサイズを調整
  mycanvas.width = width;
  mycanvas.height = height;

  // キャンバスの画像データを作成
  const CanvasImageData = ctx.createImageData(width,height);

  // キャンバスに与えるデータへの参照を取得
  const tmp = CanvasImageData.data;

  // Rust側がRGBを返すので、RGBA形式で格納
  for(let i=0;i<width*height;i++){

    tmp[i*4+0] = rustArray[i*3+0];
    tmp[i*4+1] = rustArray[i*3+1];
    tmp[i*4+2] = rustArray[i*3+2];
    tmp[i*4+3] = 255;
  }

  ctx.putImageData(CanvasImageData,0,0);

});
データがRGBAの場合
上ではデータをrgbで送ったため、Canvasが対応するrgbaに変換するためにforを回す必要があったが、rgbaであれば直接コピーできる。
const { invoke } = window.__TAURI__.core;

document.getElementById('ButtonLoadImage').addEventListener('click',async()=>{

  const mycanvas = document.getElementById('mycanvas');
  const ctx = mycanvas.getContext('2d');

  const ImageData = await window.__TAURI__.core.invoke("get_image"/*,{index}*/ );
  const rustArray = new Uint8Array(ImageData.image); // RGB8の配列
  const width = ImageData.width;
  const height = ImageData.height;
  // Canvasサイズを調整
  mycanvas.width = width;
  mycanvas.height = height;

  // キャンバスの画像データを作成
  const CanvasImageData = ctx.createImageData(width,height);

  // キャンバスにRustから受け取ったデータをセット
  CanvasImageData.data.set(rustArray);

  ctx.putImageData(CanvasImageData,0,0);

});
Rust+Tauriで画像を表示してみる
画像を高速に表示しようとするとWebGLを使うのがいいらしいが、いろいろと手間なので、まずはRust側でbase64に変換してimgに設定する方法を試す。高いフレームレートが要求される用途でなければ、十分に機能する。
バックエンド
main.rs
use base64::{engine::general_purpose, Engine as _};
use std::io::Cursor;
use image::codecs::png::PngEncoder;
use image::ImageEncoder;

// 返却用の構造体のために必要
use serde::Serialize;

// 値を返す構造体
#[derive(Serialize)]
struct ImageData{
    image:String,
    width:u32,
    height:u32,
}

// 画像と情報を返す関数
#[tauri::command]
fn get_image(index: usize) -> ImageData {

    let width:u32 = 256;
    let height:u32 = 400;

    // 画像生成
    let mut imgrgb = Vec::<u8>::new();
    for x in 0..width{
        let r = (x  % height) as u8;
        for y in 0..height{
            imgrgb.push(((r as usize * index) % 256) as u8);
            imgrgb.push(0);
            imgrgb.push(0);
        }
    }

    // PNGデータにエンコード
    // RGB配列 → PNG形式への変換
    let mut buffer = Cursor::new(Vec::new());
    let encoder = PngEncoder::new(&mut buffer);
    encoder.write_image(
        &imgrgb,
        width, height,
        image::ColorType::Rgb8
    ).unwrap();

    // Base64エンコードして返す
    // PNG形式 → Base64表現への変換
    let base64_image = general_purpose::STANDARD.encode(buffer.get_ref());

    // フロントエンドでimgタグに設定できる形式にする
    let img =format!("data:image/png;base64,{}", base64_image);

    // 返却
    ImageData {
        image: img,
        width: width,
        height: height,
    }

}

fn main() {
    tauri::Builder::default()
        .invoke_handler(tauri::generate_handler![get_image]) // get_image関数をフロントエンドが呼び出せるようにする
        .run(tauri::generate_context!())
        .expect("error while running Tauri application");
}
Cargo.toml
[package]
name = "my1st_tauri"
version = "0.1.0"
description = "A Tauri App"
authors = ["you"]
edition = "2021"

# See more keys and their definitions at https://doc.rust-lang.org/cargo/reference/manifest.html

[build-dependencies]
tauri-build = { version = "2", features = [] }

[dependencies]
tauri = { version = "2", features = [] }
tauri-plugin-shell = "2"
serde = { version = "1", features = ["derive"] }
serde_json = "1"

image = "0.24"
base64 = "0.21"
フロントエンド
<!DOCTYPE html>
<html lang="ja">
<head>
  <meta charset="UTF-8">
  <title>Rust+Tauri画像表示</title>
</head>
<body>
  <h1>Rust+Tauri画像表示</h1>
  <img id="image-viewer" alt="Image Viewer" style="border: 1px solid black; width: 256px; height: 256px;">
  <p>左右キーで再読み込み</p>

  <script>
    let currentIndex = 0;
    async function updateImage(index) {

      // Rustから画像データを取得
      const imageData = await window.__TAURI__.core.invoke("get_image", { index });

      imageview = document.getElementById("image-viewer"); // 表示領域の取得
      imageview.src = imageData.image; // 画像を設定
      imageview.style.width = `${imageData.width}px`; // 画像の幅を設定
      imageview.style.height = `${imageData.height}px`; // 画像の高さを設定
    }
    // 初期画像を読み込み
    updateImage(currentIndex);
    // キーイベントリスナー
    document.addEventListener("keydown", (event) => {
      if (event.key === "ArrowRight") {
        currentIndex++;
        updateImage(currentIndex);
      } else if (event.key === "ArrowLeft") {
        currentIndex = Math.max(0, currentIndex - 1);
        updateImage(currentIndex);
      }
    });
  </script>
</body>
</html>
Rust+Tauri(再)
久しぶりにTauriを学ぼうと思い、以前の記事を参考にプロジェクトを作ってみた
すると以下のエラーが発生
Error `tauri.conf.json` error: Additional properties are not allowed ('app', 'bundle', 'identifier', 'productName', 'version' were unexpected)
対応
これはcreate-tauri-appが作成するCargo.tomlが現在インストールされているTauriライブラリのバージョンに対応していないことが由来らしい。
ここで、create-tauri-appのバージョンを調べてみると
npm list -g create-tauri-app
C:\application\node.js\node-v21.6.2-win-x64
`-- (empty)
となっていて、create-tauri-appのバージョンがemptyになっている。このとき、create-tauri-appは必要な時だけ最新版がダウンロードされて使用されるらしい。つまりcreate-tauri-appは最新版が使われるということ。ここで、cargo install tauri-cliを実行してみると
error: failed to compile `tauri-cli v2.1.0`, intermediate artifacts can be found at `C:\User\myuser\AppData\Local\Temp\cargo-installSnryuD`.
To reuse those artifacts with a future compilation, set the environment variable `CARGO_TARGET_DIR` to that path.
Caused by:
package `tauri-cli v2.1.0` cannot be built because it requires rustc 1.77.2 or newer, while the currently active rustc version is 1.74.1
Try re-running cargo install with `--locked`
と、「現在のrustcのバージョンが1.74.1だが、最新のtauri-cliのバージョンはrustc 1.77.2以上を要求する」という理由でtauri-cliのインストールが失敗する。
つまり、プロジェクトを作るcreate-tauri-appのバージョンが常に最新版が使われているが、tauriライブラリの管理などを行うtauri-cliがructc 1.74対応版という古いものなので、最新のプロジェクトをビルドできないということだと思う。
create-tauri-appのバージョンを1.74版に指定すればうまくいきそうだが、低いバージョンを使う意味も今のところないので、rustcのバージョンアップをして対応する。
1.rustcのアップデート
なおバージョンチェックは
rustc --version
で行う。
2.tauri-cliのアップデート
Tauriプロジェクト作成
これでnpx create-tauri-appでプロジェクトを作成できるようになった。
なお、最新版ではIdentifierを作成時に指定できるので、手動でbundle > identifierを変更する必要もない。
Rust+cgmathで変換行列を計算
glTranslated等のレガシーな関数が非推奨になっているので移動行列や回転行列や射影行列を自分で計算しないといけない。面倒なのでクレートを使う。いくつかあるが、cgmathがglmに近い使い勝手らしい。
Cargo.toml
以下のようにCargo.tomlにcgmathを追加する。
[package]
name = "opengltest"
version = "0.1.0"
edition = "2021"


[dependencies]
glutin = "0.26.0"
gl="0.14.0"

cgmath = "0.18.0"
使用例
以下、translate,rotate,perspective view matrixの使用例。
pub fn draw_triangle(programid:gl::types::GLuint,vertexbuffer: gl::types::GLuint,colorbuffer:gl::types::GLuint){

    unsafe {
        gl::UseProgram(programid);
    }


    let translate_mat = cgmath::Matrix4::from_translation(
        cgmath::Vector3::new(0.0,0.0,-3.0)
    );
    let rotate_mat = cgmath::Matrix4::from_angle_z(cgmath::Deg(45.0));

    let model_mat = rotate_mat * translate_mat;

    let fov = cgmath::Deg(45.0);
    let aspect = 1.0;
    let near = 0.1;
    let far = 100.0;
    let proj_mat = cgmath::perspective(fov,aspect,near,far);


    let proj;
    let model;
    unsafe {
        let proj_location_name = CString::new("projectionMatrix").unwrap();
        let model_location_name = CString::new("modelViewMatrix").unwrap();
        proj = gl::GetUniformLocation(programid,proj_location_name.as_ptr());
        model = gl::GetUniformLocation(programid,model_location_name.as_ptr());

        gl::UniformMatrix4fv(proj,1,gl::FALSE,proj_mat.as_ptr());
        gl::UniformMatrix4fv(model,1,gl::FALSE,model_mat.as_ptr());
    }
/*
    // デバッグ
    println!("proj location: {}",proj);
    println!("model location: {}",model);
*/

    unsafe{
        gl::EnableVertexAttribArray(0);
        gl::BindBuffer(gl::ARRAY_BUFFER,vertexbuffer);
        gl::VertexAttribPointer(
            0,
            3,
            gl::FLOAT,
            gl::FALSE,
            0,
            null()
        );
    }

    unsafe{
        gl::EnableVertexAttribArray(1);
        gl::BindBuffer(gl::ARRAY_BUFFER,colorbuffer);
        gl::VertexAttribPointer(
            1,
            3,
            gl::FLOAT,
            gl::FALSE,
            0,
            null()
        );
    }

    unsafe {
        gl::DrawArrays(gl::TRIANGLES, 0,3);

        let err_check = gl::GetError();
        if err_check != gl::NO_ERROR {
            println!("ERROR::: {}\n", err_check);
        }

        gl::DisableVertexAttribArray(0);
        gl::DisableVertexAttribArray(1);
    }

    unsafe {
        gl::UseProgram(0);
    }

}
Rust+OpenGLで三角形表示
以前初期化はやったことがあるが、今回はちゃんと三角形を描く。
基本的にglBeginのような古い関数は使えないので、GLSLで書くことになる。
Rust内の文字列をC言語の文字列に変換するところがいちいちややこしい。
draw.rs
use std::ptr::null;
use std::ffi::CString;
use std::ffi::CStr;
pub fn draw_prepare() ->(gl::types::GLuint, gl::types::GLuint){

    // 頂点の定義
    let vertices: [f32;9]=[
        0.0,  0.5, 0.0, // 上頂点
        -0.5, -0.5, 0.0, // 左下
        0.5, -0.5, 0.0, // 右下
    ];
    let color:[f32;9]=[
        1.0,0.0,0.0,
        0.0,1.0,0.0,
        0.0,0.0,1.0,
    ];

    let mut vertexbuffer=0;
    unsafe{
        gl::GenBuffers(1,&mut vertexbuffer);
        gl::BindBuffer(gl::ARRAY_BUFFER,vertexbuffer);
        gl::BufferData(
            gl::ARRAY_BUFFER,
            3*3*std::mem::size_of::<gl::types::GLfloat>() as gl::types::GLsizeiptr,
            vertices.as_ptr() as *const _,
            gl::STATIC_DRAW
        );
    }
    let mut colorbuffer=0;
    unsafe{
        gl::GenBuffers(1,&mut colorbuffer);
        gl::BindBuffer(gl::ARRAY_BUFFER,colorbuffer);
        gl::BufferData(
            gl::ARRAY_BUFFER,
            3*3*std::mem::size_of::<gl::types::GLfloat>() as gl::types::GLsizeiptr,
            color.as_ptr() as *const _,
            gl::STATIC_DRAW
        );
    }

    (vertexbuffer,colorbuffer)
}
pub fn prepare_vertex_shader()->gl::types::GLuint{
    let mut VertexShaderID = 0;

    // 頂点シェーダプログラム
    let vertex_shader_source = "\
#version 460 core

layout (location = 0) in vec3 aPos;
layout (location = 1) in vec3 incolor;

out vec4 vertexColor;

uniform mat4 modelViewMatrix;
uniform mat4 projectionMatrix;

void main()
{
  gl_Position = projectionMatrix * modelViewMatrix * vec4(aPos, 1.0);
  vertexColor = vec4(incolor, 1.0);
}
";
    let c_src = CString::new(vertex_shader_source).unwrap();

    let mut Result:gl::types::GLint = 0;
    let mut InfoLogLength:i32 = 0;
    let mut info_log;
    unsafe{
        VertexShaderID = gl::CreateShader(gl::VERTEX_SHADER);
        gl::ShaderSource(
            VertexShaderID,
            1,
            &c_src.as_ptr(),
            std::ptr::null()
        );


        gl::CompileShader(VertexShaderID);

        // シェーダのチェック
        gl::GetShaderiv(VertexShaderID,gl::COMPILE_STATUS,&mut Result);
        gl::GetShaderiv(VertexShaderID,gl::INFO_LOG_LENGTH,&mut InfoLogLength);

        if InfoLogLength > 0 {
            info_log = vec![0u8; InfoLogLength as usize];
            if Result == gl::FALSE as i32 {
                gl::GetShaderInfoLog(
                    VertexShaderID,
                    InfoLogLength,
                    std::ptr::null_mut(),
                    info_log.as_mut_ptr() as *mut gl::types::GLchar
                );

                if let Ok(msg) = CStr::from_ptr(info_log.as_ptr() as *const i8).to_str() {
                    println!("Vertex Shader Error :\n {}\n", msg);
                }
            }
        }
    }

    VertexShaderID
}
pub fn prepare_fragment_shader()->gl::types::GLuint{
    let mut FragmentShaderID=0;

    let fragment_shader_source = "\
#version 460 core

out vec4 FragColor;

in vec4 vertexColor;

void main()
{
  FragColor = vertexColor;
}
";
    let c_str = CString::new(fragment_shader_source).unwrap();
    let mut Result:gl::types::GLint=0;
    let mut InfoLogLength:i32=0;
    let mut info_log;
    unsafe {
        FragmentShaderID = gl::CreateShader(gl::FRAGMENT_SHADER);
        gl::ShaderSource(
            FragmentShaderID,
            1,
            &c_str.as_ptr(), null()
        );
        gl::CompileShader(FragmentShaderID);

        // フラグメントシェーダ
        gl::GetShaderiv(FragmentShaderID, gl::COMPILE_STATUS, &mut Result);
        gl::GetShaderiv(FragmentShaderID, gl::INFO_LOG_LENGTH, &mut InfoLogLength);
        if InfoLogLength > 0 {
            if Result == gl::FALSE as i32 {
                info_log = vec![0u8; InfoLogLength as usize];
                gl::GetShaderInfoLog(
                    FragmentShaderID,
                    InfoLogLength,
                    std::ptr::null_mut(),
                    info_log.as_mut_ptr() as *mut gl::types::GLchar
                );
                if let Ok(msg) = CStr::from_ptr(info_log.as_ptr() as *const i8).to_str() {
                    println!("Fragment Shader Error :\n{}\n", msg);
                }
            }
        }
    }

    FragmentShaderID

}
pub fn link_program(VertexShaderID:gl::types::GLuint,FragmentShaderID:gl::types::GLuint)->gl::types::GLuint{
    let mut Result:gl::types::GLint = gl::FALSE as i32;
    let mut InfoLogLength:i32=0;
    let mut ProgramID:gl::types::GLuint=0;

    println!("Linking program");

    unsafe{
        ProgramID = gl::CreateProgram();

        gl::AttachShader(ProgramID,VertexShaderID);
        gl::AttachShader(ProgramID,FragmentShaderID);
        gl::LinkProgram(ProgramID);

        gl::GetProgramiv(ProgramID,gl::LINK_STATUS,&mut Result);
        gl::GetProgramiv(ProgramID,gl::INFO_LOG_LENGTH,&mut InfoLogLength);

        if InfoLogLength > 0 {
            let mut ProgramErrorMessage = vec![0u8; InfoLogLength as usize];

            gl::GetProgramInfoLog(
                ProgramID,
                InfoLogLength,
                std::ptr::null_mut(),
                ProgramErrorMessage.as_mut_ptr() as *mut gl::types::GLchar
            );

            if let Ok(msg) = CStr::from_ptr(ProgramErrorMessage.as_ptr() as *const i8).to_str() {
                println!("Program Link Error:\n{}\n",msg);
            }
        }
    }

    ProgramID

}
pub fn draw_triangle(programid:gl::types::GLuint,vertexbuffer: gl::types::GLuint,colorbuffer:gl::types::GLuint){

    unsafe {
        gl::UseProgram(programid);
    }

    let proj_mat:[f32;16]=[
        1.0, 0.0, 0.0, 0.0,
        0.0, 1.0, 0.0, 0.0,
        0.0, 0.0, 1.0, 0.0,
        0.0, 0.0, 0.0, 1.0,
    ];

    let model_mat:[f32;16]=[
        1.0, 0.0, 0.0, 0.0,
        0.0, 1.0, 0.0, 0.0,
        0.0, 0.0, 1.0, 0.0,
        0.0, 0.0, 0.0, 1.0,
    ];

    let proj;
    let model;
    unsafe {
        let proj_location_name = CString::new("projectionMatrix").unwrap();
        let model_location_name = CString::new("modelViewMatrix").unwrap();
        proj = gl::GetUniformLocation(programid,proj_location_name.as_ptr());
        model = gl::GetUniformLocation(programid,model_location_name.as_ptr());

        gl::UniformMatrix4fv(proj,1,gl::FALSE,proj_mat.as_ptr());
        gl::UniformMatrix4fv(model,1,gl::FALSE,model_mat.as_ptr());
    }
/*
    // デバッグ
    println!("proj location: {}",proj);
    println!("model location: {}",model);
*/

    unsafe{
        gl::EnableVertexAttribArray(0);
        gl::BindBuffer(gl::ARRAY_BUFFER,vertexbuffer);
        gl::VertexAttribPointer(
            0,
            3,
            gl::FLOAT,
            gl::FALSE,
            0,
            null()
        );
    }

    unsafe{
        gl::EnableVertexAttribArray(1);
        gl::BindBuffer(gl::ARRAY_BUFFER,colorbuffer);
        gl::VertexAttribPointer(
            1,
            3,
            gl::FLOAT,
            gl::FALSE,
            0,
            null()
        );
    }

    unsafe {
        gl::DrawArrays(gl::TRIANGLES, 0,3);

        let err_check = gl::GetError();
        if err_check != gl::NO_ERROR {
            println!("ERROR::: {}\n", err_check);
        }

        gl::DisableVertexAttribArray(0);
        gl::DisableVertexAttribArray(1);
    }

    unsafe {
        gl::UseProgram(0);
    }

}
main.rs
// 自作ファイル draw.rs の使用
mod draw;

// 自作関数を呼び出せるようにする
use draw::draw_triangle;
use draw::draw_prepare;
use draw::prepare_vertex_shader;
use draw::prepare_fragment_shader;
use draw::link_program;

fn main() {

    let event_loop = glutin::event_loop::EventLoop::new();
    let window = glutin::window::WindowBuilder::new().with_title("Rust glutin OpenGL");

    // GLのコンテキストを作成
    // この gl_context は ContextBuilder<NotCurrent,Window> 型
    let gl_context = glutin::ContextBuilder::new()
        // コアプロファイルを (3, 1) で3.1 に指定。3.2以上だとVAOが必須になりコードの追記が必要なため
        .with_gl(glutin::GlRequest::Specific(glutin::Api::OpenGl, (3, 1)))
        .build_windowed(window, &event_loop)
        .expect("Cannot create context");

    // Rustにはシャドーイングがあるので、同じ名前の別変数を同じスコープ内に定義できる。
    // この gl_context は ContextBuilder<PossibleCurrent,Window> 型
    // 以降、gl_currentは以前の型の意味で用いることはできない
    let gl_context = unsafe {
        gl_context
            .make_current()
            .expect("Failed to make context current")
    };


    // OpenGLの各関数を初期化
    // これでgl::Viewportをはじめとする各関数の関数ポインタにアドレスが設定され、呼び出せるようになる。
    gl::load_with(|symbol| gl_context.get_proc_address(symbol) as *const _);

    ///////////////////////////////////////////////////////////////////////////////////
    let (vbuffer,cbuffer) = draw_prepare(); // 座標と色のバッファを定義
    let VertexShaderID:gl::types::GLuint = prepare_vertex_shader(); // バーテクスシェーダ作成
    let FragmentShaderID:gl::types::GLuint = prepare_fragment_shader(); // フラグメントシェーダ作成
    let ProgramID:gl::types::GLuint = link_program(VertexShaderID,FragmentShaderID); // プログラムのリンク
    ///////////////////////////////////////////////////////////////////////////////////


    // event_loopを開始する
    event_loop.run(move |event, _, control_flow| {

        // Pollを指定するとループが走り続ける
        // Waitを指定するとイベントが発生したときだけループが動く。
        *control_flow = glutin::event_loop::ControlFlow::Wait;


        match event {

            glutin::event::Event::WindowEvent { event, .. } => match event {


                ////////////////////////////////////////////////////////////////////
                // ウィンドウを閉じる
                glutin::event::WindowEvent::CloseRequested => {
                    // ウィンドウが閉じられた場合、event_loopを停止する
                    *control_flow = glutin::event_loop::ControlFlow::Exit;
                },


                ////////////////////////////////////////////////////////////////////
                // ウィンドウのサイズを変更
                glutin::event::WindowEvent::Resized(new_size) => {

                    // ビューポート再設定
                    unsafe {
                        gl::Viewport(0, 0, new_size.width as i32, new_size.height as i32);
                    }
                },


                ////////////////////////////////////////////////////////////////////
                _ => (),
            },


            _ => (),
        }

        // 描画
        unsafe {
            gl::Clear(gl::COLOR_BUFFER_BIT | gl::DEPTH_BUFFER_BIT);
            gl::ClearColor(0.3, 0.3, 0.5, 1.0);
            gl::Disable(gl::DEPTH_TEST);
            gl::Disable(gl::CULL_FACE);

            // 描画
            draw_triangle(ProgramID,vbuffer,cbuffer);

            gl::Flush();
        }
        // スワップバッファ
        gl_context.swap_buffers().unwrap();

    });

}
RustRoverを導入
Rust用の統合開発環境RustRoverが、非商用に限り無料で使用できるらしい。
インストール後、起動するとライセンスの種類を選択できるので、無料ライセンスを選ぶ。
新規プロジェクトを作る。
実行。特に何もしなくても、▷ボタンで実行できる。
デバッグ用のコンソールはUnicodeに対応しているらしく絵文字もそのまま表示できる。
昔RustでWin32APIを使ってみたが、それも何の工夫もせずにちゃんと実行できた。
そのほか設定
個人的に極めて重要なのが、Ctrl+ホイールでエディタの文字サイズ変更がどうしても欲しい。あとテーマはLightがいい。
初学者用設定
エディター→一般→インライン補完→ローカルのFull Line補完候補を有効にするのチェックを外す。
これが入っていると調べなくても書けてしまうので上達しない。

PythonからPybind11で作成したモジュールに文字列を渡すときの注意
Pythonの文字列はutf8で扱われているが、C++側はUnicodeに弱い。使用しているライブラリがマルチバイト(非utf8なstd::string)しか受け付けてないような場合はPython側でshift_jisに変換して渡してやると都合がいい。
#include <pybind11/pybind11.h>

#include <cstdio>


namespace py = pybind11; // 名前空間を指定


void func_setstring(std::string text) {

    FILE* fp = fopen("test.txt", "wb");
    if (fp == NULL) {
        return;
    }
    fwrite(text.c_str(), sizeof(char), text.size(), fp);
    fclose(fp);
}

// PYBIND11_MODULE(モジュール名, モジュール変数名)
// 生成物はmy_module_string.pydという名前にしなければならない
PYBIND11_MODULE(my_module_string, m) {

    // 関数を定義
    m.def("func_string", &func_setstring, "Write text to file",
        py::arg("text"));

}
Shift-JISで渡す
import my_module_string

text = "こんにちは、世界!"

# テキストを書き込む
my_module_string.func_string(text.encode("shift_jis"))
エディタで確認すると、SJISと判別されている。
UTF-8で渡す
そのまま渡すとutf-8で受け取る。C++はstd::stringでutf8を扱いたがるので紛らわしい。高度な文字列処理が必要ないならそのまま使用できる。ファイルに保存してやれば受け取った内容がutf-8であることをテキストエディタで確認できる。
import my_module_string

text = "こんにちは、世界!"

# テキストを書き込む
my_module_string.func_string(text)
KdTreeを自作してみる(2)探索
class mykdtree {

   std::vector<Eigen::Vector3d>& _points;
   node* node_root;
public:
   mykdtree(std::vector<Eigen::Vector3d>& points) : _points(points) {}

   // ツリーの構築
   void build() {

      // 最初のindexリストを作成
      std::vector<size_t> indices(_points.size());
      for (size_t i = 0; i < _points.size(); i++) {
         indices[i] = i;
      }

      // 再帰的にツリー作成
      node_root = buildnode(_points, indices, 0/*X軸*/);

   }
   node* getRoot() {
      return node_root;
   }
   // 半径内の頂点を探索する関数
   // 再帰的に探索する関数
   // nd: 現在のノード
   // query: 探索する点
   // radius: 探索半径
   // results: 探索結果のindexリスト
   void radiusSearch_core(
      node* nd,
      const Eigen::Vector3d& query,
      double radius,
      std::vector<size_t>& results) {

      if (nd == nullptr) {
         return;
      }

      const auto& nodePt = _points[nd->index];

      // ノード と query の距離を計算
      float dist = (query - nodePt).norm();


      // 現在のノードがqueryを中心とした探索範囲内にあるか確認
      if (dist <= radius) {
         results.push_back(nd->index);//現在のノードを結果に追加
      }


      // サブツリーの探索条件
      // 軸に沿った距離を計算
      ///////////////////////////////////////////////////////////
      //
      //                            |
      // ------------●-------------○----------------
      //           query          nodePt
      //                            |
      //
      //         query.x - nodePt.x < 0
      //           queryが現在のノードの左側にある → nodePtの左側を探索
      ///////////////////////////////////////////////////////////
      //
      //             |
      // ------------○-------------●----------------
      //           nodePt          query
      //             |
      //
      //         query.x - nodePt.x > 0
      //           queryが現在のノードの右側にある → nodePtの右側を探索
      ///////////////////////////////////////////////////////////

      float axisDist = query[nd->axis] - nodePt[nd->axis];

      // ケース1 queryがノードの左側にある
      if (axisDist < 0) {

         // 左側にあるので、左側を探索
         radiusSearch_core(nd->left, query, radius, results);

         // ケース1(2)nodePtが、queryの半径以内にあるなら、右側にもあるかもしれない
         if (axisDist * axisDist <= radius * radius) {
            radiusSearch_core(nd->right, query, radius, results);
         }
      }
      else {
         // ケース2 queryがノードの右側にある

         // 右側にあるので、右側を探索
         radiusSearch_core(nd->right, query, radius, results);

         // ケース2(2)nodePtが、queryの半径以内にあるなら、左側にもあるかもしれない
         if (axisDist * axisDist <= radius * radius) {
            radiusSearch_core(nd->left, query, radius, results);
         }
      }
   }
   // 半径内の頂点を探索する関数
   // query: 探索する点
   // radius: 探索半径
   // results: 探索結果のindexリスト
   void radiusSearch(
      const Eigen::Vector3d& query,
      double radius,
      std::vector<size_t>& results) {

      results.clear();
      radiusSearch_core(node_root, query, radius, results);
   }
};
#include <iostream>

//VTK_MODULE_INITに必要
#include <vtkAutoInit.h>


#include <vtkSmartPointer.h>
#include <vtkRenderer.h>
#include <vtkRenderWindow.h>
#include <vtkRenderWindowInteractor.h>

//円筒とその表示に必要
#include <vtkPolyDataMapper.h>

#pragma comment(lib,"opengl32.lib")
#pragma comment(lib,"psapi.lib")
#pragma comment(lib,"dbghelp.lib")
#pragma comment(lib,"ws2_32.lib")

#include <Eigen/Core>
#include <array>

#include <vtkActor.h>
#include <vtkPoints.h>
#include <vtkPolyData.h>
#include <vtkUnsignedCharArray.h>
#include <vtkPointData.h>
#include <vtkVertexGlyphFilter.h>
#include <vtkProperty.h>

#include "mykdtree.hpp"

//必須
VTK_MODULE_INIT(vtkRenderingOpenGL2);
VTK_MODULE_INIT(vtkInteractionStyle);

// VTK表示用
struct MyVtkCloud {
   std::vector<Eigen::Vector3d> points;
   std::array<unsigned char, 3> color;
   std::vector<std::array<unsigned char, 3> > color_array;

   vtkSmartPointer<vtkActor> actor;
   void makeActor() {
      // VTKのデータ構造に変換
      vtkSmartPointer<vtkPoints> vtk_points = vtkSmartPointer<vtkPoints>::New();
      vtkSmartPointer<vtkUnsignedCharArray> vtk_colors = vtkSmartPointer<vtkUnsignedCharArray>::New();
      vtk_colors->SetNumberOfComponents(3); // RGB
      vtk_colors->SetName("Colors");

      for (size_t i = 0; i < points.size(); ++i) {
         // 点を追加
         vtk_points->InsertNextPoint(points[i].x(), points[i].y(), points[i].z());

         if (color_array.size() == 0) {
            vtk_colors->InsertNextTypedTuple(color.data());
         }
         else {
            vtk_colors->InsertNextTypedTuple(color_array[i].data());
         }
      }

      ////////////////////////////////////////////////////////////
      vtkSmartPointer<vtkPolyData> polyData = vtkSmartPointer<vtkPolyData>::New();
      polyData->SetPoints(vtk_points);
      polyData->GetPointData()->SetScalars(vtk_colors);
      ////////////////////////////////////////////////////////////
      vtkSmartPointer<vtkVertexGlyphFilter> vertexFilter = vtkSmartPointer<vtkVertexGlyphFilter>::New();
      vertexFilter->SetInputData(polyData);
      vertexFilter->Update();
      ////////////////////////////////////////////////////////////
      vtkSmartPointer<vtkPolyDataMapper> mapper = vtkSmartPointer<vtkPolyDataMapper>::New();
      mapper->SetInputConnection(vertexFilter->GetOutputPort());

      vtkSmartPointer<vtkActor> actor = vtkSmartPointer<vtkActor>::New();
      actor->SetMapper(mapper);

      // 頂点サイズを指定
      actor->GetProperty()->SetPointSize(5); // ここで頂点サイズを指定します

      this->actor = actor;
   }
};
int main(int /*argc*/, char** /*argv*/)
{
   MyVtkCloud cloud1;

   std::vector<std::array<unsigned char, 3> > color_array;


   srand((unsigned int)5);
   //// ランダムな点群を作成
   for (size_t i = 0; i < 10000; ++i) {
      cloud1.points.push_back(Eigen::Vector3d::Random());

      color_array.push_back({ 255,0,0 });
   }
   cloud1.color = std::array<unsigned char, 3>{ 0, 255, 0 };
   cloud1.makeActor();


   mykdtree kdtree(cloud1.points);
   kdtree.build();
   node* root = kdtree.getRoot();

   std::vector<size_t> indices;
   kdtree.radiusSearch(
      Eigen::Vector3d(0.3,0.3,0.3), 0.3, indices);

   for(auto i:indices){
      color_array[i] = { 0,255,0 };
   }
   cloud1.color_array = color_array;
   cloud1.makeActor();

   // 表示
   std::vector<size_t> indices_look = indices;
   // 昇順ソート
   std::sort(indices_look.begin(), indices_look.end());
   // コンソールに表示
   for (auto i : indices_look) {
      std::cout << i << std::endl;
   }


   //////////////////////////////////////
   auto renderer = vtkSmartPointer<vtkRenderer>::New();
   renderer->AddActor(cloud1.actor);
   renderer->ResetCamera();

   //////////////////////////////////////
   auto interactor = vtkSmartPointer<vtkRenderWindowInteractor>::New();

   //////////////////////////////////////
   auto renderWindow = vtkSmartPointer<vtkRenderWindow>::New();
   renderWindow->AddRenderer(renderer);
   renderWindow->SetInteractor(interactor);
   renderWindow->Render();

   interactor->Start(); //イベントループへ入る

   return 0;
}