skia(1) vcpkgで導入して試す
skiaを使いたいがビルドに失敗するので妥協してvcpkgで導入してとにかく使う。
vcpkg
適当なディレクトリからgit cloneした後、bootstrap-vcpkg.batを実行。
skiaの導入
導入はinstallコマンドで行う。ビルド等が行われた後、includeディレクトリなどが packages\skia_x64-windows\ に入っている。
サンプルコード
#pragma comment(lib,"skia.dll.lib")

#include "skia/include/core/SkCanvas.h"
// SkBitmap
#include "skia/include/core/SkBitmap.h"

#include <cstdio>
#include <vector>

// 必要なDLL
// skia.dll
// jpeg62.dll
// zlib1.dll


#pragma warning(disable:4996)

//! @brief PPM(RGB各1byte,カラー,テキスト)を書き込む
//! @param [in] fname ファイル名
//! @param [in] vmax 全てのRGBの中の最大値
//! @param [in] width 画像の幅
//! @param [in] height 画像の高さ
//! @param [in] p 画像のメモリへのアドレス
//! @details RGBRGBRGB....のメモリを渡すと、RGBテキストでファイル名fnameで書き込む
void pnmP3_Write(const char* const fname, const int width, const int height, const unsigned char* const p) { // PPM ASCII

    FILE* fp = fopen(fname, "wb");
    fprintf(fp, "P3\n%d %d\n%d\n", width, height, 255);

    size_t k = 0;
    for (size_t i = 0; i < (size_t)height; i++) {
        for (size_t j = 0; j < (size_t)width; j++) {
            fprintf(fp, "%d %d %d ", p[k * 3 + 0], p[k * 3 + 1], p[k * 3 + 2]);
            k++;
        }
        fprintf(fp, "\n");
    }

    fclose(fp);
}

int main()
{
    // skiaの設定
    SkBitmap bitmap;
    bitmap.setInfo(SkImageInfo::MakeN32Premul(400, 400));
    bitmap.allocPixels();
    SkCanvas canvas(bitmap);

    // 図形の描画
    SkPaint paint;
    paint.setStyle(SkPaint::kStroke_Style);
    paint.setStrokeWidth(5);
    paint.setColor(SK_ColorRED);
    canvas.drawCircle(200, 200, 100, paint);
    // canvasのバッファへアクセス
    SkImageInfo info = bitmap.info();
    unsigned char* pixels = (unsigned char* )bitmap.getPixels(); // 画像データの先頭アドレス
    size_t rowBytes = bitmap.rowBytes(); // 1行のバイト数
    // チャンネル数
    int channels = info.bytesPerPixel();
    // 画像サイズ
    int width = info.width();
    int height = info.height();
printf("channels %d\n", channels);
    // PPMへ出力
    std::vector<unsigned char> ppm(width * height * 3);
    for (int i = 0; i < height; i++) {
        for (int j = 0; j < width; j++) {
            size_t pos_ppm = (i * width + j) * 3;
            size_t pos_sk  = (i * rowBytes + j * channels);
            ppm[pos_ppm + 0] = pixels[pos_sk + 2];
            ppm[pos_ppm + 1] = pixels[pos_sk + 1];
            ppm[pos_ppm + 2] = pixels[pos_sk + 0];
        }
    }

    pnmP3_Write("output.ppm", width, height, ppm.data());
}
結果
雑談
実は一年くらい公式のビルド方法を試して失敗している。もういい。
Windows 11にDocker Desktopを導入(5)(不完全メモ)Windows 11上、WSL2(Ubuntu)のDockerコンテナのUbuntuからCUDAを使う
できるようにはなったが、想定した手順の再現が思ったようにできていない(環境の初期化に自信がない)。(いつもそうだが今回はいつのも増して)自分用のメモなので、参考にされる方は注意。
登場人物
・Windows 11 ... いつも使っている Windows 11
・WSL2 ... Windowsの上で動かしているUbuntu
・コンテナ ... docker内で動いている環境。今回はUbuntu。
・Docker ... WSL2の中でコンテナを動かす。導入済みとする。
手順1 windows 11にNVIDIA ドライバのインストール
CGとかゲームやってる人ならすでに入っていると思う。Windows 11 に、自分のグラフィックボード用のドライバを入れた記憶があるなら次の手順へ。
よく注意されるのは、ドライバのインストールはあくまで普通の「Windowsへドライバを入れる作業(公式から.exeを落としてマウスでアイコンをポイントしダブルクリックしインストール画面を開きウィザードに従って次へを押していく)」として行わなければならず、「WSL2でLinuxを使っているからと言ってaptコマンドで入れないように」という所。
公式: https://www.nvidia.co.jp/Download/index.aspx?lang=jp
動作チェック
WSL2上で以下のコマンドを打って、ドライバのバージョンの表記が出れば成功。
なおここでCUDAバージョンが表示されるが、これはこのドライバが対応しているCUDAドライバの最大バージョンとなる。これより新しいCUDAは入れられないという意味。
手順2 WSL2へnvidia-container-toolkitのインストール
公式のインストール方法に従って、WSL2上に、aptを使ってインストールする。
公式: https://docs.nvidia.com/datacenter/cloud-native/container-toolkit/latest/install-guide.html
以下を写経
curl -fsSL https://nvidia.github.io/libnvidia-container/gpgkey | sudo gpg --dearmor -o /usr/share/keyrings/nvidia-container-toolkit-keyring.gpg \
  && curl -s -L https://nvidia.github.io/libnvidia-container/stable/deb/nvidia-container-toolkit.list | \
    sed 's#deb https://#deb [signed-by=/usr/share/keyrings/nvidia-container-toolkit-keyring.gpg] https://#g' | \
    sudo tee /etc/apt/sources.list.d/nvidia-container-toolkit.list
手順3 WSL2へCUDA Toolkitを導入
Docker内のUbuntuは、WSL2にインストールされたCUDA Toolkitを参照する形で使用する。
CUDA Toolkitのインストールコマンドを入手
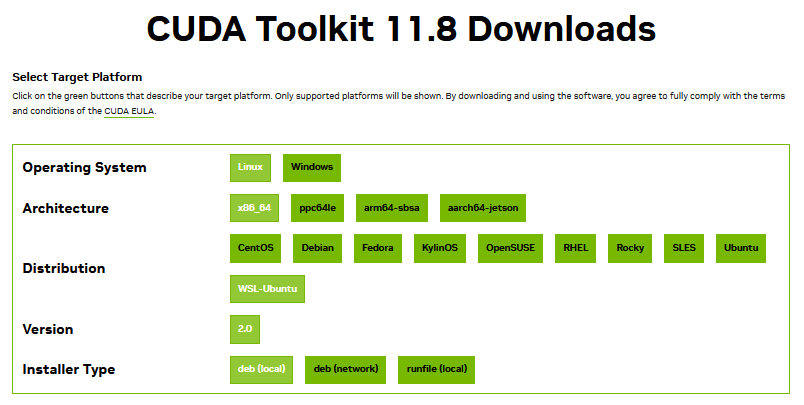
公式へ行く。例えばCUDA 11.8を導入したい場合、以下。
https://developer.nvidia.com/cuda-11-8-0-download-archive
Linux → x86_64 → WSL-Ubuntu → 2.0 → deb(local)
の順で選択するとコマンドが表示されるのでそれをWSL2で実行する。
wget https://developer.download.nvidia.com/compute/cuda/repos/wsl-ubuntu/x86_64/cuda-wsl-ubuntu.pin
sudo mv cuda-wsl-ubuntu.pin /etc/apt/preferences.d/cuda-repository-pin-600
wget https://developer.download.nvidia.com/compute/cuda/11.8.0/local_installers/cuda-repo-wsl-ubuntu-11-8-local_11.8.0-1_amd64.deb
sudo dpkg -i cuda-repo-wsl-ubuntu-11-8-local_11.8.0-1_amd64.deb
sudo cp /var/cuda-repo-wsl-ubuntu-11-8-local/cuda-*-keyring.gpg /usr/share/keyrings/
sudo apt-get update
sudo apt-get -y install cuda
手順4 コンテナを作成
CUDAを使うためには -v と --gpusを指定しなければいけない。
-v ... WSL2側のディレクトリをコンテナにマウントする。これにより、WSL2側にインストールしたcudart.so.11.0等をコンテナ側から使えるようになる。
--gpus ... コンテナからGPUを使う設定。allを指定する
-vオプションでは、WSL2側のCUDAのインストールディレクトリを、コンテナ側の指定したパスでアクセスできるようにしている。
手順5 確認
まずはコンテナを起動し、
ドライバが読めていることを確認
CUDA Toolkitが使えることを確認
Windows 11にDocker Desktopを導入(4)windows上のdocker内のUbuntuからmatplotlibのshow()が表示できない問題を解決
問題
Python環境
まず、以下のようにpython環境を整えておく。
サンプルコード
必須
test.py
import numpy as np
import matplotlib.pyplot as plt

def plot_sample(start, end, step):
    x = np.arange(start, end, step)
    y = np.sin(x)

    plt.plot(x, y)
    plt.title('Sine Curve')
    plt.xlabel('x')
    plt.ylabel('sin(x)')
    plt.grid(True)
    plt.show()

if __name__ == "__main__":
    plot_sample(0, 2*np.pi, 0.01)
実行
症状
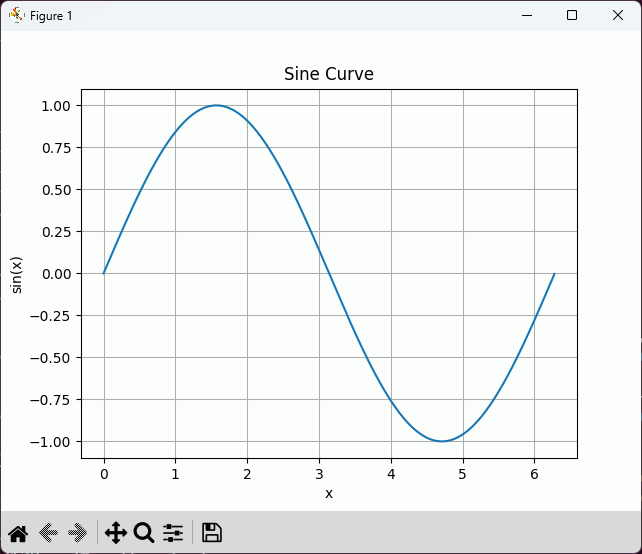
上記コードを実行しても何も起こらない
解決手順
ホストのwindowsにVcXsrvをインストール
VcXsrvはXサーバーで、windows上でLinuxのGUIを表示するのに必要。以下からダウンロード
https://sourceforge.net/projects/vcxsrv/
設定は以下のサイトがとても端的にまとまっている。
https://qiita.com/ryoi084/items/0dff11134592d0bb895c
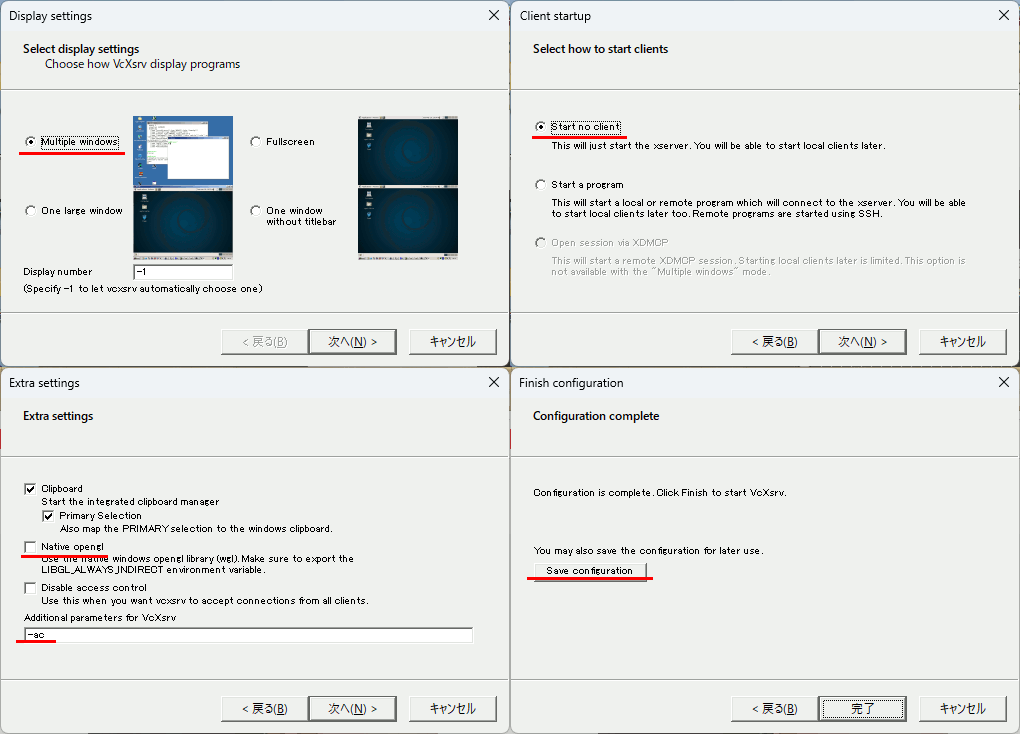
以下のように設定。Native openglを外す。
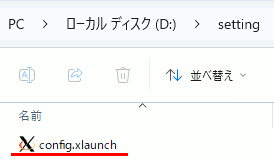
最後にSave Configurationで設定ファイル(拡張子.xlaunch)を出力。これを開くとサーバーが起動する。
docker内の~/.bashrcに追記
GUIを表示したいUbuntuに、Xserverがあることを教える設定をする。
vim ~/.bashrc などで、.bashrcを開き、末尾に以下を追記
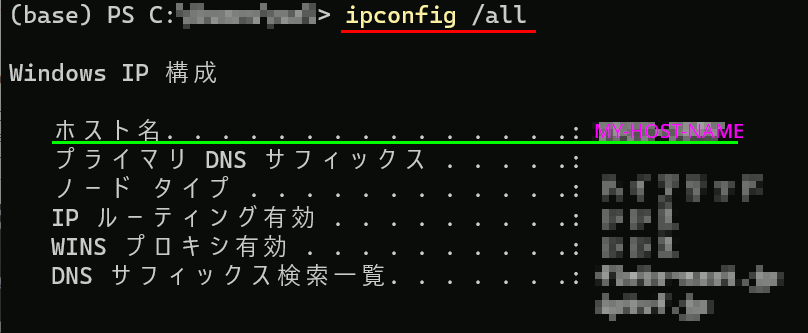
ここで、MY-HOST-NAMEは自分のパソコンのホスト名を記述。自分のホスト名はPowerShellなどを起動して、ipconfig /all をすると出てくる。
ここで一度実行
ここで一度、test.pyを実行すると、以下のエラーが出た。
plt.show()
これはtkinterがインストールされていないために起こるらしい。なので以下を実行。
tkinterは、インストール途中、エリアを聞かれるのでAsia、Tokyoを指定。
他に、PySide2が(も)要求されるかもしれない。
あるいはPyQt5が(も)必要かもしれない。
参考
Windows 11にDocker Desktopを導入(3)docker内のubuntuにsudoなどを入れて環境づくり(Linux復習)。あとイメージを作る
なんと、docker内に作ったubuntu環境にはsudoが入っていない。
というかそもそも気分的にrootで作業したくない。ユーザの追加をしたい。
というわけでLinuxコマンドの復習と再学習を始めたい。
sudo
入れ方:
vimを入れる
ユーザーを追加した後 visudo コマンドを使いたいが vim がインストールされていないと使えないのでvimを入れておく。
ユーザ追加
ユーザー切替は
これだけだと、sudoを使おうとしたときに
と言われるので、sudoersファイルを編集しなければならない。
whoamiを実行すると現在のユーザがわかるので、rootであることを確認する
root
そしてvisudoで/etc/sudoersを編集
下のほうにある、# User privilege specification のrootの下に、使いたいユーザを入れる
root ALL=(ALL:ALL) ALL
myusername ALL=(ALL:ALL) ALL # new user
wq;でviから出ると追加したユーザでsudoが使えるようになっている。
設定したコンテナのdockerイメージを作る
毎度この設定をするのも面倒なので、今回の設定をしたUbuntuをdockerイメージとして作成し、いつでもコンテナを作れるようにしておく。なおイメージ名は小文字でないといけない
docker ps -a でコンテナ名を確認してから、 docker commitを行う。
docker commit u2204base my_image_ubuntu_2204
Windows 11にDocker Desktopを導入(1)
はじめに
投稿順序を間違えた。こっちが先。
Docker Desktopについて
Docker Desktopを導入した。正直色々調べながらどうにか入れたので理解しきれていない部分もある。ヒント程度の意味でまとめている。
Windows上でDockerを使うには
・WSL2 (Windows上でUbuntuを使う仕組み)
・Ubuntu (Windows上にMicrosoft Storeからインストール)
・Docker Desktop (本体)
の三つが必要。
概要
順番は前後してもいい(私がやった順番は3124だがちゃんと動いた)。
- PowerShellなどからwslの設定をする
- Microsoft Storeへ行ってUbuntuをインストールする
- Docker Desktopをダウンロードしてインストール
- Ubuntuを起動してDockerの動作確認
WSL2の導入
wslはWindows上でLinuxを動かすための仕組みのこと。
コマンドプロンプトまたはPowerShellを開き、以下を実行する
そもそもwslが入っていない場合、インストールする必要がある。
wslにはバージョン1と2がある。基本的に2のほうが優れているので、Ubuntu環境を使うときにデフォルトで2を使うように設定しておく
Ubuntuを入れたあと、Ubuntuを実行しようとするとエラーが出る場合がある。これはupdateで解決する
WindowsにUbuntuの導入
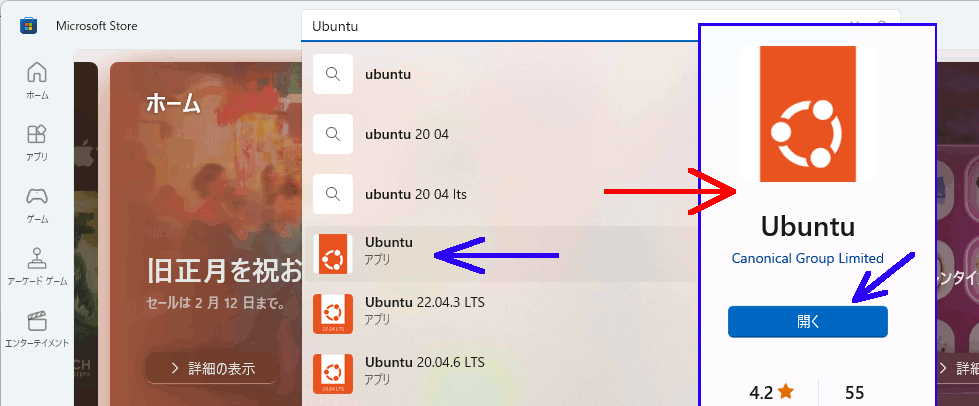
WSLのおかげでWindows上でUbuntuを実行できる。Microsoft Storeへ行ってUbuntuを検索。バージョン違いが複数出てくる。特にこだわりがなければバージョン未表記のものを選べば最新版が入る。
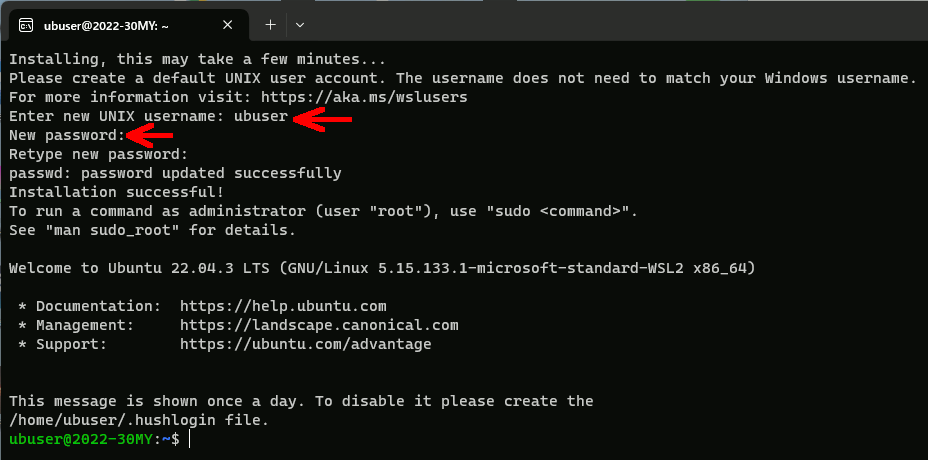
インストール後、「開く」でUbuntuの設定が走る。Ubuntu上で使うユーザ名とパスワードを入力する。
もしここで以下のエラーが出るようなら上に書いたように wsl --updateを実行。
Installing, this may take a few minutes...
WslRegisterDistribution failed with error: 0x800701bc
Error: 0x800701bc WSL 2 ???????????? ??????????????????????? https://aka.ms/wsl2kernel ?????????
Press any key to continue...
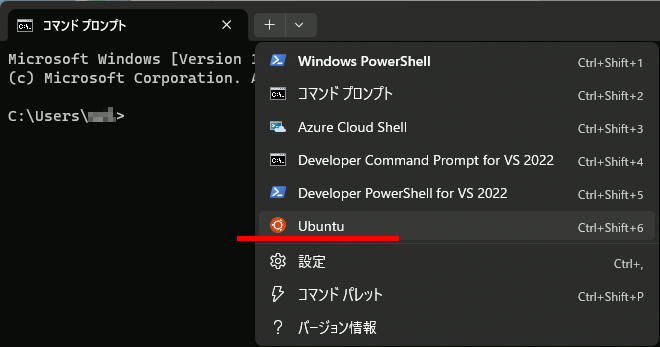
うまくいけばUbuntuのターミナルが使えるようになる。
Docker Desktop
以下へ行き、Docker Hub からダウンロード からダウンロード・インストールする。
https://docs.docker.jp/docker-for-windows/install.html
注意:インストール後、docker subscription service agreement という、利用規約に合意しろという意味のウィンドウが出てくるので、Acceptする。これをしないでCloseするとDockerが動かない。
Dockerの動作確認
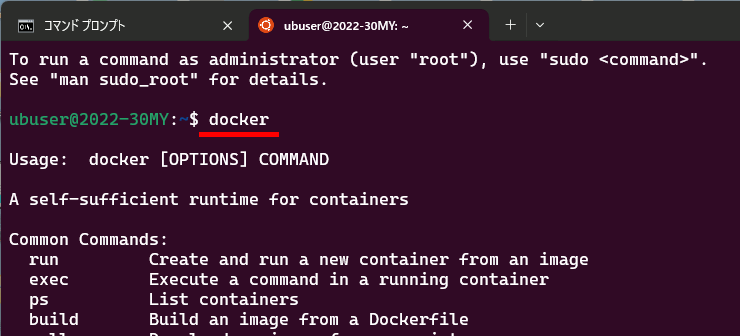
コマンドプロンプト、PowerShell、Ubuntuのターミナルのどれでもいいのでdockerコマンドを実行
なお、私はここで
The command 'docker' could not be found in this WSL 2 distro.
We recommend to activate the WSL integration in Docker Desktop settings.
For details about using Docker Desktop with WSL 2, visit:
https://docs.docker.com/go/wsl2/
に苦しめられた。調べるとDocker Desktopの設定から
[Resoures] → [WSL integration] → [Enable integration with additional distros:]
でUbuntuをOnにすれば解決、と言われるのだがその項目すらない。
私の場合は上で書いたように、docker subscription service agreementでAcceptしていなかったのでDockerが動いていなかった。
参考
https://ascii.jp/elem/000/004/127/4127643/
Windows 11にDocker Desktopを導入(2)dockerで開発環境を作る
docker ... 仮想環境作成ソフト
イメージ ... 仮想環境のひな型
コンテナ ... イメージから作った実際に動く仮想環境
という関係になっている。環境構築の手順としてはまずイメージをダウンロードし、それを元にコンテナを作る。今回はubuntuの環境を作る。
イメージのダウンロード
現在使用できるイメージの列挙
ダウンロードの前に、いまどのイメージを使えるのかを確認する。
結果。まだ何もないのでイメージ一覧には何も出てこない。
イメージのダウンロード
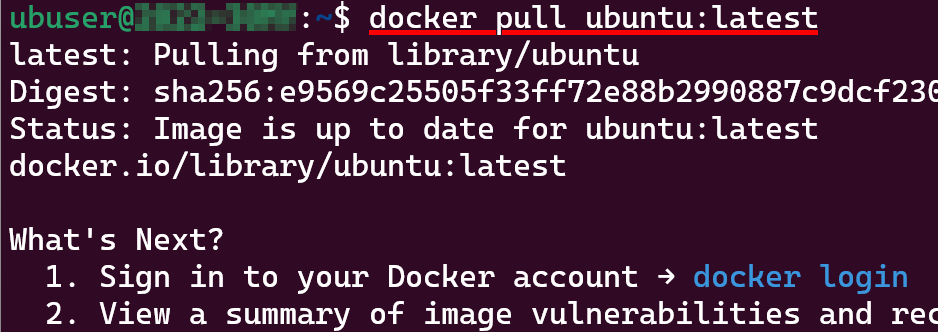
次にイメージを取得。ネットにつながっていれば、docker pullでイメージをダウンロードできる。
これは
の順番で記述する。例えばバージョン18.04が欲しければ、 docker pull ubuntu:18.04 と記述する。最新版が欲しい場合は docker pull ubuntu:latest と、latest指定をする。
もう一度docker imagesをしてみると、イメージ一覧にubuntuのlatestが追加されている。
仮想環境の作成
イメージがダウンロードできたので、このubuntu:latestを元にコンテナ(=仮想環境)を作る。
コンテナを作るには、docker create を使う。
オプションは、-t,-i両方を指定しておいたほうがいい。一応個別に設定できるが(詳しくないのに)つけないでいると仮想環境が動かなかったりI/Oができなかったりする。
-tオプション ... 仮想環境で仮想ターミナルを使う。
-iオプション ... 仮想環境と標準入出力を繋げる。コマンドラインが使用可能になる
仮想環境の起動
起動
作った仮想環境を動かすにはdocker startを使う。
-a ... 標準出力,エラー出力を接続
-i ... コンテナと対話できるようにする
-aはコンテナの出力を見ることができる(こちらから入力できない)
-aだけで接続してしまった場合、こちらから入力できないので、Ctrl+Cで帰ってくる以外に何もできなくなる。
終了
終了する場合は、exitすれば自動的に終了する。
docker psは、何もつけないと現在動作しているコンテナしか表示されないので、-aをつけて停止中のコンテナも表示する
ただし、Ctrl+Cでコンテナから出た場合、終了していないので docker stop 環境名 をする必要がある。
docker runを使った場合
docker run は、コンテナを作成し、その後起動まで行う。便利といえば便利だが、docker runする度に新たなコンテナが新規作成されるので注意が必要。
docker run でただ起動すると名前が勝手に付けられる(NAMES)。名前を付けたいときは --nameを指定。
コンテナの削除
イメージの削除
コンテナにイメージが使われている場合削除できないので、先にdocker rm で、削除したいイメージから作成したコンテナをすべて削除しておく必要がある。
docker rmi ubuntu:latest
C++/CLIでHashSetを使ってみる
コメントに質問があったので使用例を置いておきたい。
HashSetは等価であることを比較するためにEqualsメソッドを持っていなければならない。
全てのクラスはObjectの子クラスなので、Equalsをオーバーライドしてもいいが、IEquatableを継承するとObject型ではなく指定した型のデータをとるEqualsをオーバーライドできるようになる。
#include "pch.h"
// 自作クラス
// IEquatableを継承しているのでEqualsメソッドをオーバーライドすることで
// インスタンスの等価判定が可能
public ref class DataType : System::IEquatable<DataType^> {
private:
    int a, b;

public:
    DataType() : a(0), b(0) {}
    DataType(int _a, int _b) : a(_a), b(_b) {}

    int geta() { return a; }
    int getb() { return b; }
    void set(int _a, int _b) { a = _a; b = _b; }

    /*
    // IEquatableを使用しない場合はObject^型で受け取って評価できる
    // ObjectのEqualsメソッドをオーバーライド
    virtual bool Equals(Object^ obj) override {
        if (obj == nullptr) return false;

        DataType^ other = dynamic_cast<DataType^>(obj);
        if (other == nullptr) return false;

        return a == other->a && b == other->b;
    }
    */

    // IEquatableのEqualsメソッドを実装
    virtual bool Equals(DataType^ other) {
        if (other == nullptr) return false;
        return (a == other->a) && (b == other->b);
    }


    // ObjectのGetHashCodeメソッドをオーバーライド
    virtual int GetHashCode() override {
        return a.GetHashCode() ^ b.GetHashCode();
    }
};
// 比較用クラス
// IComparerを継承してCompareメソッドをオーバーライドする。
// このクラスをArray::Sortの第二引数に渡すことで、ソートの基準を変更できる。
public ref class Ccmp : System::Collections::Generic::IComparer<DataType^> {
    public:
	virtual int Compare(DataType^ x, DataType^ y) {
            if (x->geta() < y->geta()) return -1;
            if (x->geta() > y->geta()) return 1;

            if (x->getb() < y->getb()) return -1;
            if (x->getb() > y->getb()) return 1;
	}
};
void sort_test() {
    array<DataType^>^ ary = gcnew array<DataType^>(3);
    ary[0] = gcnew DataType(1, 2);
    ary[1] = gcnew DataType(6, 8);
    ary[2] = gcnew DataType(2, 4);
    //ソート実行。
    Ccmp^ cmp = gcnew Ccmp();//比較用クラスのインスタンスを作成し、
    System::Array::Sort(ary, cmp);//Array::Sortの第二引数にそのハンドルを渡す

    for each (DataType^ data in ary) {
        System::Console::WriteLine("a = {0}, b = {1}", data->geta(), data->getb());
    }
}
void hashset_test() {

    using namespace System::Collections::Generic; // HashSetを使えるようにする

    // DataTypeのHashSetを作成
    HashSet<DataType^>^ hashSet = gcnew HashSet<DataType^>();

    // DataTypeのインスタンスを作成してHashSetに追加

    DataType^ data1 = gcnew DataType(-1, 3); // 重複するデータ
    DataType^ data2 = gcnew DataType(4, 2);
    DataType^ data3 = gcnew DataType(-1, 3); // 重複するデータ
    hashSet->Add(data1);
    hashSet->Add(data2);
    hashSet->Add(data3);

    //hashSet内の全データ表示
    for each (DataType ^ data in hashSet) {
        System::Console::WriteLine("a = {0}, b = {1}", data->geta(), data->getb());
    }
}
int main(array<System::String^>^ args) {

    sort_test();

    hashset_test();


    return 0;
}
実行例 sort_test()の結果
a = 2, b = 4
a = 6, b = 8
実行例 hashset_test()の結果
a = 4, b = 2
VTK9.3をMFCの上に張り付ける
ビルド
VTKをMFCのウィンドウに張り付ける。VTKのビルド時にMFCサポートを入れておく必要がある。
VTKのビルド時、VTK_MODULE_ENABLE_VTK_GUISupportMFCを設定しておく必要がある。
ビルド時 VTK_MODULE_ENABLE_VTK_GUISupportMFC を YES に設定
VTK_MODULE_ENABLE_VTK_GUISupportMFCをYESに設定。
この設定をすると、vtkMFCWindow.hなどが使用できるようになる。
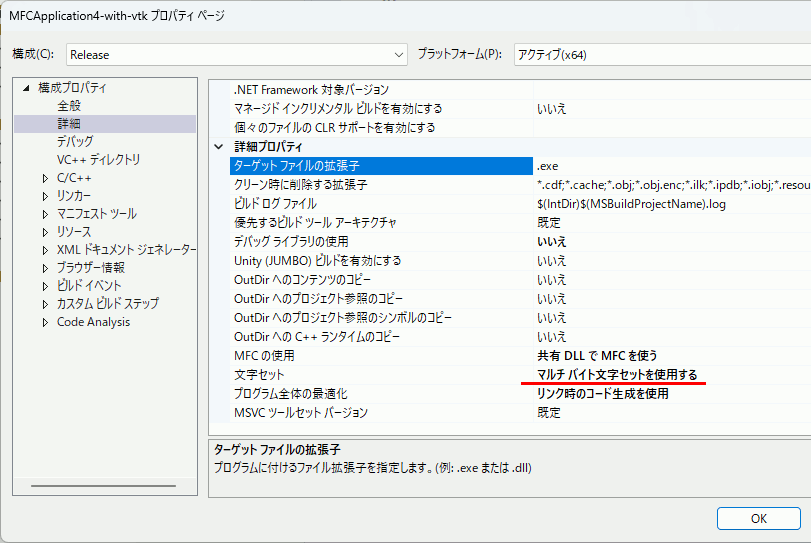
文字セットをマルチバイト文字セットを使用する に設定
MFCを使用するプロジェクトの設定を「マルチバイト文字セットを使用する」に変更する。
経験上、プロジェクト設定がUnicodeだとデバッグモードでウィンドウを作成できない(例外発生)。
この設定をしないと特にデバッグモードでvtkMFCWindow内でCWnd::Createのあたりで落ちる。
vtkMFCWindow::vtkMFCWindow(CWnd* pcWnd)
{
  this->pvtkWin32OpenGLRW = nullptr;

  // create self as a child of passed in parent
  DWORD style = WS_VISIBLE | WS_CLIPSIBLINGS;
  if (pcWnd)
    style |= WS_CHILD;
  BOOL bCreated =
    CWnd::Create(nullptr, _T("VTK-MFC Window"), style, CRect(0, 0, 1, 1), pcWnd, (UINT)IDC_STATIC);

  SUCCEEDED(bCreated);

  // create a default vtk window
  vtkWin32OpenGLRenderWindow* win = vtkWin32OpenGLRenderWindow::New();
  this->SetRenderWindow(win);
  win->Delete();
}
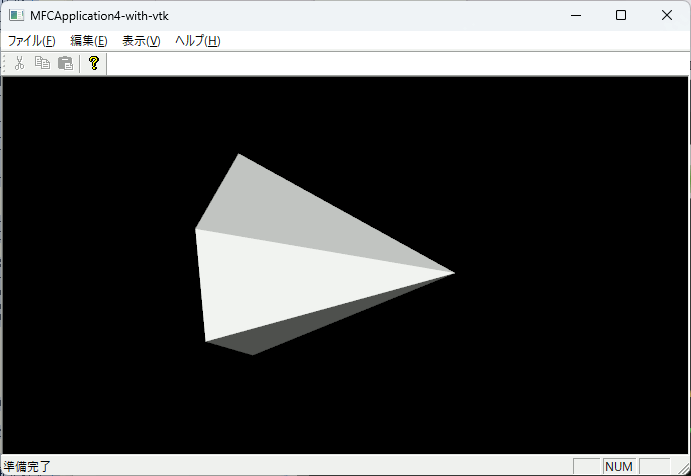
サンプルコード
ChildView.h
#pragma once

///////////////////////////////
// VTKに必要
#include <vtkMFCWindow.h>               // vtkMFCWindowを使うために必要
#include <vtkWin32OpenGLRenderWindow.h> // vtkMFCWindowを使うために必要
#include <vtkSmartPointer.h>
#include <vtkRenderer.h>
#include <vtkRenderWindow.h>
#include <vtkConeSource.h>
#include <vtkPolyDataMapper.h>
#include <vtkActor.h>
#include <vtkCamera.h>

/*
* 以下をはじめとする、wgl系のリンクエラーが出たら、opengl32.libをリンクする
1>vtkRenderingOpenGL2-9.3.lib(vtkWin32OpenGLRenderWindow.obj) : error LNK2001: 外部シンボル __imp_wglCreateContext は未解決です
*/
#pragma comment(lib,"opengl32.lib")

/*
以下のエラーが出たら、Psapi.libをリンクする
vtksys-9.3.lib(SystemInformation.obj) : error LNK2001: 外部シンボル GetProcessMemoryInfo は未解決です
*/
#pragma comment(lib, "Psapi.lib")

/*
以下のエラーが出たら、Dbghelp.libをリンクする
vtksys-9.3.lib(SystemInformation.obj) : error LNK2001: 外部シンボル __imp_SymGetLineFromAddr64 は未解決です
vtksys-9.3.lib(SystemInformation.obj) : error LNK2001: 外部シンボル __imp_SymInitialize は未解決です
vtksys-9.3.lib(SystemInformation.obj) : error LNK2001: 外部シンボル __imp_SymFromAddr は未解決です
*/
#pragma comment(lib, "Dbghelp.lib")


class CChildView : public CWnd
{

  vtkMFCWindow* m_vtkMFCWindow;

  /* 略 */

protected:
  afx_msg void OnPaint();
  DECLARE_MESSAGE_MAP()
public:
  afx_msg int OnCreate(LPCREATESTRUCT lpCreateStruct);
  afx_msg void OnSize(UINT nType, int cx, int cy);
  afx_msg void OnDestroy();
};
ChildView.cpp
#include "pch.h"
#include "framework.h"
#include "MFCApplication4-with-vtk.h"
#include "ChildView.h"


// trackball 対応
#include <vtkInteractorStyleImage.h>
#include <vtkWin32RenderWindowInteractor.h> //win32api対応

// vtkWin32RenderWindowInteractor.h 内でincludeされている
//#include <vtkRenderWindowInteractor.h>

#include <cstdio>

#ifdef _DEBUG
#define new DEBUG_NEW
#endif


// CChildView

CChildView::CChildView()
{
  m_vtkMFCWindow = nullptr;

}

CChildView::~CChildView()
{
}


BEGIN_MESSAGE_MAP(CChildView, CWnd)
  ON_WM_PAINT()
  ON_WM_CREATE()
  ON_WM_SIZE()
  ON_WM_DESTROY()
END_MESSAGE_MAP()


// CChildView メッセージ ハンドラー

BOOL CChildView::PreCreateWindow(CREATESTRUCT& cs)
{
  if (!CWnd::PreCreateWindow(cs))
    return FALSE;

  cs.dwExStyle |= WS_EX_CLIENTEDGE;
  cs.style &= ~WS_BORDER;
  cs.lpszClass = AfxRegisterWndClass(CS_HREDRAW|CS_VREDRAW|CS_DBLCLKS,
    ::LoadCursor(nullptr, IDC_ARROW), reinterpret_cast<HBRUSH>(COLOR_WINDOW+1), nullptr);


  return TRUE;
}

void CChildView::OnPaint()
{
  CPaintDC dc(this); // 描画のデバイス コンテキスト
  // 初回起動時のウィンドウサイズ指定
  static bool firsttime = true;
  if (m_vtkMFCWindow && firsttime) {
    firsttime = false;

    // ウィンドウの現在のサイズを取得
    CRect rect;
    GetClientRect(&rect);

    // VTKのウィンドウサイズを変更
    m_vtkMFCWindow->GetRenderWindow()->SetSize(rect.right, rect.bottom);

  }
  if (m_vtkMFCWindow) {

    m_vtkMFCWindow->DrawDC(&dc);// 描画
    // こちらでもいい。
    //m_vtkMFCWindow->GetRenderWindow()->Render();

  }
}


int CChildView::OnCreate(LPCREATESTRUCT lpCreateStruct)
{
  if (CWnd::OnCreate(lpCreateStruct) == -1)
    return -1;
  // VTKのMFC用ウィンドウ作成
  m_vtkMFCWindow = new vtkMFCWindow(this);
  m_vtkMFCWindow->SetParent(this);
  // レンダラーの作成
  vtkSmartPointer<vtkRenderer> renderer = vtkSmartPointer<vtkRenderer>::New();
  m_vtkMFCWindow->GetRenderWindow()->AddRenderer(renderer);

  // オブジェクトを作成・登録
  vtkSmartPointer<vtkConeSource> coneSource;
  coneSource = vtkSmartPointer<vtkConeSource>::New();
  vtkSmartPointer<vtkPolyDataMapper> mapper;
  mapper = vtkSmartPointer<vtkPolyDataMapper>::New();
  mapper->SetInputConnection(coneSource->GetOutputPort());
  vtkSmartPointer<vtkActor> actor;
  actor = vtkSmartPointer<vtkActor>::New();
  actor->SetMapper(mapper);
  renderer->AddActor(actor);


  vtkSmartPointer<vtkRenderWindowInteractor> interactor = vtkSmartPointer<vtkRenderWindowInteractor>::New();
  m_vtkMFCWindow->GetRenderWindow()->SetInteractor(interactor);

  auto iren = vtkSmartPointer<vtkWin32RenderWindowInteractor>::New();
  vtkSmartPointer<vtkInteractorStyleTrackballCamera> style =
    vtkSmartPointer<vtkInteractorStyleTrackballCamera>::New();
  iren->SetInteractorStyle(style);
  iren->SetRenderWindow(m_vtkMFCWindow->GetRenderWindow());
  return 0;
}


void CChildView::OnSize(UINT nType, int cx, int cy)
{
  CWnd::OnSize(nType, cx, cy);
  // ウィンドウサイズの変更に合わせて
  // VTKの表示範囲を変更
  RECT rect;
  m_vtkMFCWindow->MoveWindow(0, 0, cx,cy);
}


void CChildView::OnDestroy()
{
  CWnd::OnDestroy();

  // これをしないとアプリケーション終了しようとしても
  // なぜか終了しないことがある
  PostQuitMessage(0);
}
wxWidgetsでファイルのドラッグ&ドロップに対応
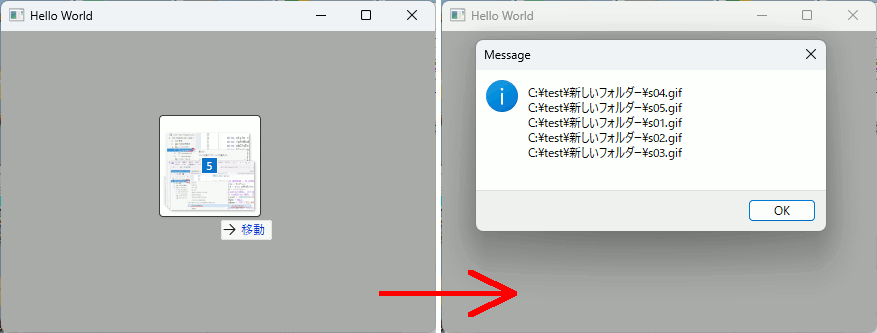
ドラッグ&ドロップの実装は、SetDropTargetにwxFileDropTarget を継承したクラスを指定する。
すると、ドラッグ時にMyFileDropTarget::OnDropFilesが呼び出されるので、そこから(必要であれば)MyFrame::OnDropFilesを呼び出す。
この時ただ関数呼び出しするのではなくてwxDropFilesEvent 型のイベントオブジェクトを作ってwxPostEventする。
この時、wxDropFilesEvent オブジェクトに渡したwxString* pathはwxWidgetsが管理する(らしい)のでdelete[]は書かない。
// プリプロセッサに以下二つを追加
// __WXMSW__
// WXUSINGDLL

// サブシステムをWindowsに設定(WinMainで呼び出すので)
// Windows (/SUBSYSTEM:WINDOWS)

#ifndef WX_PRECOMP
#include <wx/wx.h>
#endif

#include <wx/gdicmn.h> // wxPointに必要
#include <wx/frame.h>  // wxFrameに必要

#ifdef _DEBUG
#pragma comment(lib,"wxbase32ud.lib")
#pragma comment(lib,"wxbase32ud_net.lib")
#pragma comment(lib,"wxbase32ud_xml.lib")
#pragma comment(lib,"wxmsw32ud_adv.lib")
#pragma comment(lib,"wxmsw32ud_aui.lib")
#pragma comment(lib,"wxmsw32ud_core.lib")
#pragma comment(lib,"wxmsw32ud_gl.lib")
#pragma comment(lib,"wxmsw32ud_html.lib")
#pragma comment(lib,"wxmsw32ud_media.lib")
#pragma comment(lib,"wxmsw32ud_propgrid.lib")
#pragma comment(lib,"wxmsw32ud_qa.lib")
#pragma comment(lib,"wxmsw32ud_ribbon.lib")
#pragma comment(lib,"wxmsw32ud_richtext.lib")
#pragma comment(lib,"wxmsw32ud_stc.lib")
#pragma comment(lib,"wxmsw32ud_webview.lib")
#pragma comment(lib,"wxmsw32ud_xrc.lib")

#else

#pragma comment(lib,"wxbase32u.lib")
#pragma comment(lib,"wxbase32u_net.lib")
#pragma comment(lib,"wxbase32u_xml.lib")
#pragma comment(lib,"wxmsw32u_adv.lib")
#pragma comment(lib,"wxmsw32u_aui.lib")
#pragma comment(lib,"wxmsw32u_core.lib")
#pragma comment(lib,"wxmsw32u_gl.lib")
#pragma comment(lib,"wxmsw32u_html.lib")
#pragma comment(lib,"wxmsw32u_media.lib")
#pragma comment(lib,"wxmsw32u_propgrid.lib")
#pragma comment(lib,"wxmsw32u_qa.lib")
#pragma comment(lib,"wxmsw32u_ribbon.lib")
#pragma comment(lib,"wxmsw32u_richtext.lib")
#pragma comment(lib,"wxmsw32u_stc.lib")
#pragma comment(lib,"wxmsw32u_webview.lib")
#pragma comment(lib,"wxmsw32u_xrc.lib")

#endif


#include <string>

// ドラッグドロップに必要
#include <wx/dnd.h>


/////////////////////////////////////
/////////////////////////////////////
/////////////////////////////////////
// ドラッグ&ドロップに対応するクラス
class MyFileDropTarget : public wxFileDropTarget {
    wxWindow* m_owner;
public:
    MyFileDropTarget(wxWindow* owner) : m_owner(owner) {}
    virtual bool OnDropFiles(wxCoord x, wxCoord y, const wxArrayString& filenames) override {

        size_t nFiles = filenames.GetCount();

        // wxString* の配列を作成。このメモリはwxWidgetsが管理する(らしい)のでdelete[]しないko
        wxString* paths = new wxString[nFiles];
        for (size_t i = 0; i < nFiles; i++) {
            paths[i] = filenames[i];
        }

        wxDropFilesEvent event(wxEVT_DROP_FILES, nFiles, paths);

        wxPostEvent(m_owner, event);// MyFrame::OnDropFilesを呼び出す

        return true;
    }
};
// ウィンドウ作成
class MyFrame : public wxFrame
{

public:

    void PostCreate() {

        this->Layout(); // レイアウトの更新
    }

    MyFrame(const wxString& title, const wxPoint& pos, const wxSize& size)
        : wxFrame(NULL, wxID_ANY, title, pos, size)

    {

        // CallAfter : 現在処理中のイベントが終わったらPostCreateを実行
        // コンストラクタはウィンドウ生成イベント扱い
        CallAfter(&MyFrame::PostCreate);

        // ドラッグ&ドロップを有効にする
        SetDropTarget(new MyFileDropTarget(this));

        // ドラッグドロップされた時に呼ばれるイベントを設定
        Bind(wxEVT_DROP_FILES, &MyFrame::OnDropFiles, this);

    }
    // wxEVT_DROP_FILES に対応するイベントハンドラ
    void OnDropFiles(wxDropFilesEvent& event) {

        wxString* filePaths = (wxString*)event.GetFiles();// ファイル名一覧を取得
        wxString str;
        for (size_t i = 0; i < event.GetNumberOfFiles(); i++) {
            str += filePaths[i];
            str += "\n";
        }

        wxMessageBox(str);

        // 管理はwxWidgetsが行っているので解放しない
        //delete[] filePaths;
    }
private:
};

/////////////////////////////////////
/////////////////////////////////////
/////////////////////////////////////

// wxWidgetsのアプリケーション作成
class MyApp : public wxApp {
public:

    virtual bool OnInit() {

        MyFrame* frame = new MyFrame("Hello World", wxPoint(50, 50), wxSize(450, 340));
        frame->Show(true);

        return true;
    }

};

/////////////////////////////////////
/////////////////////////////////////
/////////////////////////////////////

// WinMainをマクロで定義
wxIMPLEMENT_APP(MyApp);
Visual Studioが起動直後にクラッシュして落ちる現象に遭遇
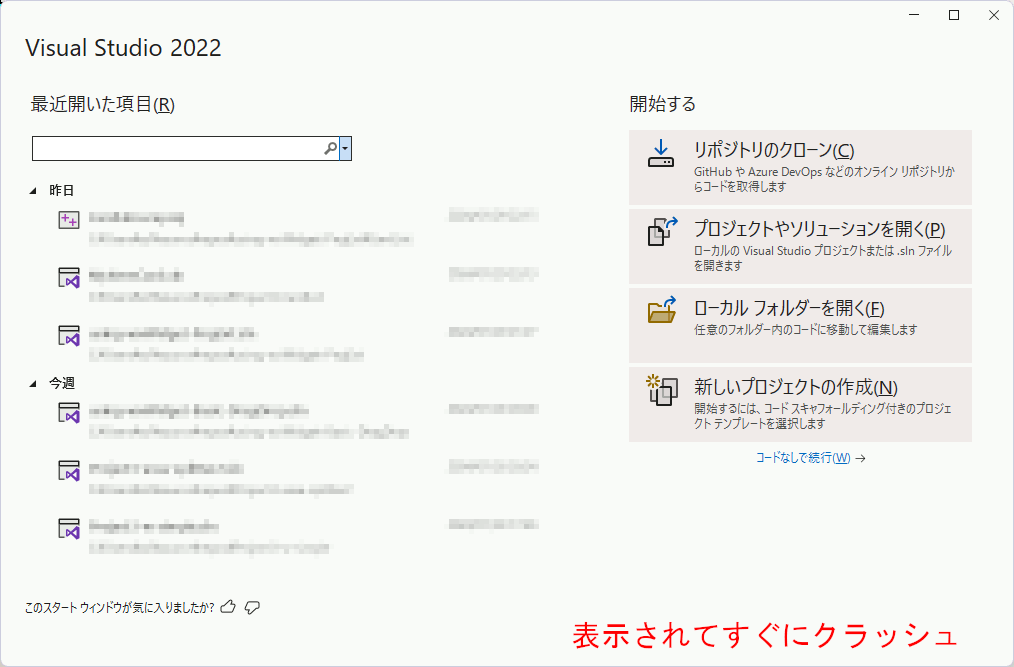
(多分)PCが強制終了せいで、Visual Stdio 2022が起動しなくなった。スタートウィンドウまではいくが数秒で落ちる。
調べ方
Developer Command Prompt For VS 2022を起動し、以下のコマンドでVisual Studioのログを出力する。
ログを見ると、
と、シャットダウンの理由らしきものが書かれていたので、これで調べる。
回復方法
%USERPROFILE%\AppData\Local\Microsoft\VSCommon\OnlineLicensing\ にある、VisualStudio\ディレクトリを名前変更する。
↓
これで起動するとクラッシュしなくなった。
参考
https://learn.microsoft.com/en-us/answers/questions/1116991/visual-studio-2022-crashing-on-startup


